> ## Documentation Index
> Fetch the complete documentation index at: https://apidoc.cometapi.com/llms.txt
> Use this file to discover all available pages before exploring further.

# Verbinde Zapier mit CometAPI

> Verwende diese Anleitung, um Zapier mit CometAPI zu verbinden, indem du die base URL, den API-Schlüssel sowie model- oder Provider-Optionen festlegst.

Zapier verbindet CometAPI mit Tausenden von Apps — automatisiere KI-gestützte Workflows, ohne Code zu schreiben.

## Voraussetzungen

* Ein CometAPI-Konto mit einem aktiven API key — [hier erhalten](https://www.cometapi.com/console/token)
* Ein Zapier-Konto — [hier registrieren](https://zapier.com/app/home)

<Steps>
  <Step title="Holen Sie sich Ihren CometAPI API key">
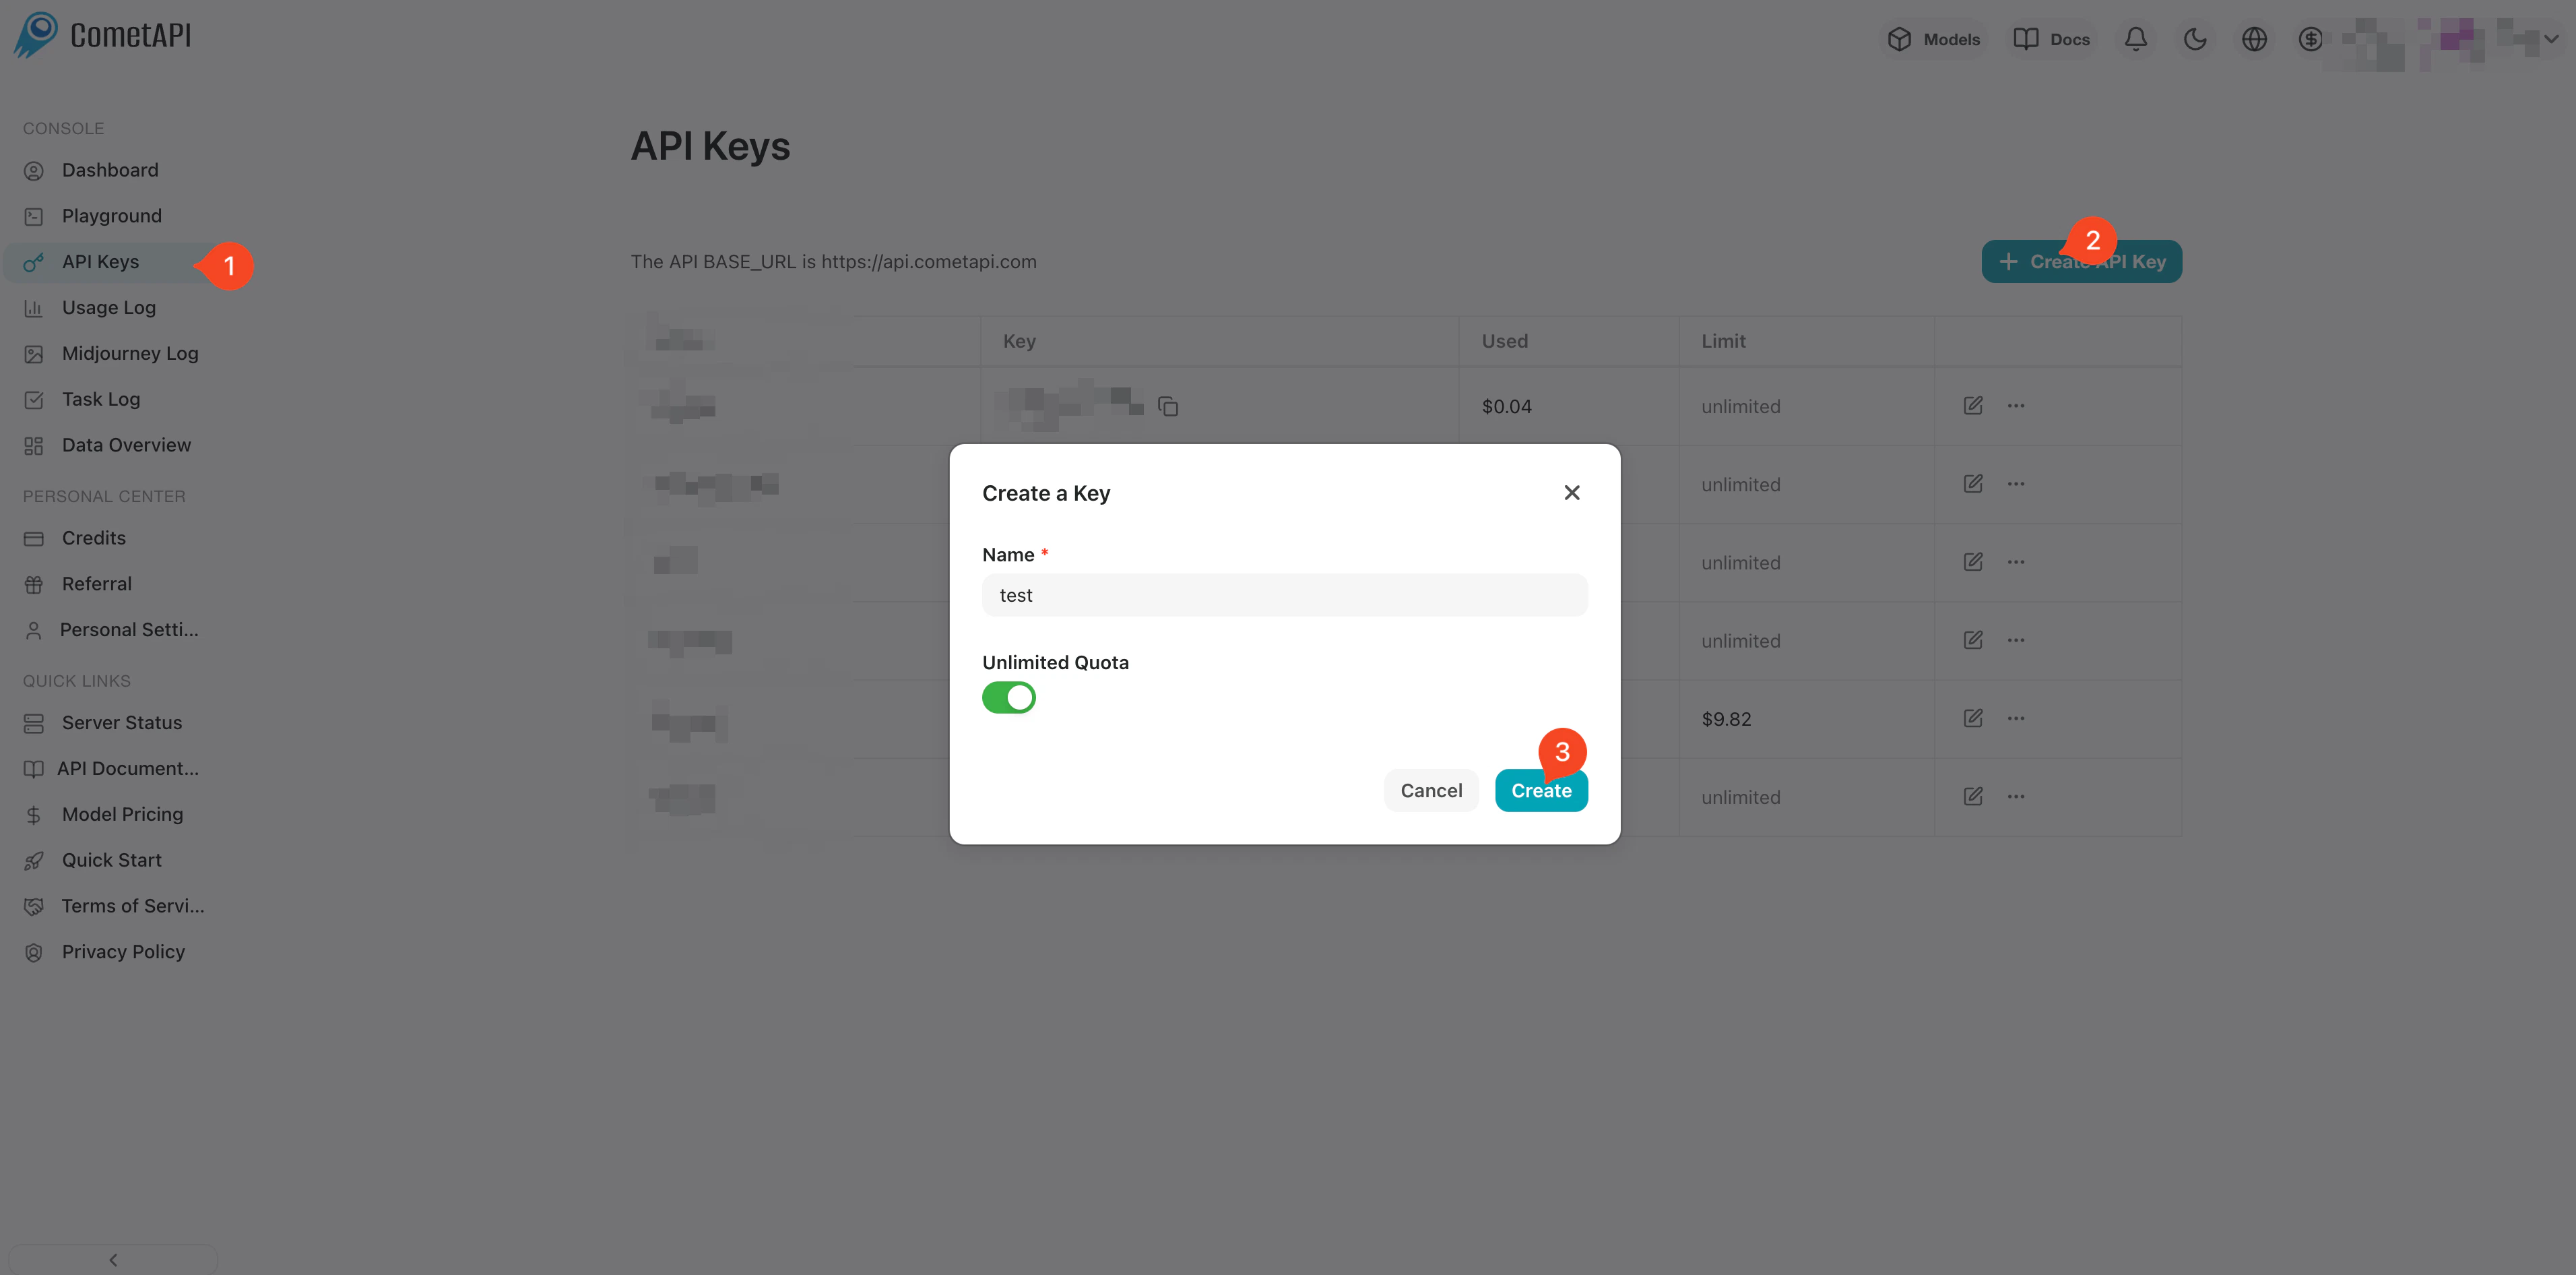
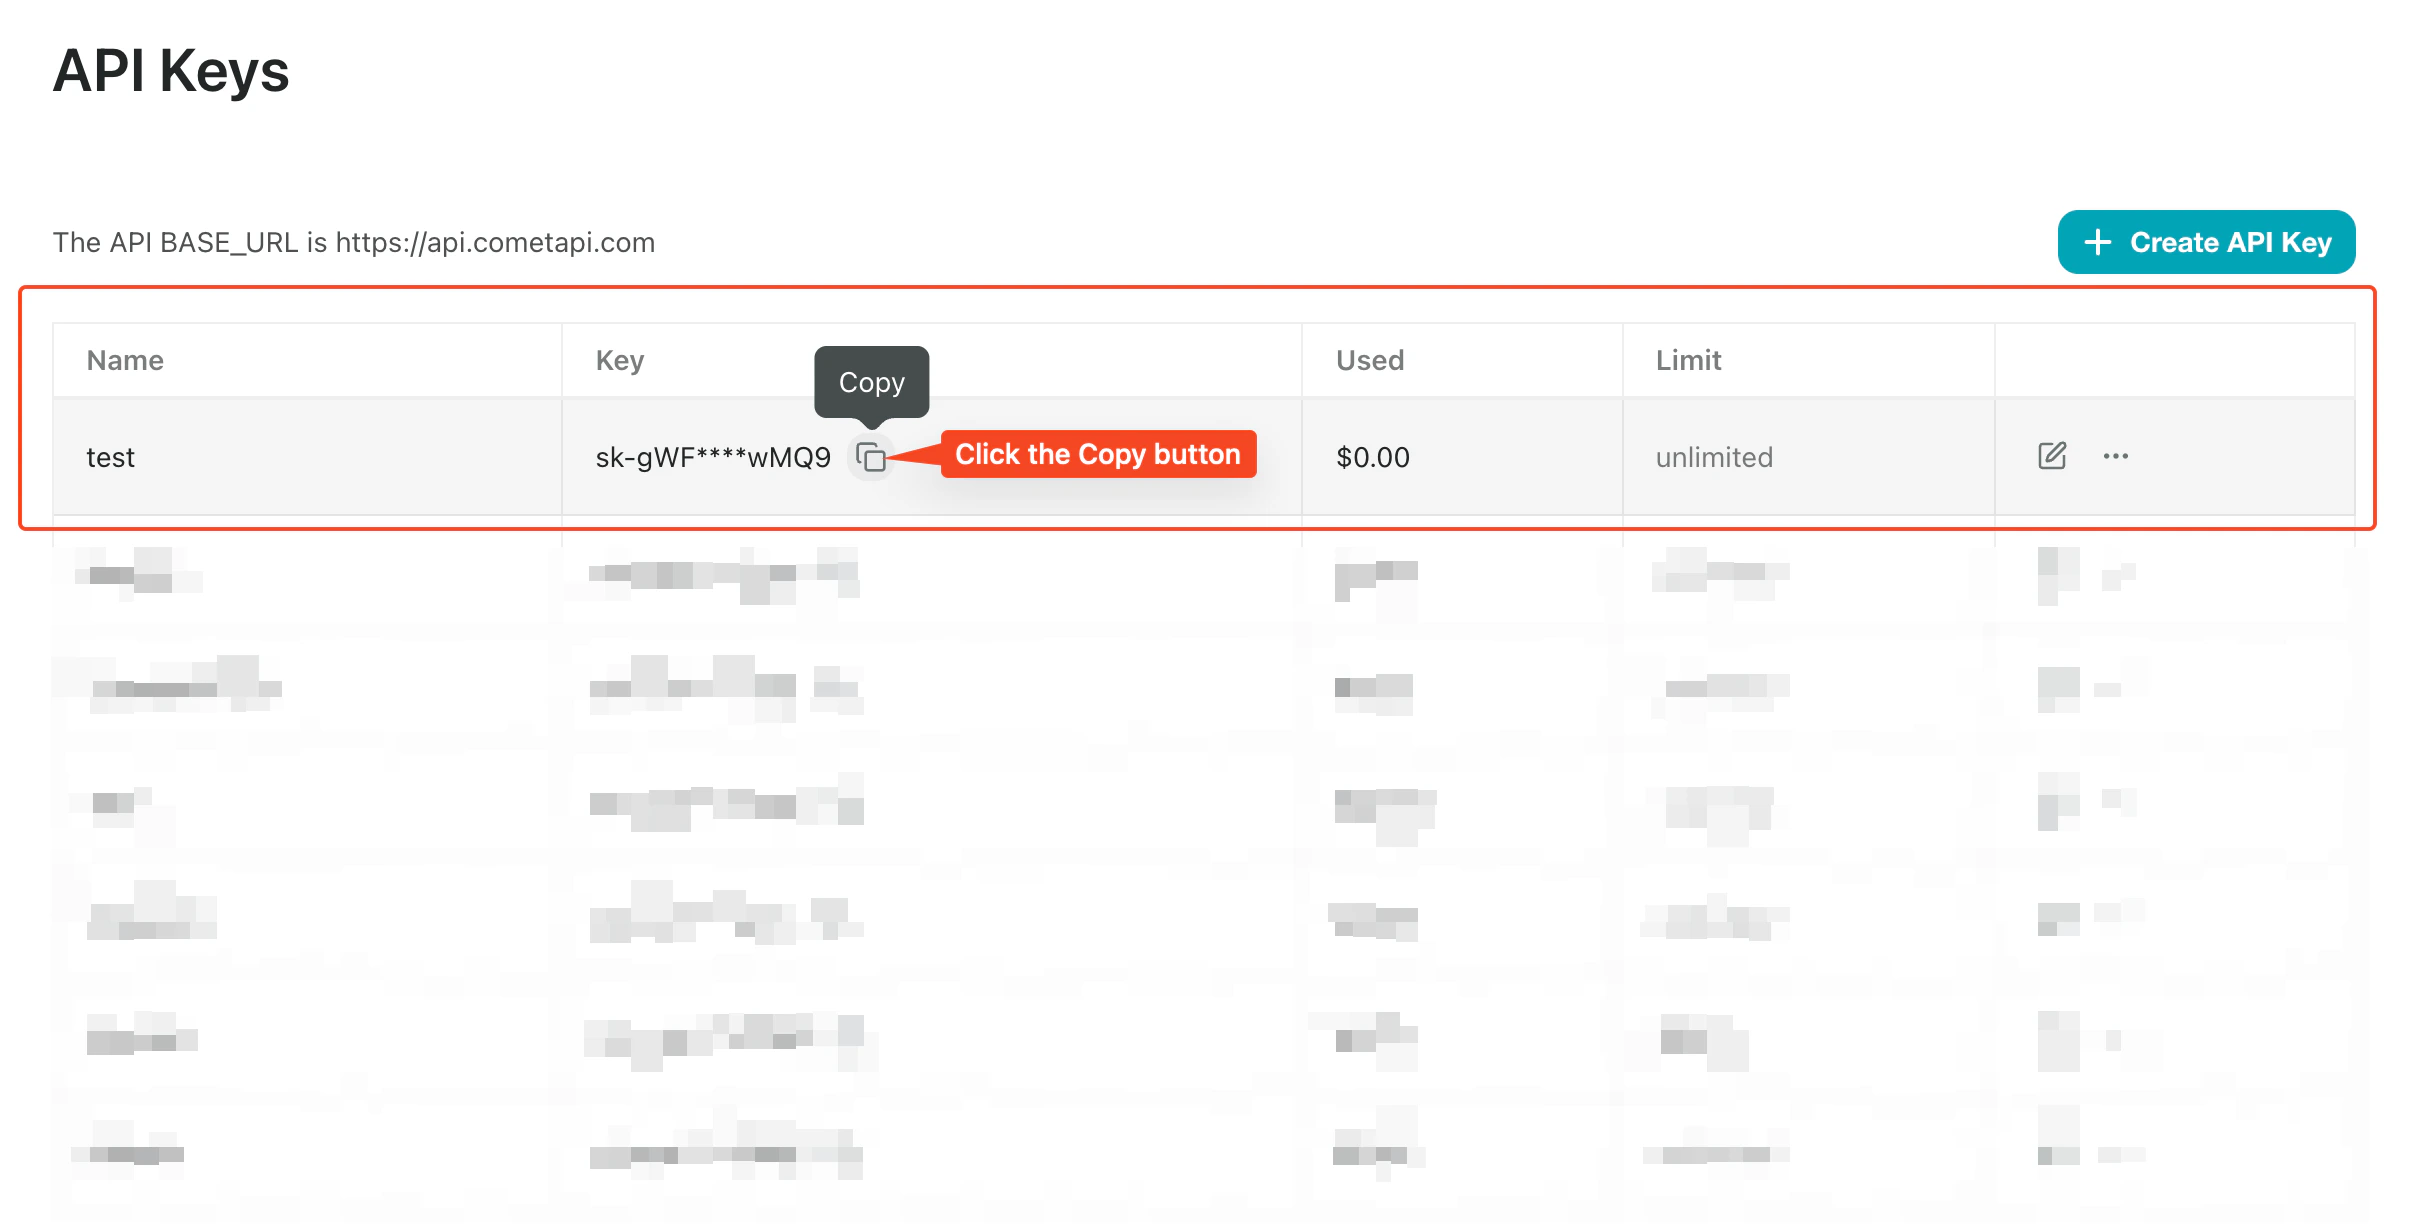
    Melden Sie sich in der [CometAPI-Konsole](https://www.cometapi.com/console/token) an. Klicken Sie auf **Add API Key** und kopieren Sie Ihren CometAPI API key.
    <Frame>
      <img src="https://mintcdn.com/cometapi/SZhlxZhCnMLn__BW/images/overview/810968_364191.png?fit=max&auto=format&n=SZhlxZhCnMLn__BW&q=85&s=aef81a83f29f8eb16655ed4060425f50" alt="CometAPI-Dashboard mit der Schaltfläche Add API Key" width="3824" height="1892" data-path="images/overview/810968_364191.png" />
    </Frame>

    <Frame>
      <img src="https://mintcdn.com/cometapi/HhtmQffktazbxUvS/images/overview/810968_364193.png?fit=max&auto=format&n=HhtmQffktazbxUvS&q=85&s=d893f659267150d0faf45f99eb5dffc1" alt="CometAPI-API-key-Details mit base URL" width="2434" height="1232" data-path="images/overview/810968_364193.png" />
    </Frame>
  </Step>

  <Step title="CometAPI als Zap-Schritt hinzufügen">
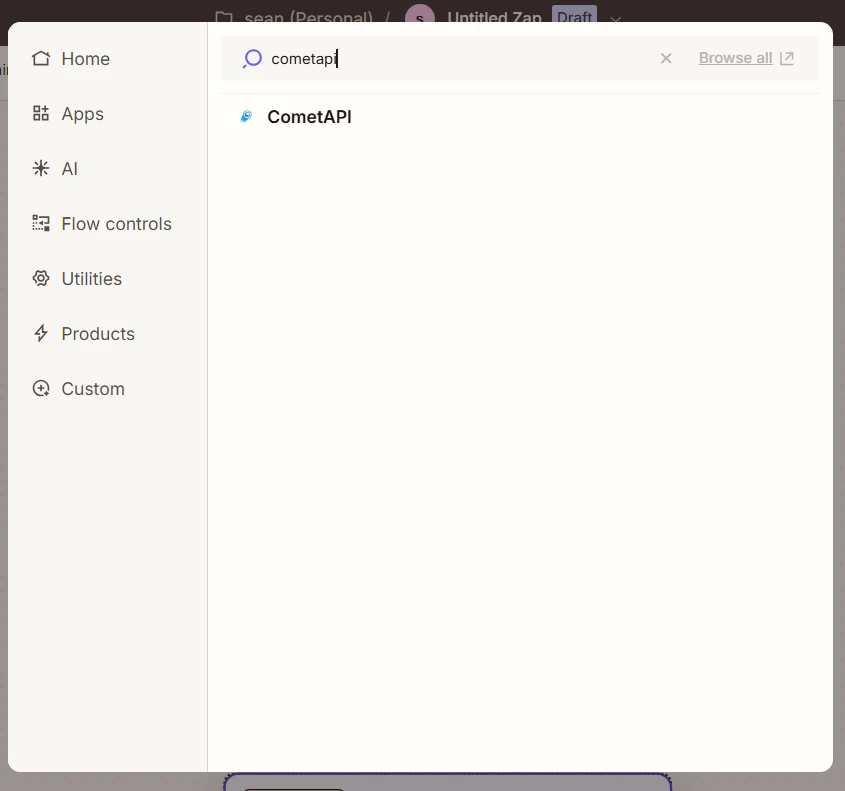
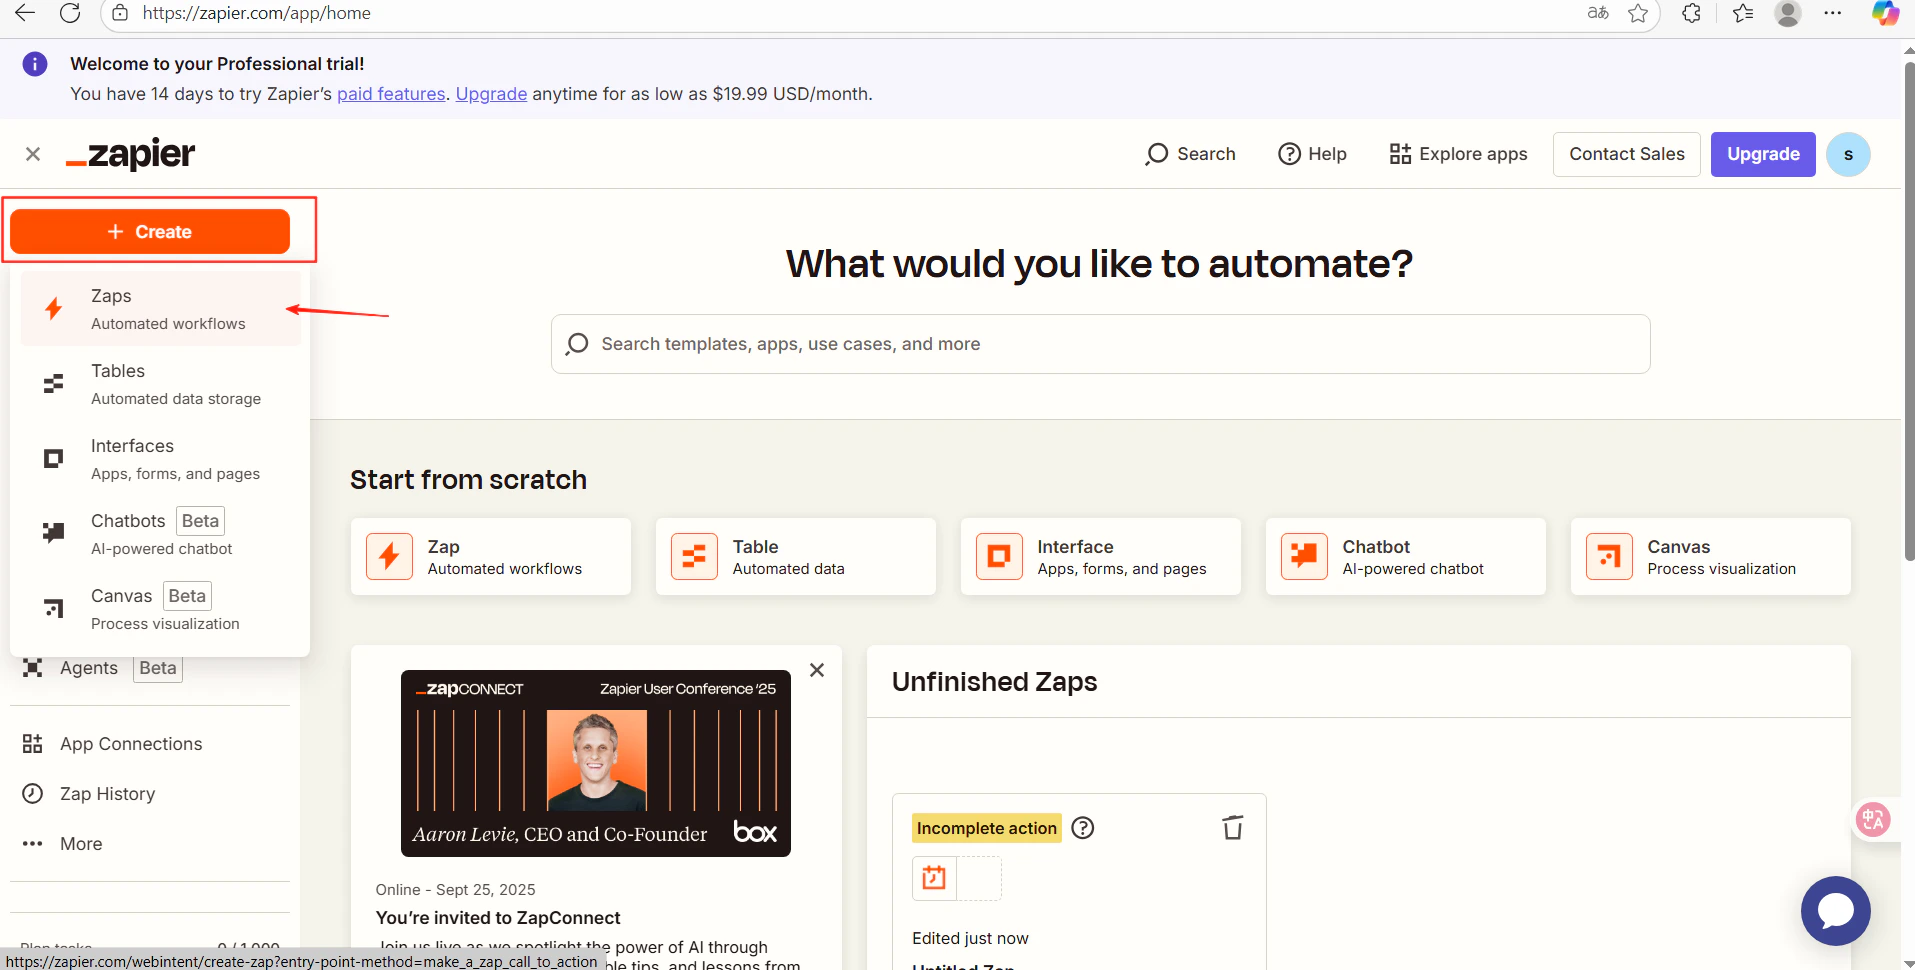
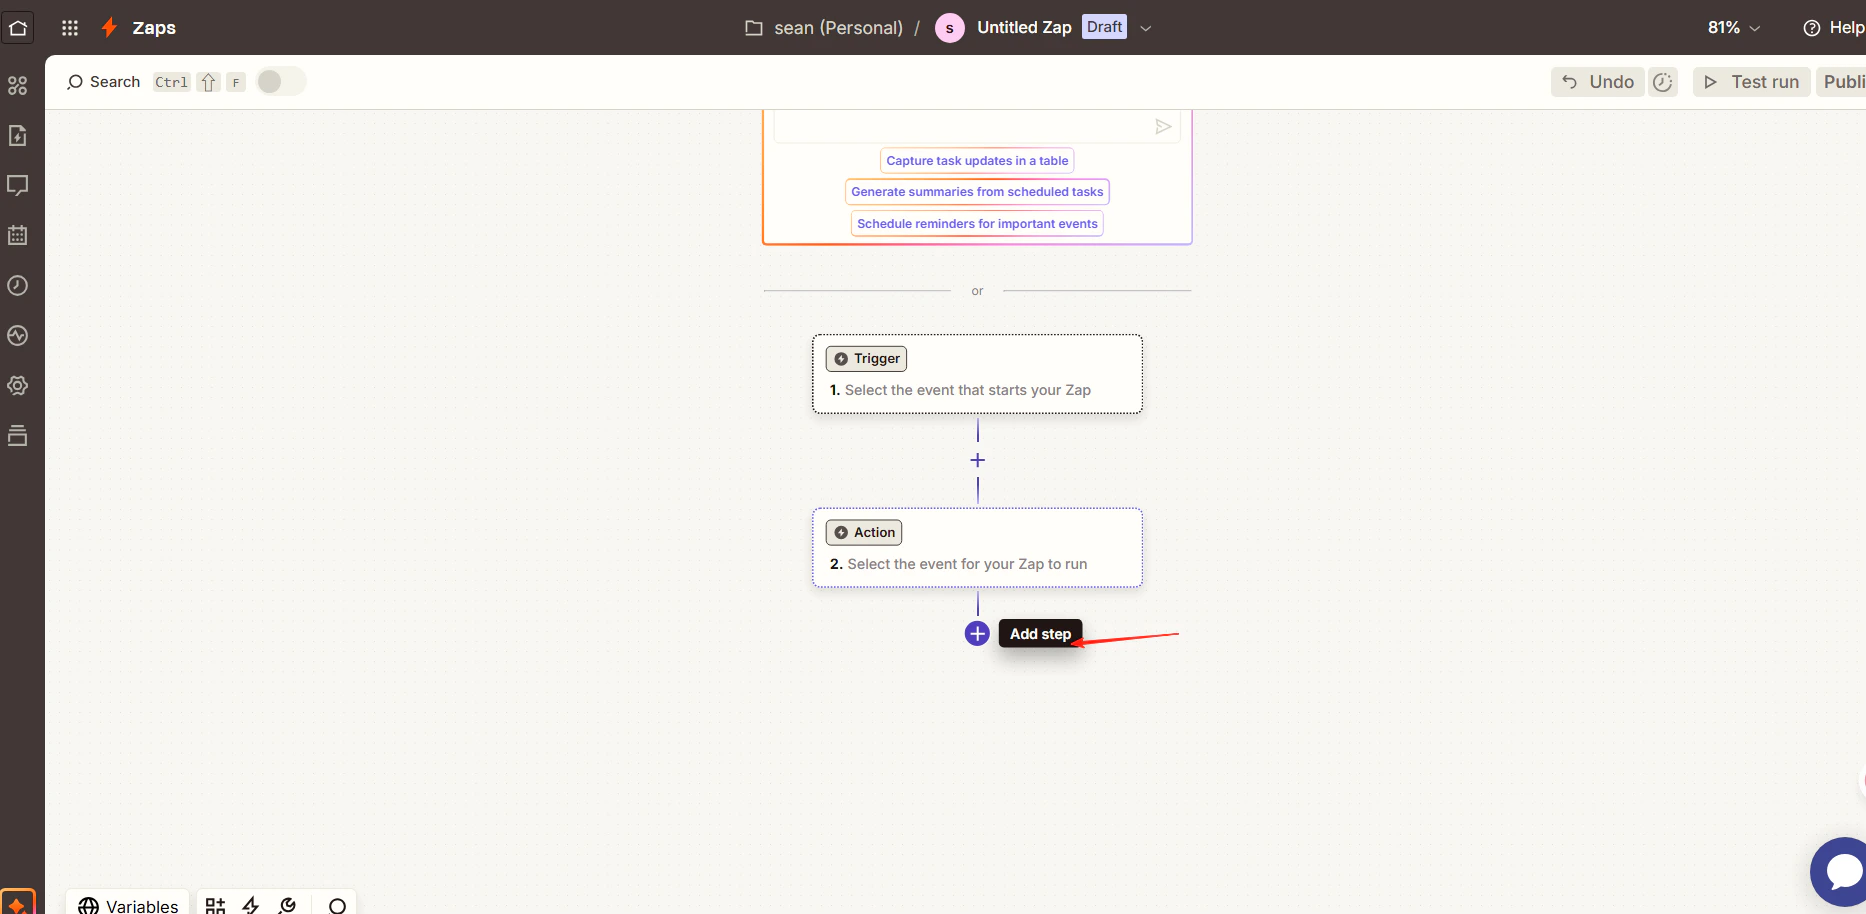
    Erstellen Sie in Zapier einen neuen Zap. Klicken Sie im Workflow-Editor auf **Add Step** und suchen Sie nach **CometAPI**.
    <Frame>
      <img src="https://mintcdn.com/cometapi/E4FFvyMYmaOZoldp/images/integrations/810968_360288.png?fit=max&auto=format&n=E4FFvyMYmaOZoldp&q=85&s=e0f9acf9b0c6c296ba4590b3f94a8ca1" alt="Zapier-Workflow-Editor mit Schaltfläche Add Step" width="1915" height="970" data-path="images/integrations/810968_360288.png" />
    </Frame>

    <Frame>
      <img src="https://mintcdn.com/cometapi/E4FFvyMYmaOZoldp/images/integrations/810968_360289.png?fit=max&auto=format&n=E4FFvyMYmaOZoldp&q=85&s=f4a3fa5bf0e19ad96248a4b1dbfc2220" alt="Zapier-Suchergebnisse mit der CometAPI-App" width="1866" height="914" data-path="images/integrations/810968_360289.png" />
    </Frame>

    <Frame>
      <img src="https://mintcdn.com/cometapi/E4FFvyMYmaOZoldp/images/integrations/810968_360293.png?fit=max&auto=format&n=E4FFvyMYmaOZoldp&q=85&s=826cddfb18b75c459896d25e30ec69b4" alt="CometAPI-Aktionsauswahlbildschirm" width="845" height="791" data-path="images/integrations/810968_360293.png" />
    </Frame>
  </Step>

  <Step title="Die Aktion konfigurieren und Ihr Konto verbinden">
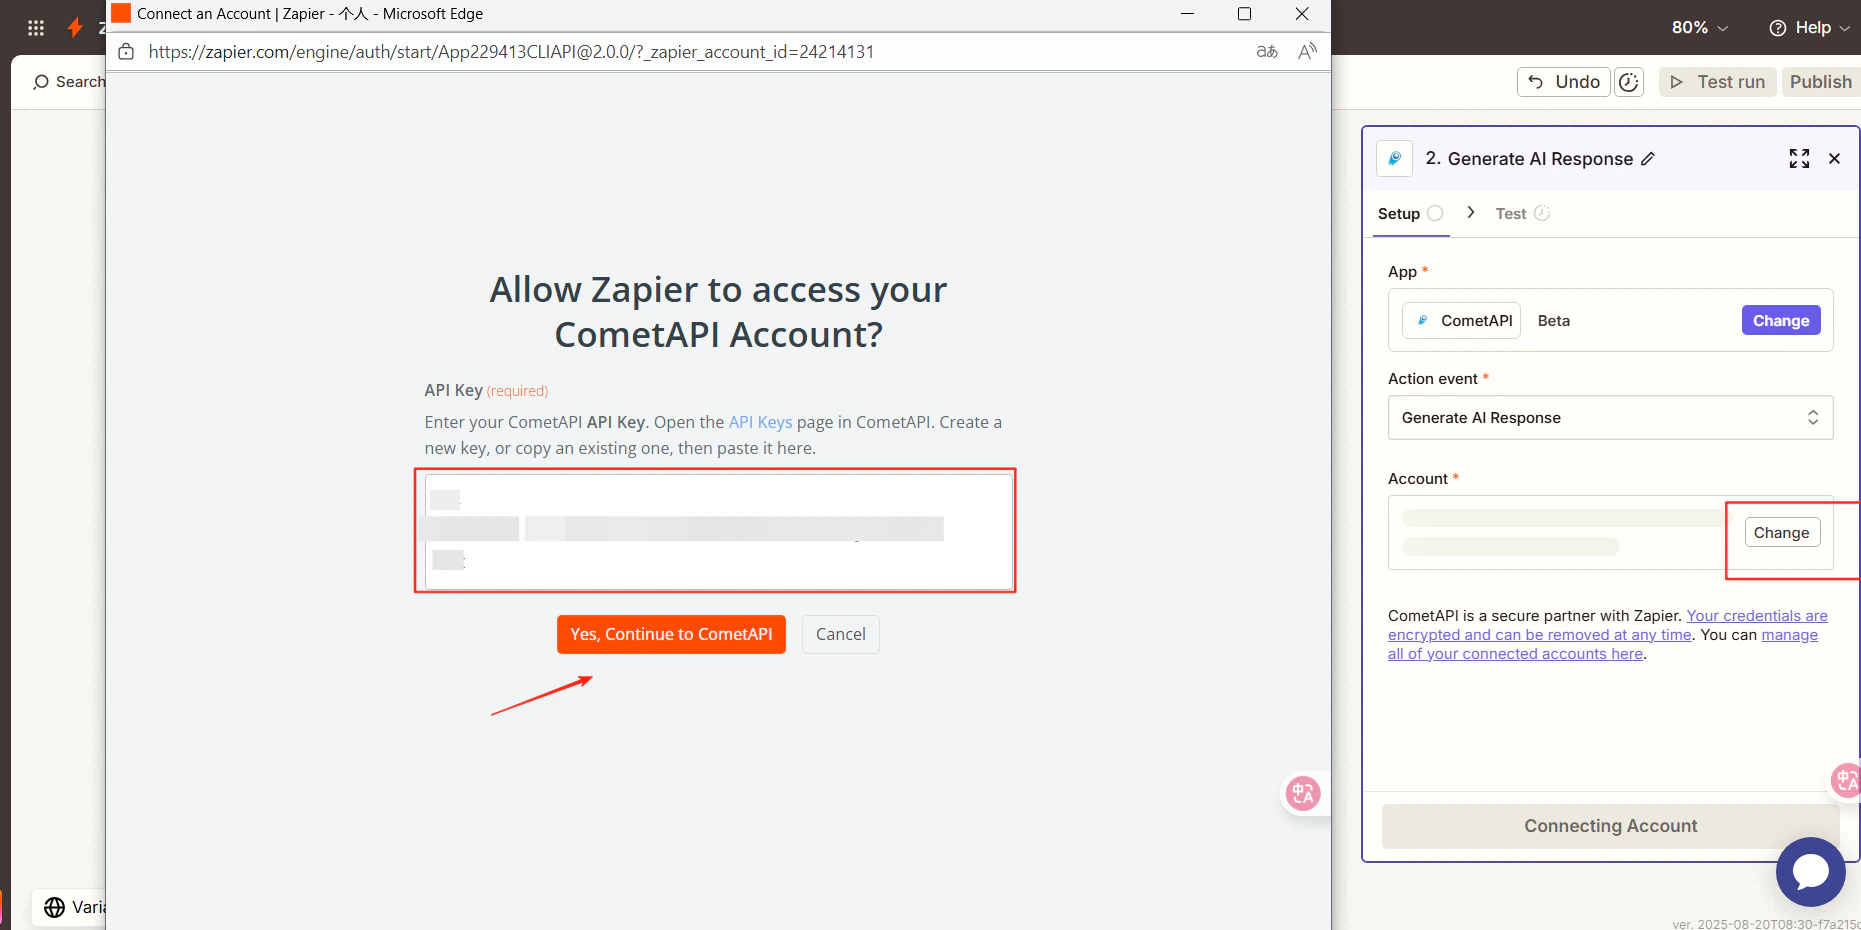
    * **Action Event**: Wählen Sie **Generate AI Response**
    * **Account**: Klicken Sie auf **Connect a new account** und fügen Sie Ihren CometAPI API key ein
    <Frame>
      <img src="https://mintcdn.com/cometapi/E4FFvyMYmaOZoldp/images/integrations/810968_360290.png?fit=max&auto=format&n=E4FFvyMYmaOZoldp&q=85&s=7512d3317a69a9387b59799e064f0060" alt="Zapier-Dialog zur Kontoverbindung mit API-key-Feld" width="1861" height="930" data-path="images/integrations/810968_360290.png" />
    </Frame>
  </Step>

  <Step title="Ein model auswählen und testen">
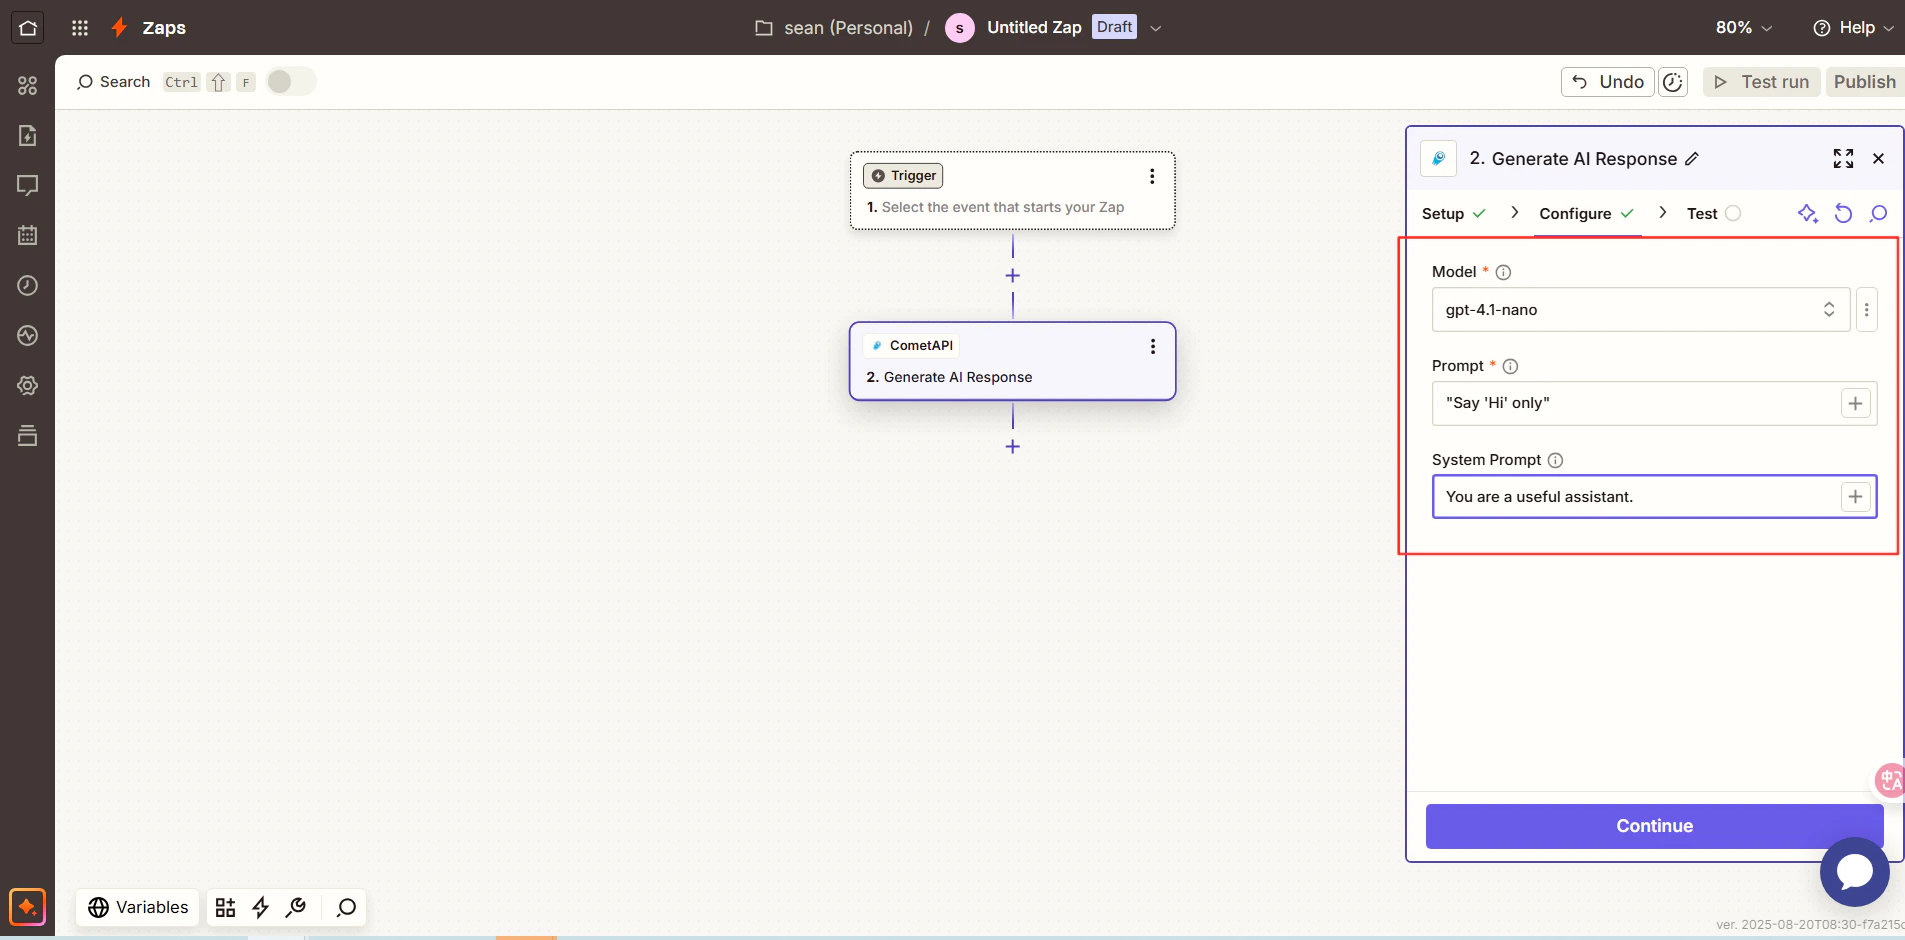
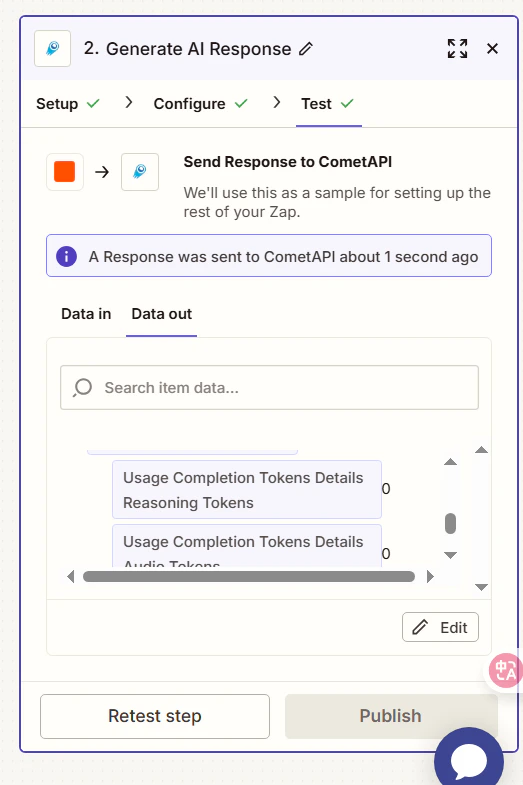
    Klicken Sie auf **Continue**, wählen Sie das aktuelle model aus, das Sie verwenden möchten, klicken Sie dann erneut auf **Continue** und führen Sie **Test Step** aus.
    <Frame>
      <img src="https://mintcdn.com/cometapi/E4FFvyMYmaOZoldp/images/integrations/810968_360291.png?fit=max&auto=format&n=E4FFvyMYmaOZoldp&q=85&s=478bf8b48bd4e762807eeec15eb11785" alt="Zapier-Schritt zur Modellauswahl" width="1905" height="940" data-path="images/integrations/810968_360291.png" />
    </Frame>

    <Frame>
      <img src="https://mintcdn.com/cometapi/E4FFvyMYmaOZoldp/images/integrations/810968_360292.png?fit=max&auto=format&n=E4FFvyMYmaOZoldp&q=85&s=18713a41c1a86a980c2bde6a6e072e48" alt="Zapier-Testergebnis mit einer erfolgreichen AI-Antwort" width="523" height="785" data-path="images/integrations/810968_360292.png" />
    </Frame>

    Ein erfolgreiches Testergebnis bestätigt die Integration. Klicken Sie auf **Publish**, um Ihren Zap zu aktivieren.

    Wenn der Aufruf fehlschlägt, überprüfen Sie Ihren API key noch einmal oder wenden Sie sich an den [CometAPI-Support](https://www.cometapi.com).
  </Step>
</Steps>

<Tip>
  CometAPI erscheint als native Zapier-App, daher ist keine benutzerdefinierte HTTP-Aktion erforderlich. Sie können sie mit Gmail, Google Sheets, Slack und Tausenden weiteren Zapier-Integrationen verknüpfen.
</Tip>

<script type="application/ld+json">
  {`
    {
    "@context": "https://schema.org",
    "@graph": [
      {
        "@type": "HowTo",
        "@id": "https://apidoc.cometapi.com/integrations/zapier#howto",
        "name": "Zapier mit CometAPI verbinden",
        "description": "Verwenden Sie diese Anleitung, um Zapier mit CometAPI zu verbinden, indem Sie die base URL, den API key sowie model- oder provider-Optionen festlegen.",
        "step": [
          {
            "@type": "HowToStep",
            "@id": "https://apidoc.cometapi.com/integrations/zapier#step-1",
            "position": 1,
            "name": "Holen Sie sich Ihren CometAPI API key",
            "text": "Erstellen oder öffnen Sie Ihr CometAPI-Konto und kopieren Sie dann einen aktiven API key aus dem Dashboard."
          },
          {
            "@type": "HowToStep",
            "@id": "https://apidoc.cometapi.com/integrations/zapier#step-2",
            "position": 2,
            "name": "CometAPI als Zap-Schritt hinzufügen",
            "text": "Führen Sie den Schritt CometAPI als Zap-Schritt hinzufügen in der Anleitung Zapier mit CometAPI verbinden aus."
          },
          {
            "@type": "HowToStep",
            "@id": "https://apidoc.cometapi.com/integrations/zapier#step-3",
            "position": 3,
            "name": "Die Aktion konfigurieren und Ihr Konto verbinden",
            "text": "Führen Sie den Schritt Die Aktion konfigurieren und Ihr Konto verbinden in der Anleitung Zapier mit CometAPI verbinden aus."
          },
          {
            "@type": "HowToStep",
            "@id": "https://apidoc.cometapi.com/integrations/zapier#step-4",
            "position": 4,
            "name": "Ein model auswählen und testen",
            "text": "Führen Sie den Schritt Ein model auswählen und testen in der Anleitung Zapier mit CometAPI verbinden aus."
          }
        ]
      },
      {
        "@type": "BreadcrumbList",
        "itemListElement": [
          {
            "@type": "ListItem",
            "position": 1,
            "name": "CometAPI-Dokumentation",
            "item": "https://apidoc.cometapi.com/"
          },
          {
            "@type": "ListItem",
            "position": 2,
            "name": "Integrationen",
            "item": "https://apidoc.cometapi.com/integrations"
          },
          {
            "@type": "ListItem",
            "position": 3,
            "name": "Zapier mit CometAPI verbinden",
            "item": "https://apidoc.cometapi.com/integrations/zapier"
          }
        ]
      }
    ]
    }
    `}
</script>