> ## Documentation Index
> Fetch the complete documentation index at: https://apidoc.cometapi.com/llms.txt
> Use this file to discover all available pages before exploring further.
# Connect BuildShip to CometAPI
> Use this guide to connect BuildShip to CometAPI by setting the base URL, API key, and model or provider options.
BuildShip is a low-code visual backend builder. Use the community **CometAPI Text Generator** node to add AI-powered text generation to any workflow.
## Prerequisites
* A CometAPI account with an active API key — [get yours here](https://www.cometapi.com/console/token)
* A BuildShip account — [sign in here](https://app.buildship.com)
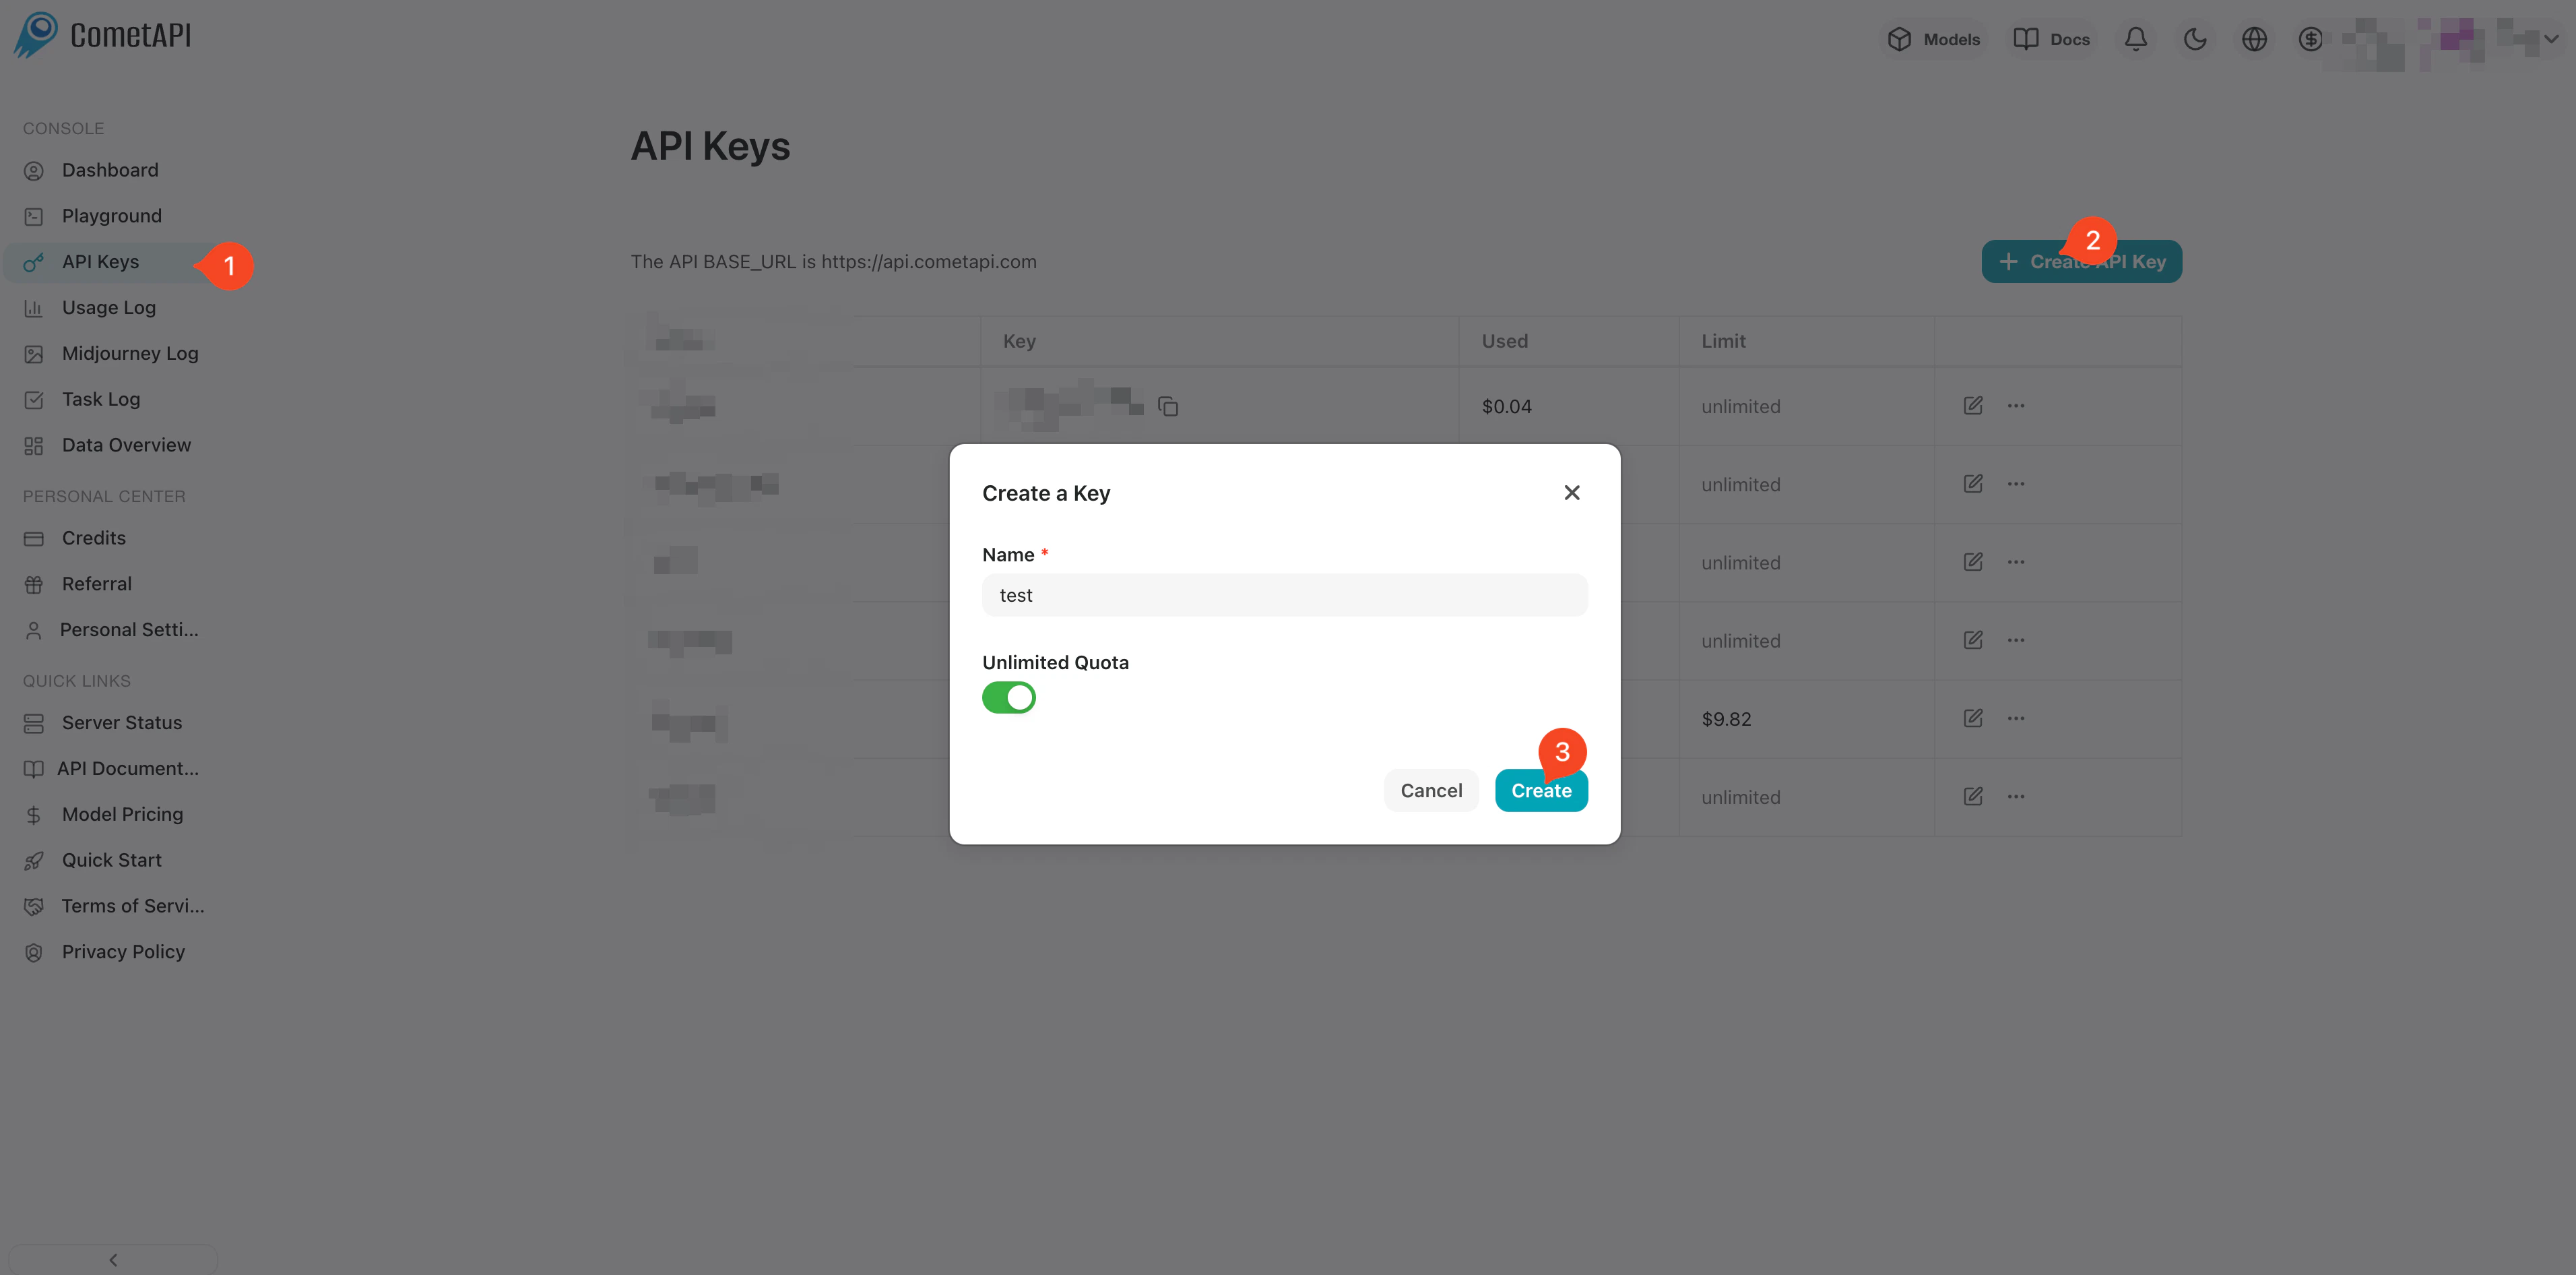
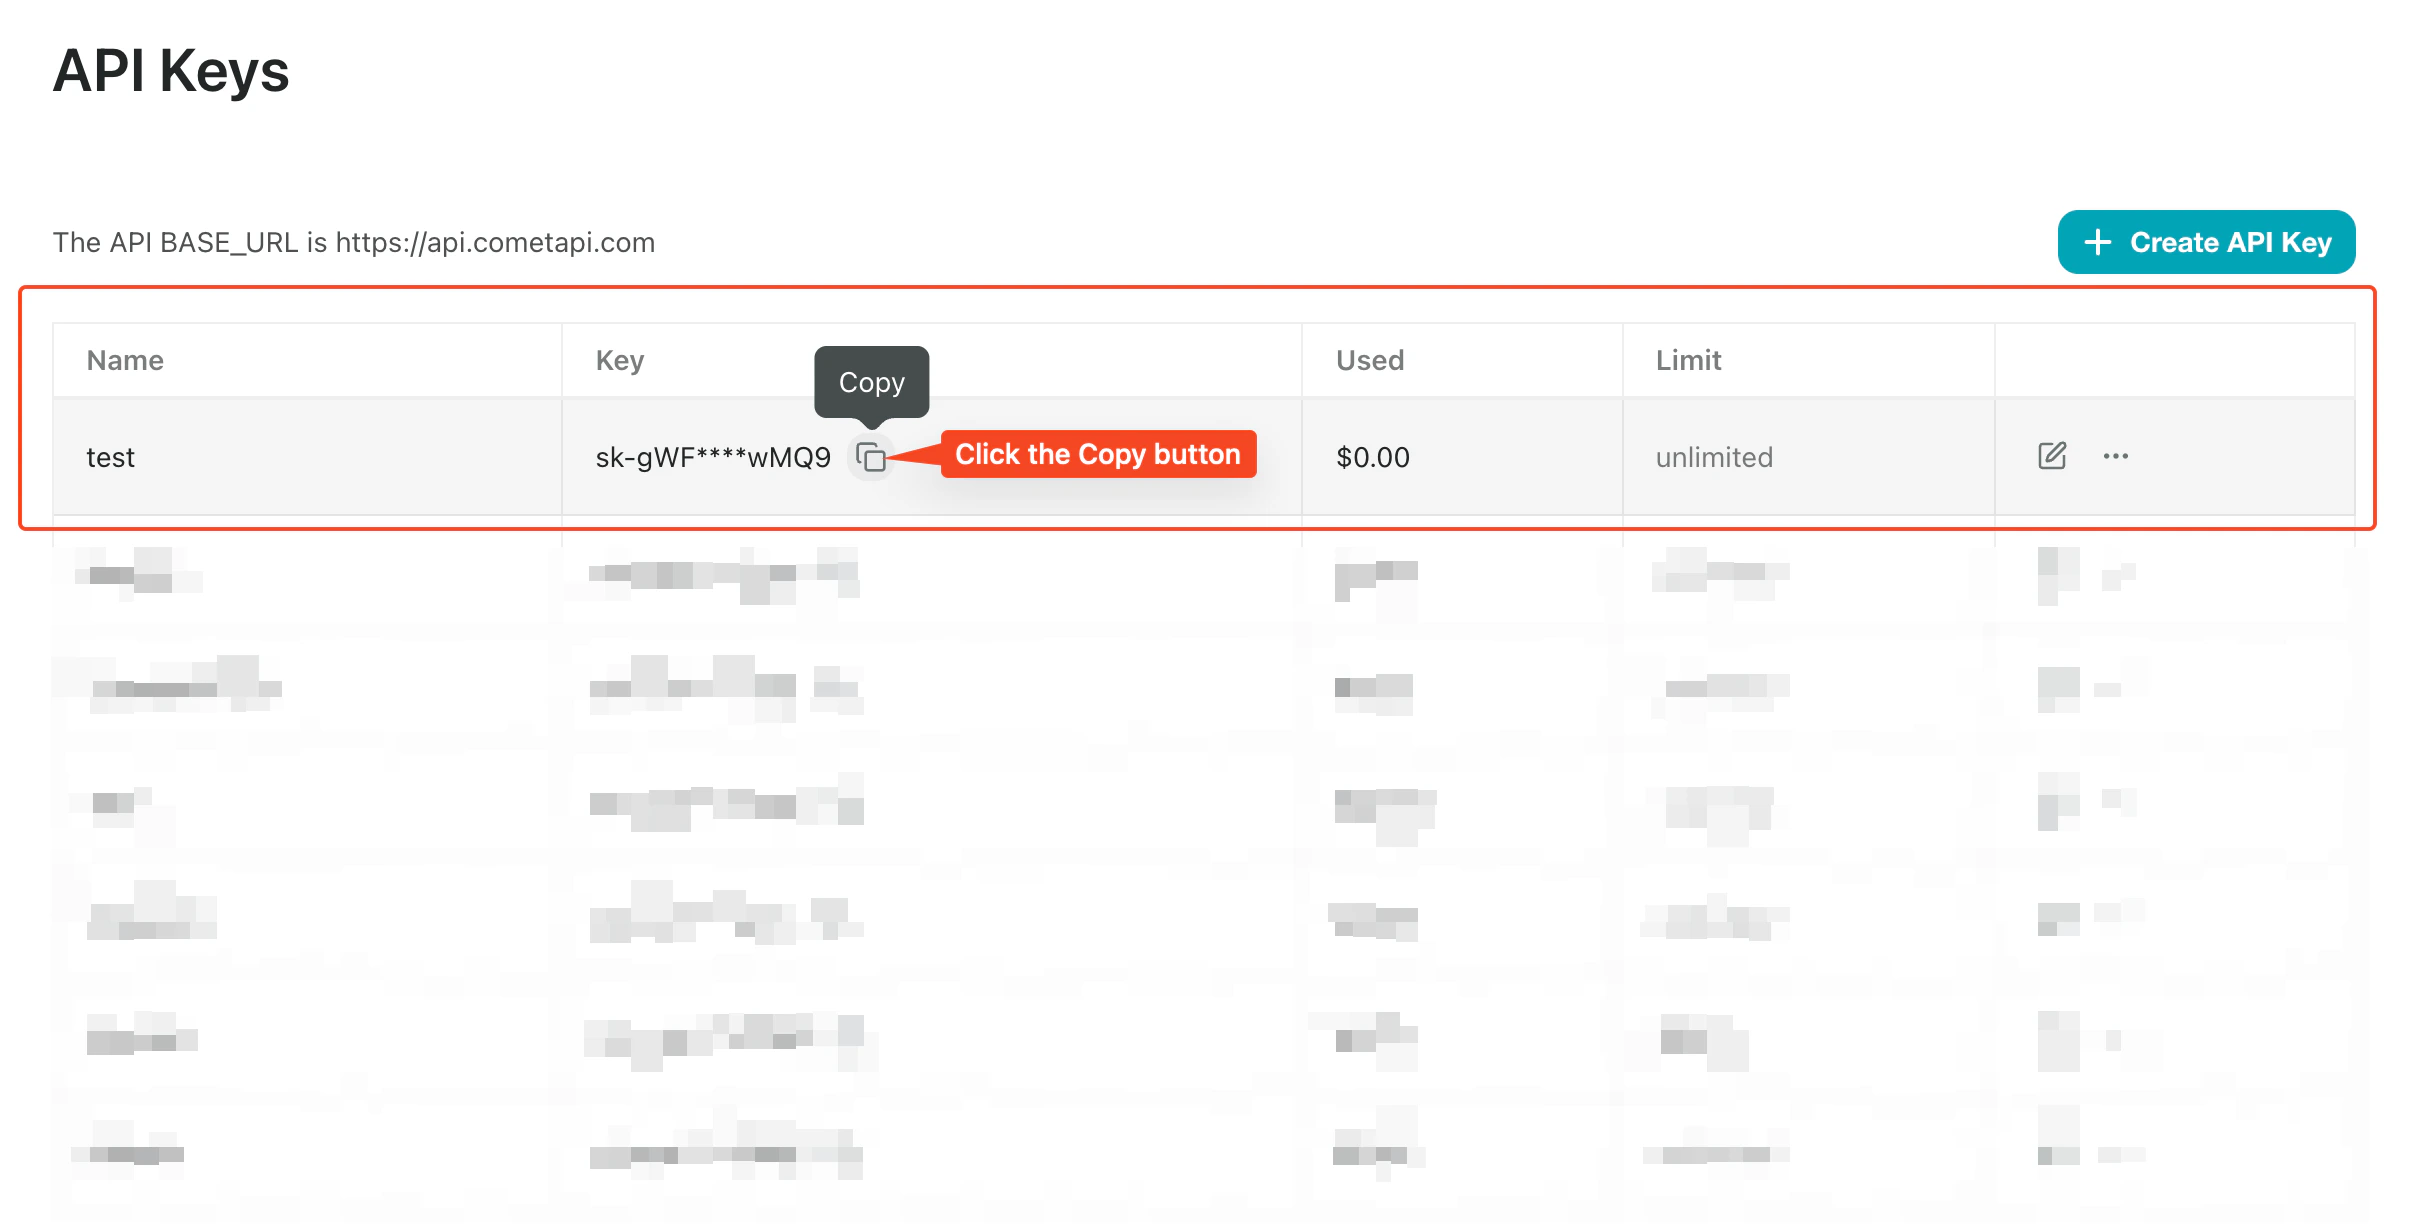
Log in to the [CometAPI console](https://www.cometapi.com/console/token). Click **Add API Key** and copy your CometAPI API key.
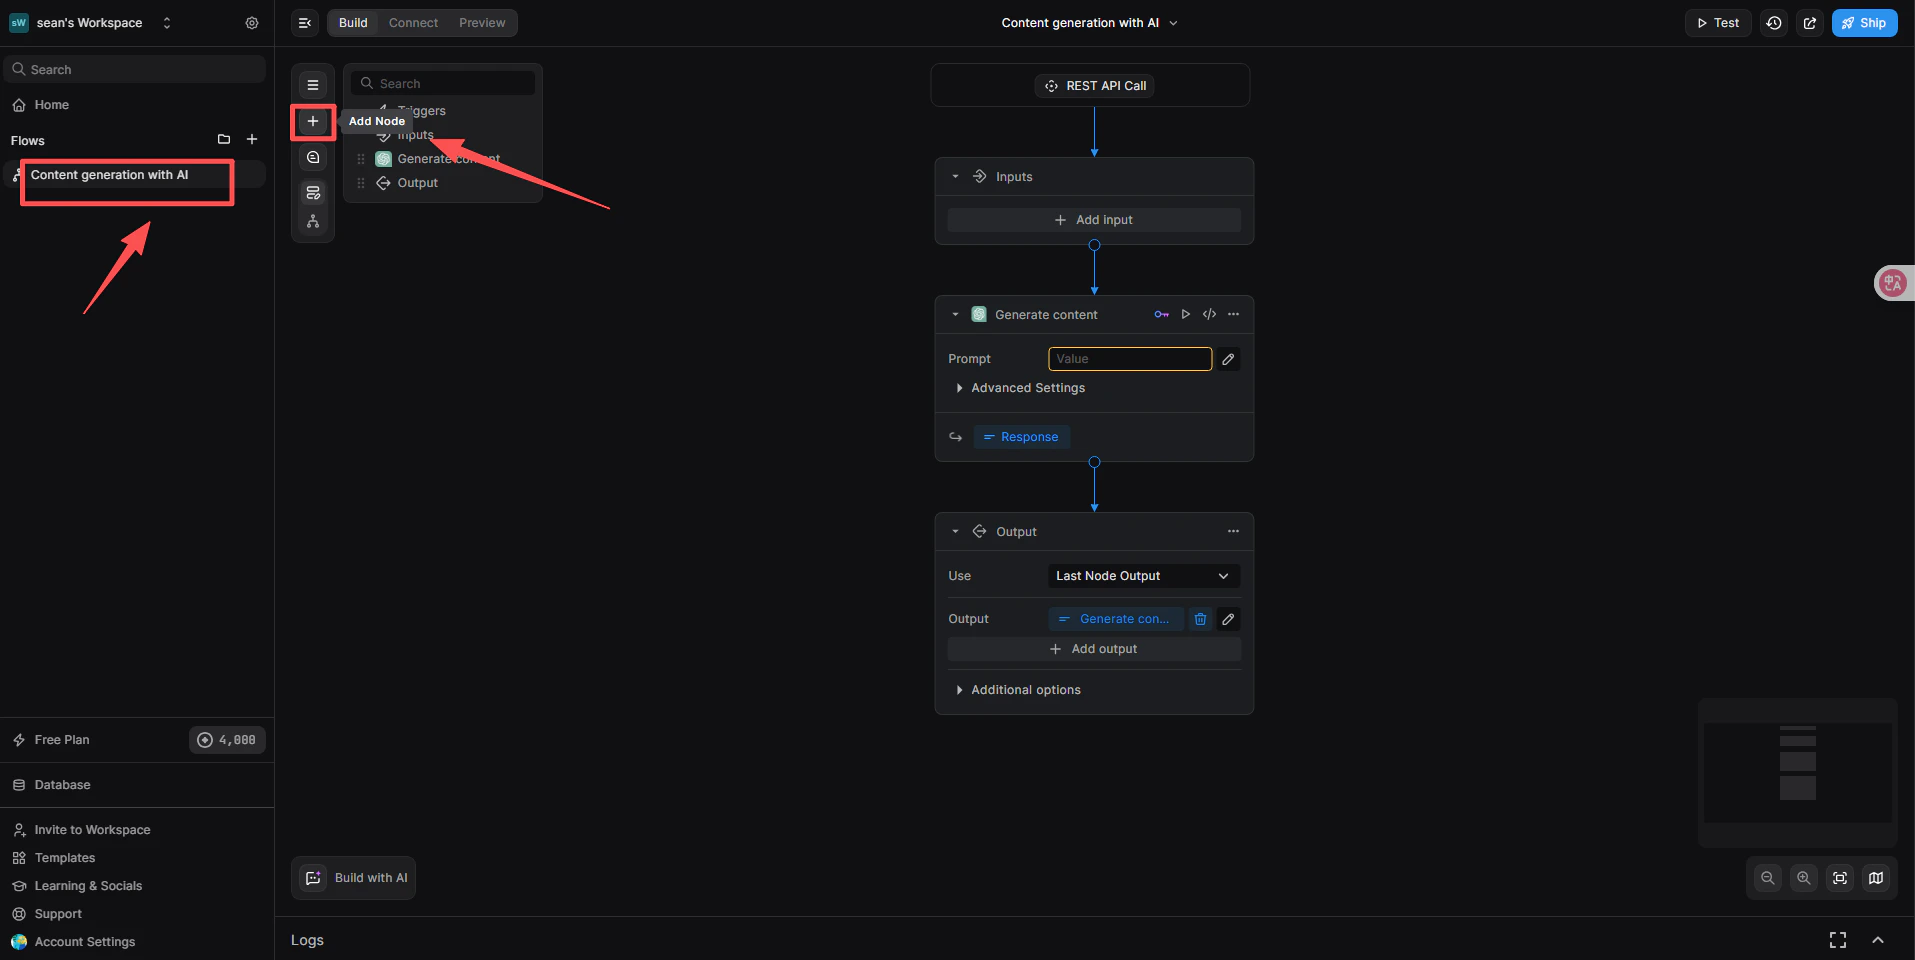
 1. In the BuildShip dashboard, click **Create a new workflow → From Scratch**.
2. On the canvas, click **Add Trigger** and select **REST API**. This generates a callable endpoint for the workflow.
1. Below the REST API trigger, click **+ Add a new step**.
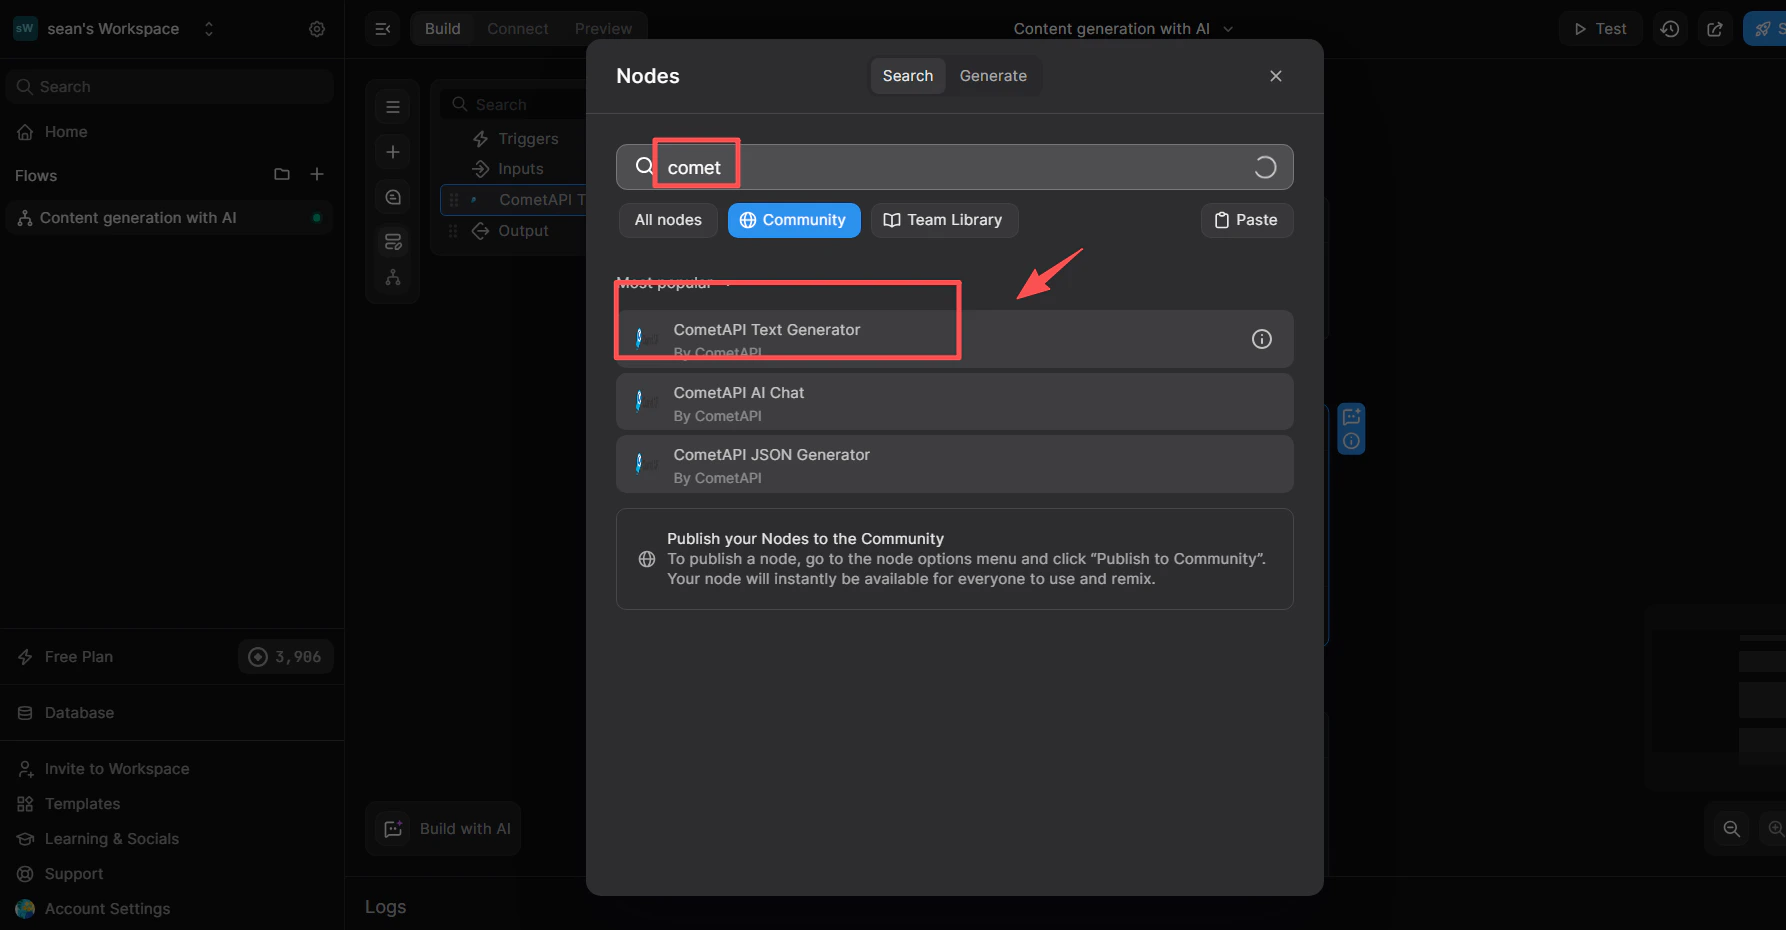
2. In the node library search box, type `cometapi`.
3. From the **Community** list, select **CometAPI Text Generator**.
1. In the BuildShip dashboard, click **Create a new workflow → From Scratch**.
2. On the canvas, click **Add Trigger** and select **REST API**. This generates a callable endpoint for the workflow.
1. Below the REST API trigger, click **+ Add a new step**.
2. In the node library search box, type `cometapi`.
3. From the **Community** list, select **CometAPI Text Generator**.
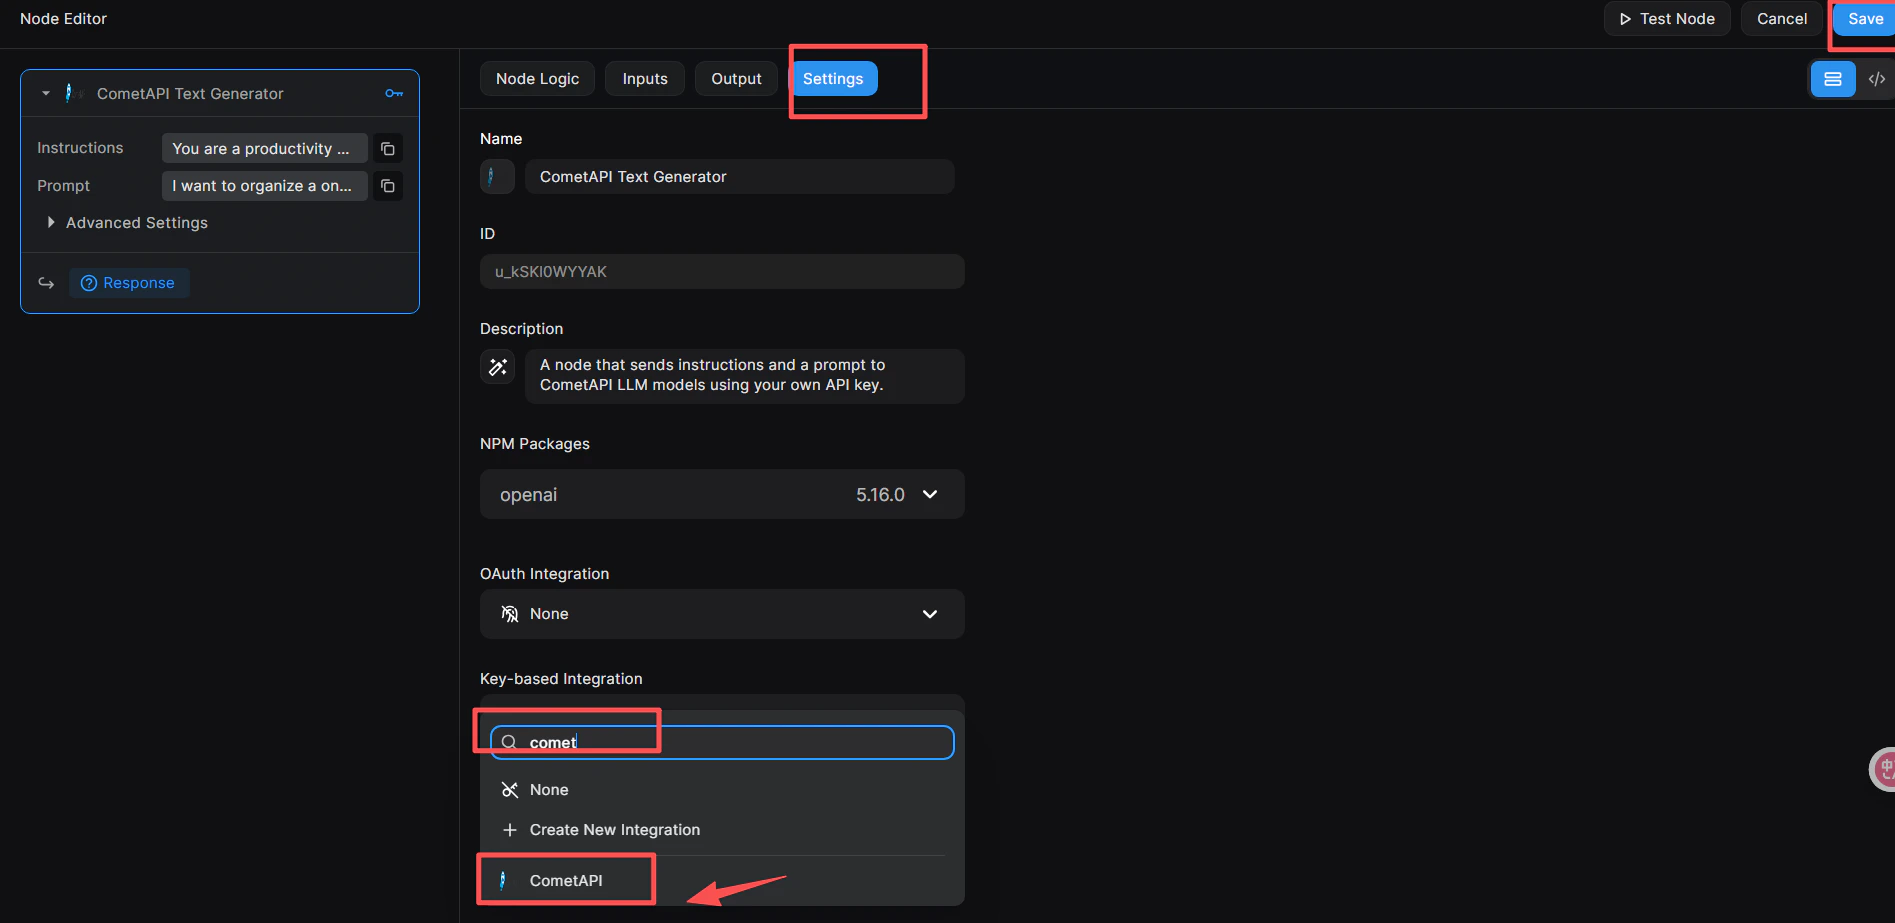
 This step tells the node which key management system to use.
1. Click the node to open the **Node Editor** on the right.
2. Switch to the **Settings** tab.
3. In **Key-based Integration**, open the dropdown and select **CometAPI**.
4. Click the blue **Save** button in the top-right corner.
This step tells the node which key management system to use.
1. Click the node to open the **Node Editor** on the right.
2. Switch to the **Settings** tab.
3. In **Key-based Integration**, open the dropdown and select **CometAPI**.
4. Click the blue **Save** button in the top-right corner.
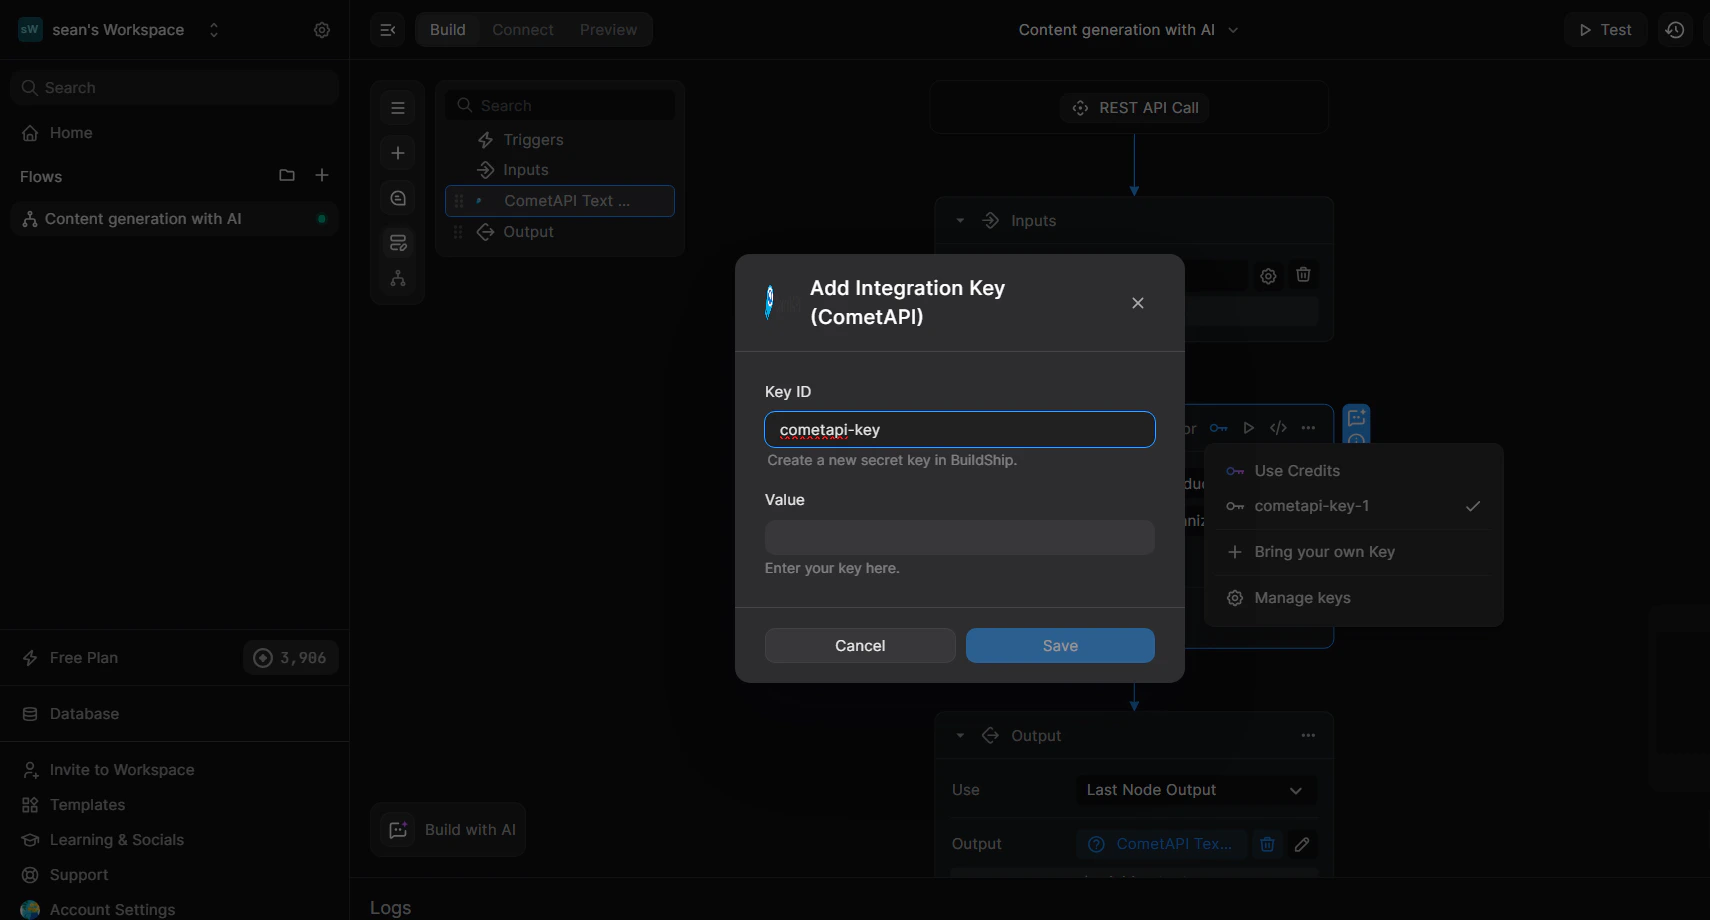
 1. In the Node Editor, switch to the **Inputs** tab (or click directly on the node).
2. Click the 🔑 key icon in the node's top-right corner to open the key dropdown.
3. Select **+ Bring your own Key**.
4. Enter a **Key ID** (e.g. `cometapi-key-1`) and paste your CometAPI API key in **Value**.
5. Click **Save**.
1. In the Node Editor, switch to the **Inputs** tab (or click directly on the node).
2. Click the 🔑 key icon in the node's top-right corner to open the key dropdown.
3. Select **+ Bring your own Key**.
4. Enter a **Key ID** (e.g. `cometapi-key-1`) and paste your CometAPI API key in **Value**.
5. Click **Save**.
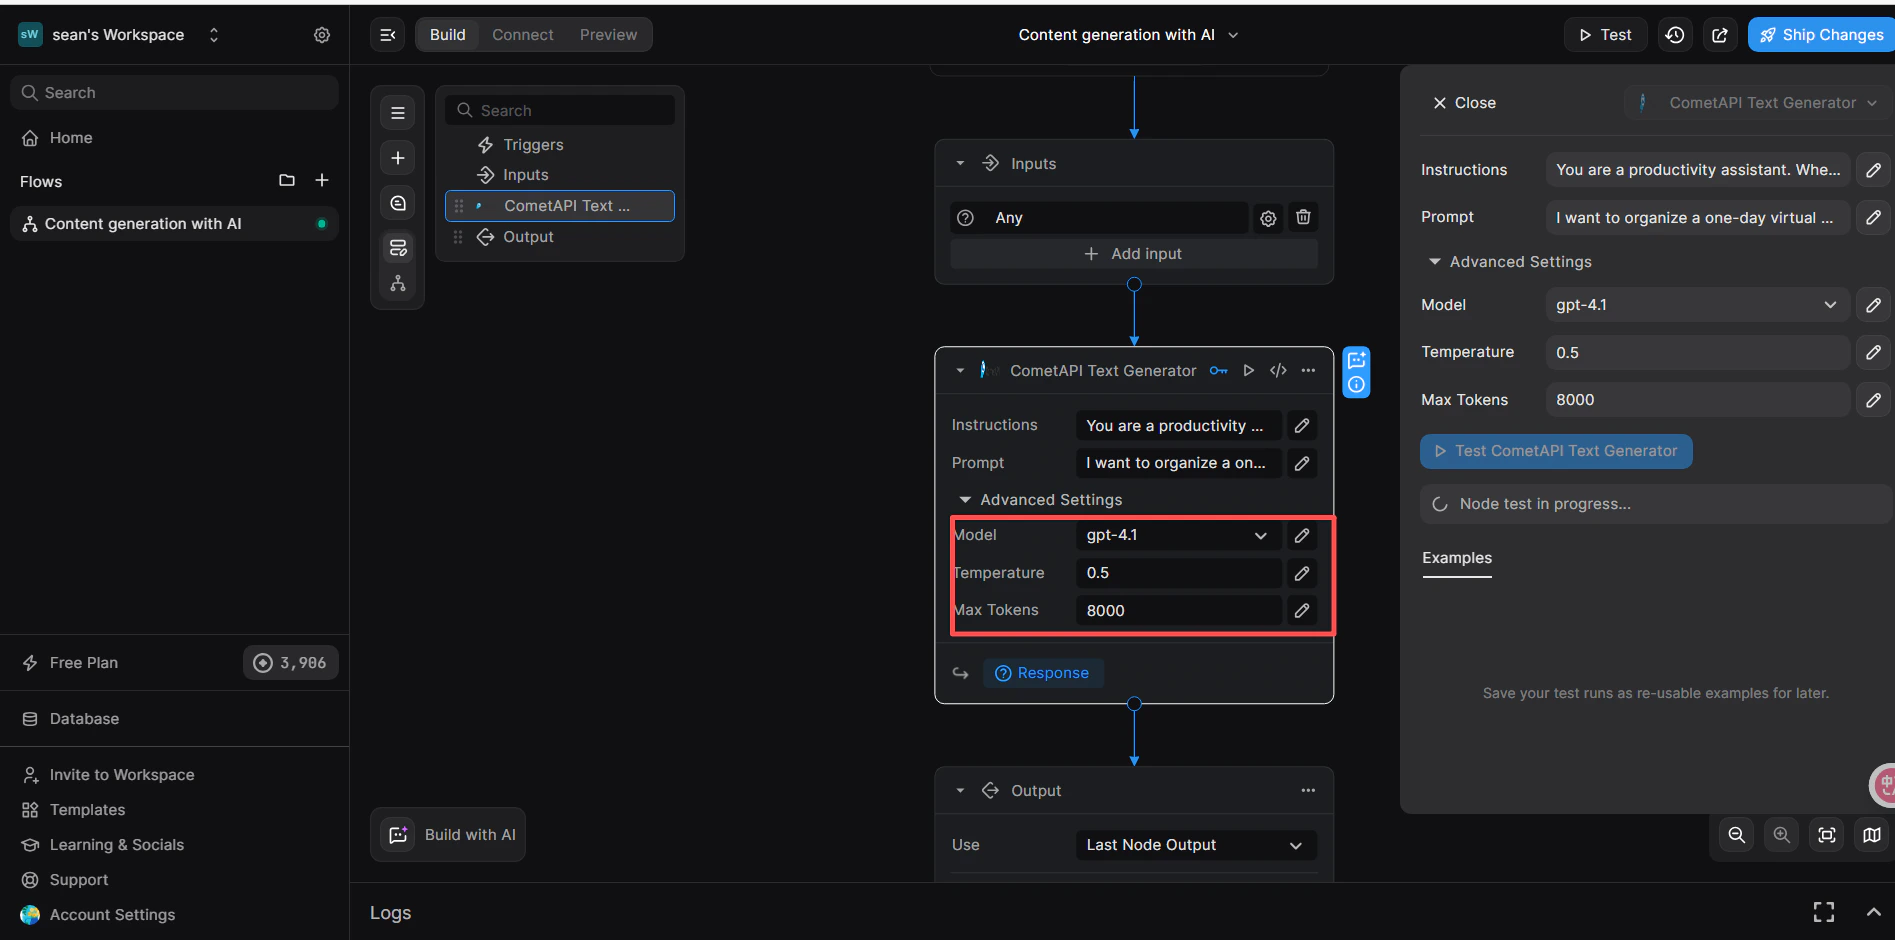
 In the node's **Inputs** tab:
* **Instructions** (optional): set a system role, e.g. `You are a productivity assistant.`
* **Prompt**: click the **``** icon, then select **Trigger → Body → prompt** to map the incoming request body.
* **Advanced → Model**: enter the current model ID you want to use.
In the node's **Inputs** tab:
* **Instructions** (optional): set a system role, e.g. `You are a productivity assistant.`
* **Prompt**: click the **``** icon, then select **Trigger → Body → prompt** to map the incoming request body.
* **Advanced → Model**: enter the current model ID you want to use.
 1. Below the CometAPI node, click **+ Add a new step** and select **Return Response**.
2. In the **Body** field, click **``** and select the `response` variable from the CometAPI Text Generator node.
3. Click **Test** in the upper-right corner, select **JSON** input format, and send:
```json theme={null}
{
"prompt": "hi"
}
```
4. A successful response in the **Result** panel confirms the workflow is working.
1. Below the CometAPI node, click **+ Add a new step** and select **Return Response**.
2. In the **Body** field, click **``** and select the `response` variable from the CometAPI Text Generator node.
3. Click **Test** in the upper-right corner, select **JSON** input format, and send:
```json theme={null}
{
"prompt": "hi"
}
```
4. A successful response in the **Result** panel confirms the workflow is working.
 If the call fails, verify your API key and that the Key-based Integration is set to **CometAPI**, or contact [CometAPI support](https://www.cometapi.com).
The **Key-based Integration** step (linking the node to CometAPI) is essential — skipping it will cause authentication errors even if your API key is correct.
If the call fails, verify your API key and that the Key-based Integration is set to **CometAPI**, or contact [CometAPI support](https://www.cometapi.com).
The **Key-based Integration** step (linking the node to CometAPI) is essential — skipping it will cause authentication errors even if your API key is correct.