> ## Documentation Index
> Fetch the complete documentation index at: https://apidoc.cometapi.com/llms.txt
> Use this file to discover all available pages before exploring further.
# Use NextChat with CometAPI
> Use this guide to configure NextChat with CometAPI by setting the base URL, API key, and model or provider options.
[NextChat](https://nextchat.club/) (formerly ChatGPT Next Web) is a one-click deployable AI chat app. Connect it to CometAPI using the OpenAI-compatible API settings.
## Prerequisites
* [NextChat](https://nextchat.club/) (web, desktop, or self-hosted)
* A [CometAPI](https://www.cometapi.com) account with an active API key
## Setup
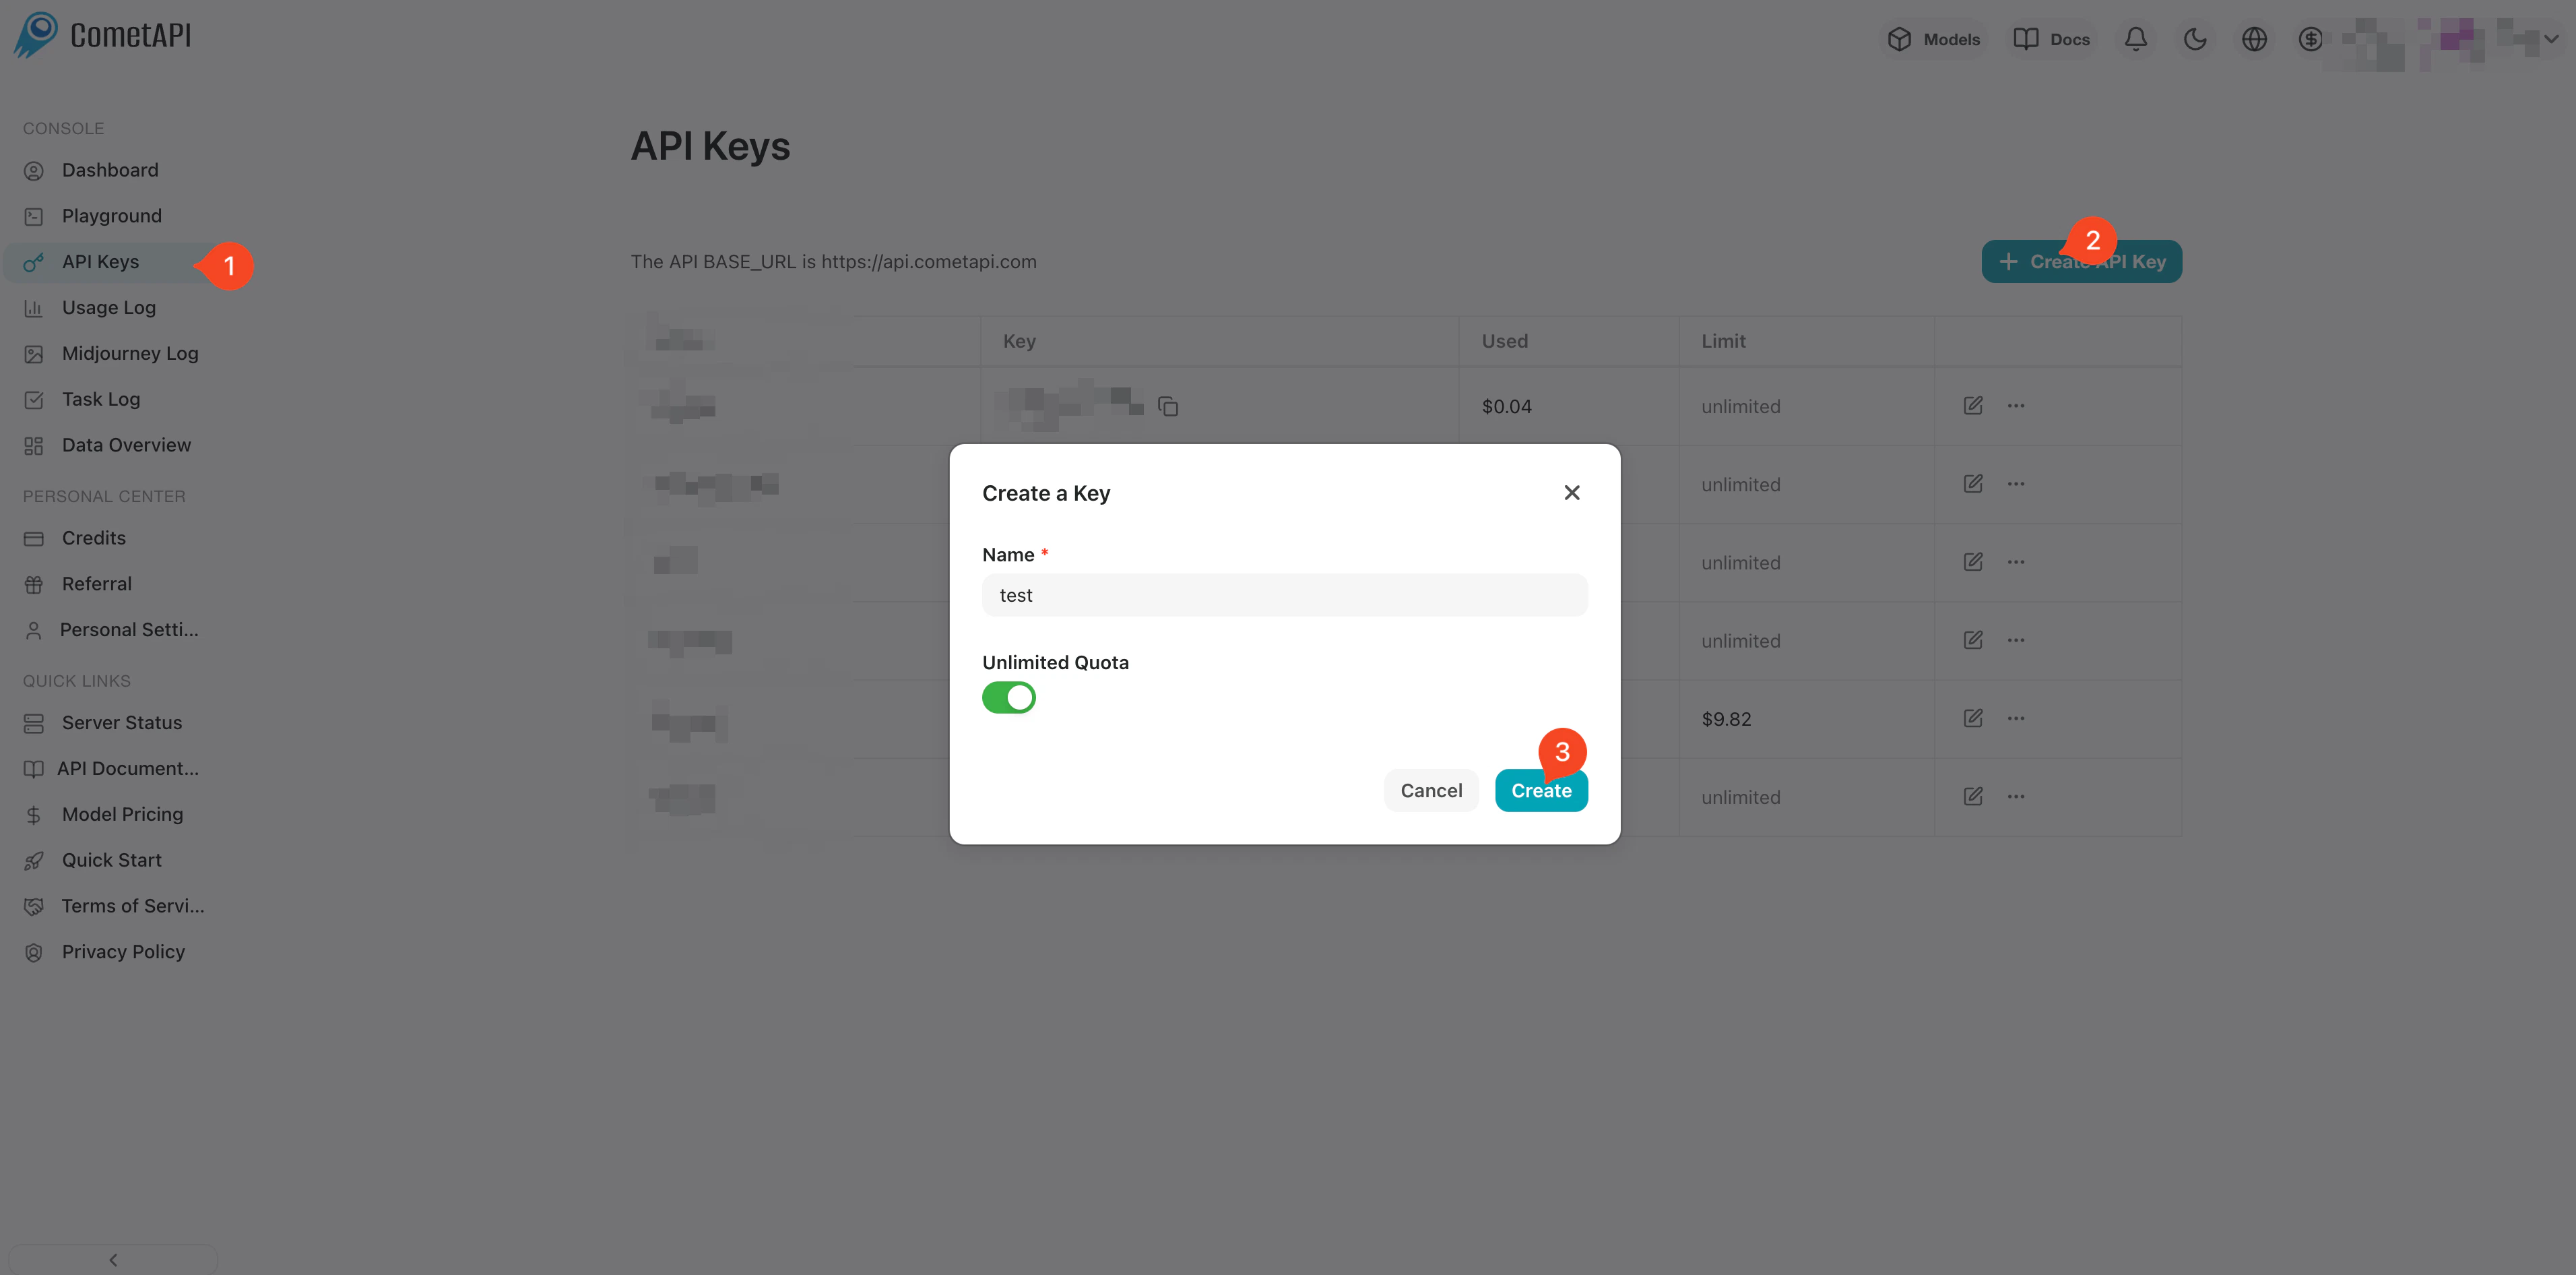
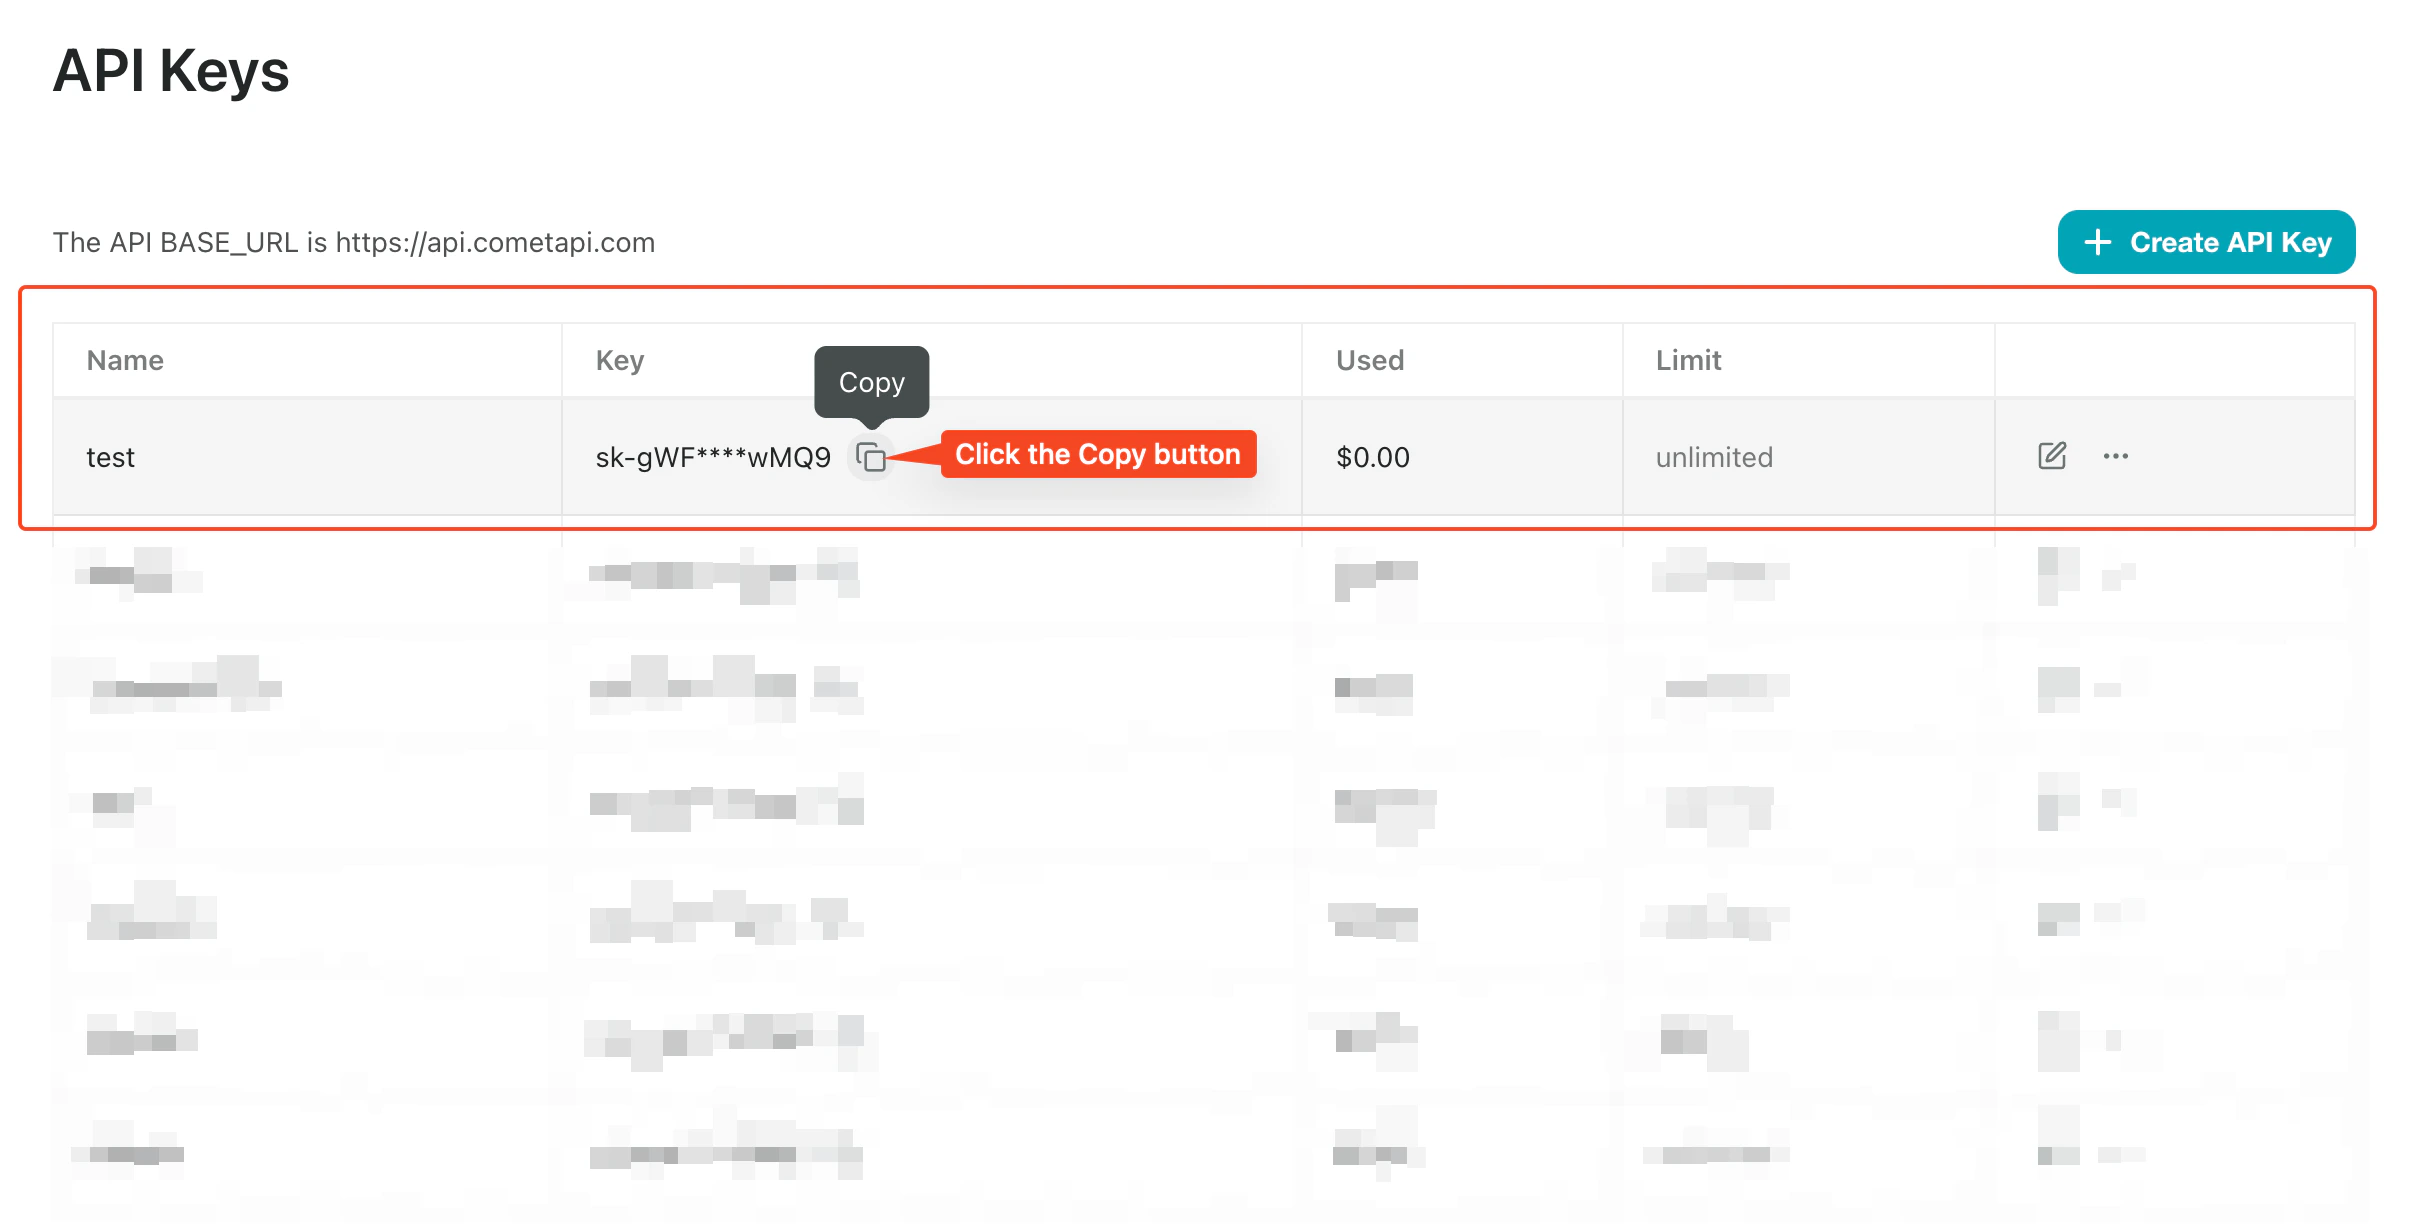
Log in to the [CometAPI dashboard](https://www.cometapi.com/console). Click **Add API Key** and copy your key and base URL (`https://api.cometapi.com`).
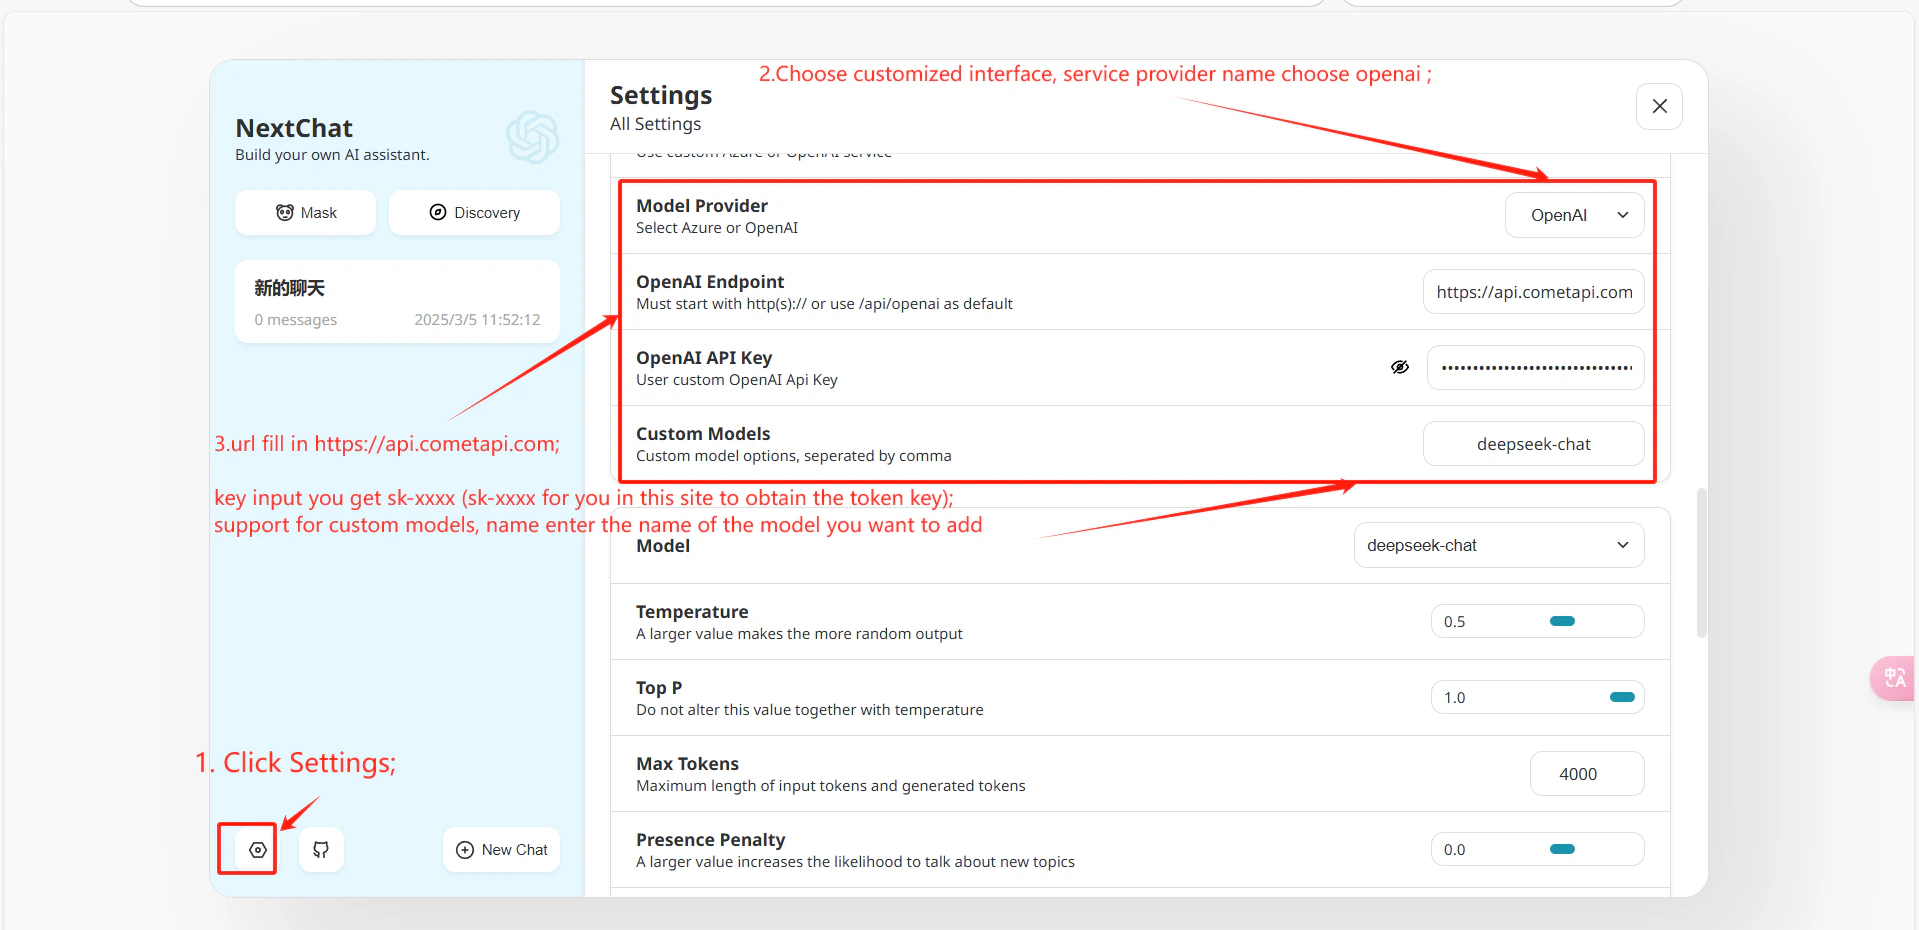
 Open NextChat **Settings** → **Custom Interface**. Select **OpenAI API**, enter `https://api.cometapi.com` in the **Interface Address** field, paste your key into **API Key**, and click **Save**.
 Send a test message. A successful reply confirms the integration is working.
To add custom models, go to **Settings** → **Custom Model Names** and enter entries in this format:
```
+your-model-id@OpenAI
```
Format: `+` adds a model, the name before `@` is the model ID, and `@OpenAI` means it uses OpenAI format. Separate multiple entries with commas.
Send a test message. A successful reply confirms the integration is working.
To add custom models, go to **Settings** → **Custom Model Names** and enter entries in this format:
```
+your-model-id@OpenAI
```
Format: `+` adds a model, the name before `@` is the model ID, and `@OpenAI` means it uses OpenAI format. Separate multiple entries with commas.