> ## Documentation Index
> Fetch the complete documentation index at: https://apidoc.cometapi.com/llms.txt
> Use this file to discover all available pages before exploring further.

# Zapier を CometAPI に接続する

> このガイドでは、base URL、API key、model または provider オプションを設定して、Zapier を CometAPI に接続する方法を説明します。

Zapier は CometAPI を数千のアプリに接続し、コードを書かずに AI を活用したワークフローを自動化できます。

## 前提条件

* 有効な API キーを持つ CometAPI アカウント — [こちらから取得](https://www.cometapi.com/console/token)
* Zapier アカウント — [こちらから登録](https://zapier.com/app/home)

<Steps>
  <Step title="CometAPI API キーを取得する">
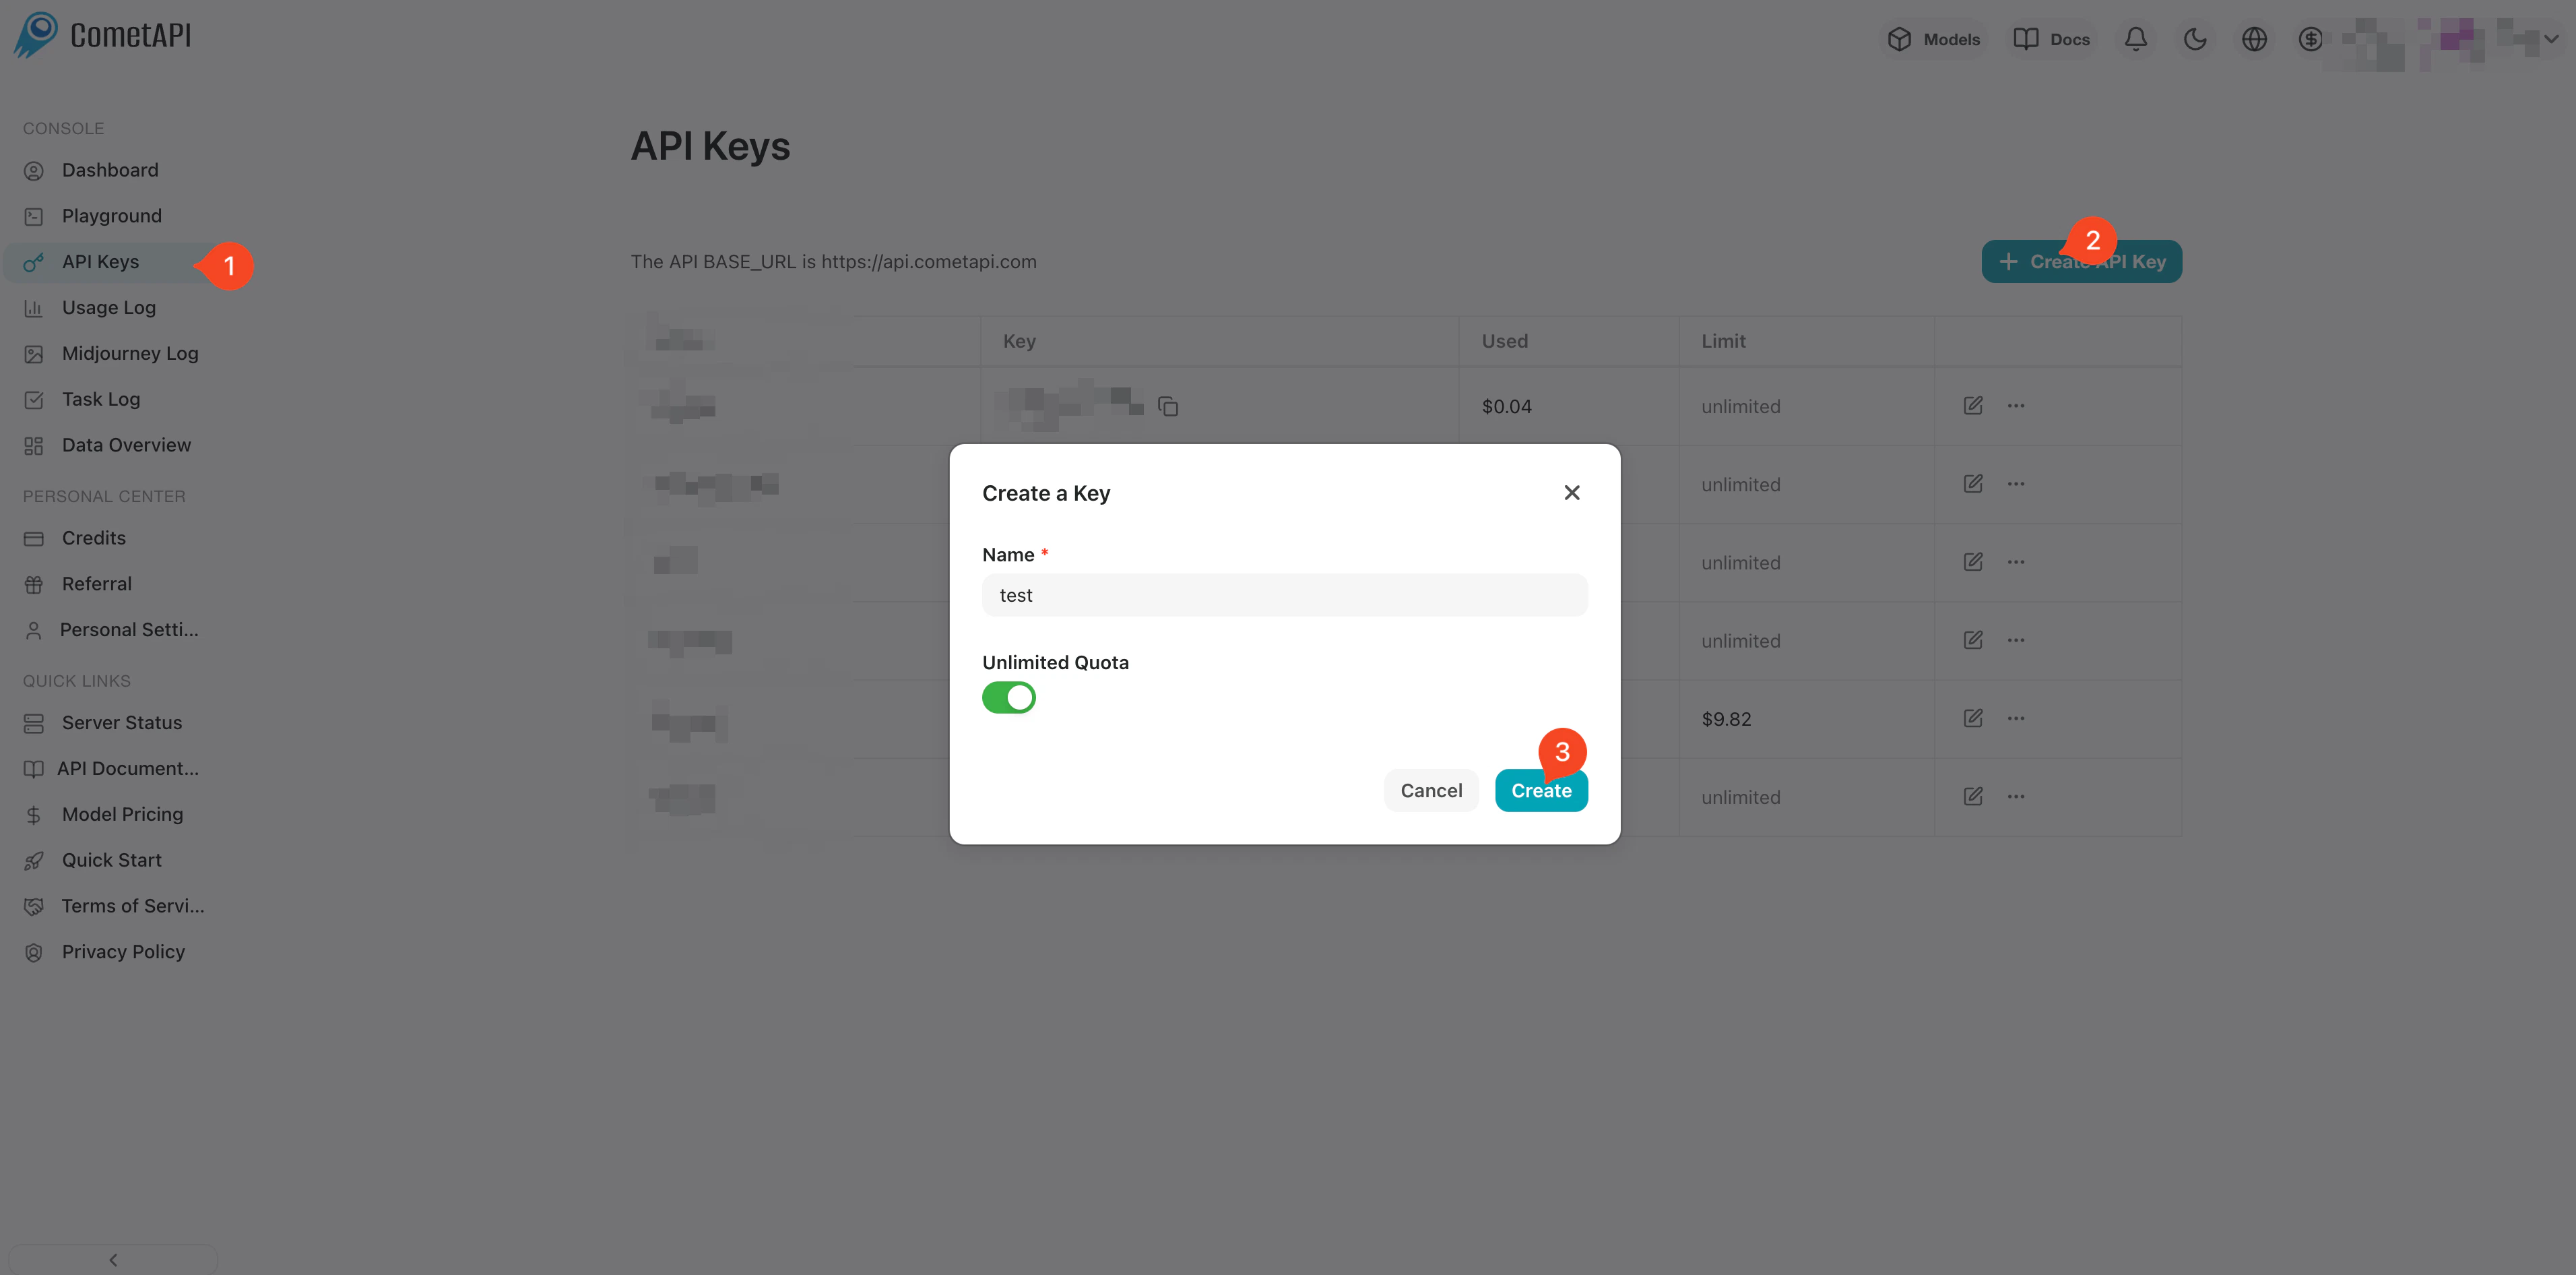
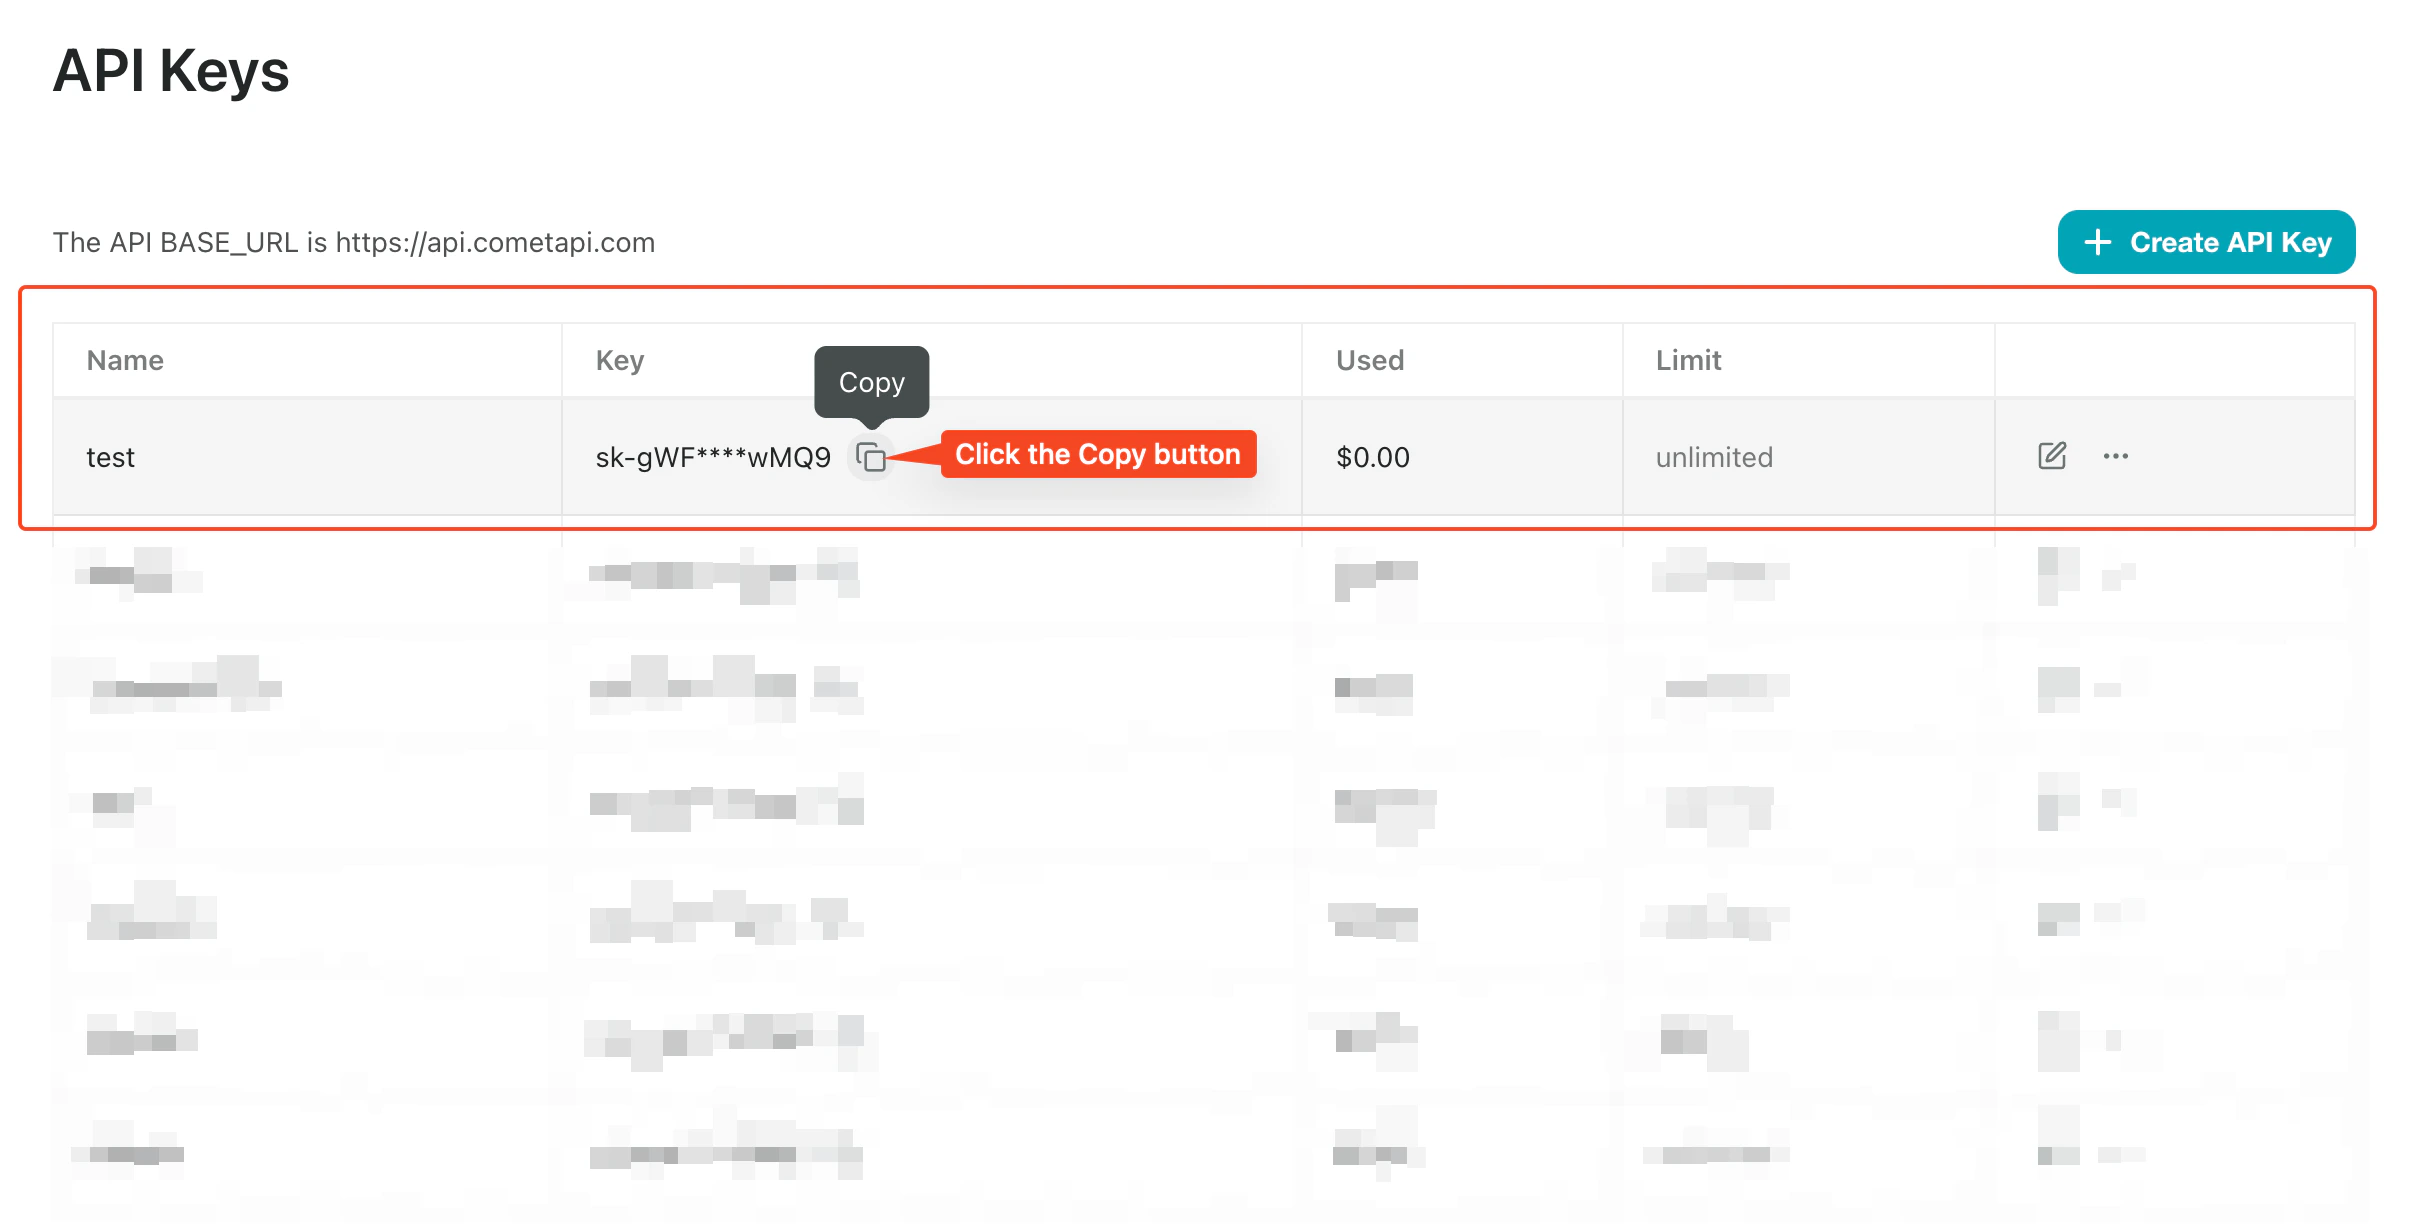
    [CometAPI コンソール](https://www.cometapi.com/console/token)にログインします。**Add API Key** をクリックし、CometAPI API キーをコピーします。
    <Frame>
      <img src="https://mintcdn.com/cometapi/SZhlxZhCnMLn__BW/images/overview/810968_364191.png?fit=max&auto=format&n=SZhlxZhCnMLn__BW&q=85&s=aef81a83f29f8eb16655ed4060425f50" alt="Add API Key ボタンが表示された CometAPI ダッシュボード" width="3824" height="1892" data-path="images/overview/810968_364191.png" />
    </Frame>

    <Frame>
      <img src="https://mintcdn.com/cometapi/HhtmQffktazbxUvS/images/overview/810968_364193.png?fit=max&auto=format&n=HhtmQffktazbxUvS&q=85&s=d893f659267150d0faf45f99eb5dffc1" alt="base URL が表示された CometAPI API キー詳細" width="2434" height="1232" data-path="images/overview/810968_364193.png" />
    </Frame>
  </Step>

  <Step title="Zap ステップとして CometAPI を追加する">
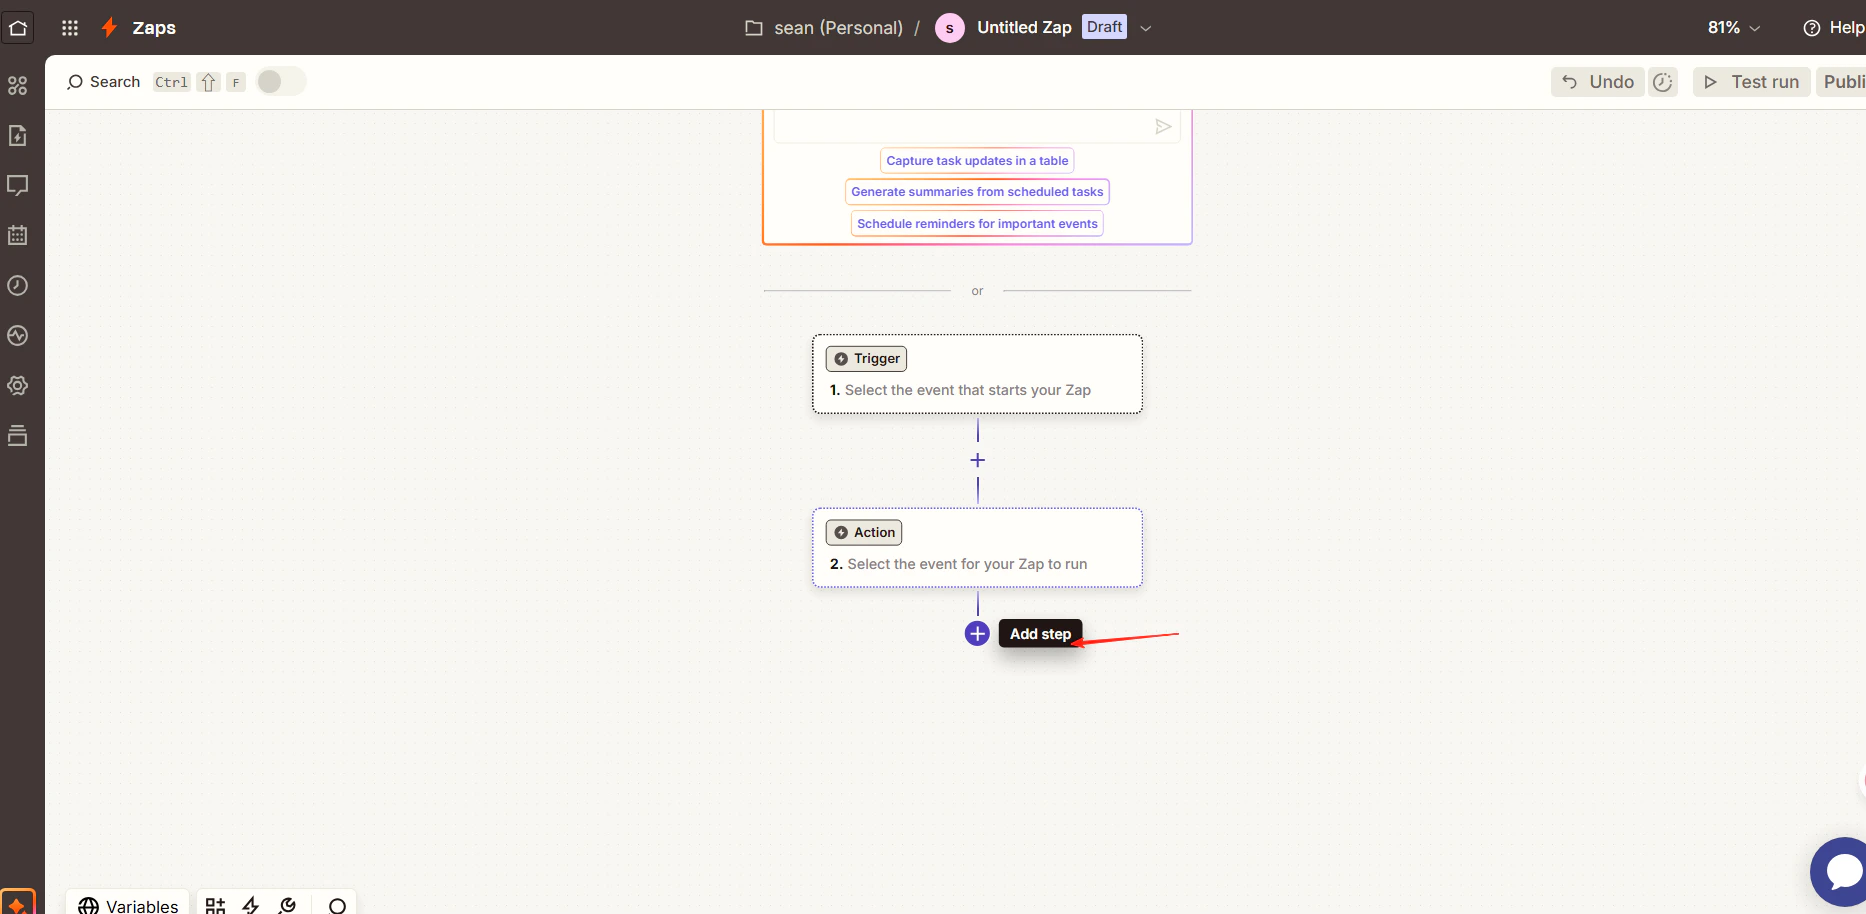
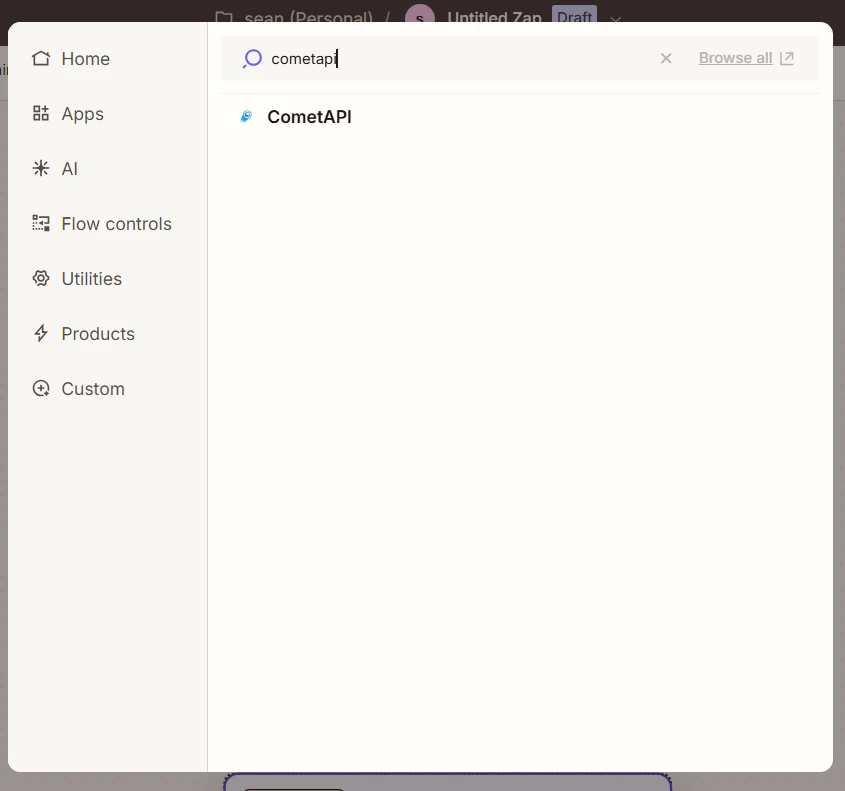
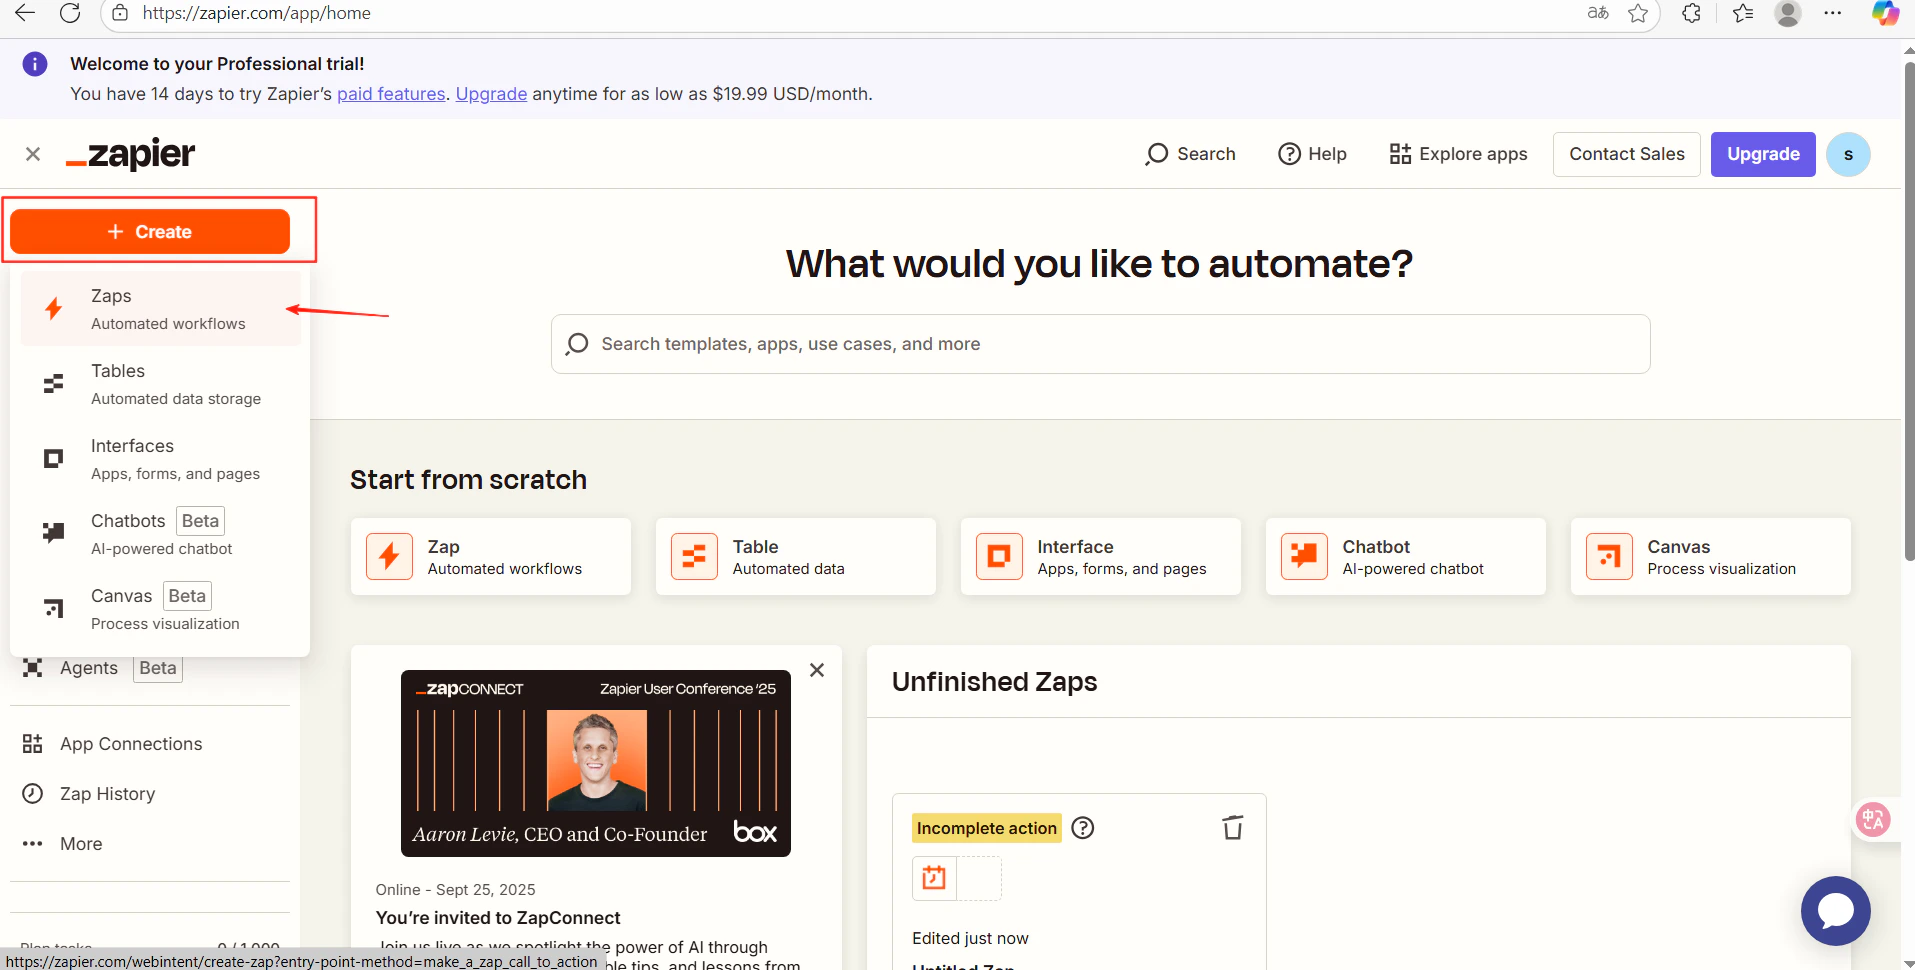
    Zapier で新しい Zap を作成します。ワークフローエディタで **Add Step** をクリックし、**CometAPI** を検索します。
    <Frame>
      <img src="https://mintcdn.com/cometapi/E4FFvyMYmaOZoldp/images/integrations/810968_360288.png?fit=max&auto=format&n=E4FFvyMYmaOZoldp&q=85&s=e0f9acf9b0c6c296ba4590b3f94a8ca1" alt="Add Step ボタンが表示された Zapier ワークフローエディタ" width="1915" height="970" data-path="images/integrations/810968_360288.png" />
    </Frame>

    <Frame>
      <img src="https://mintcdn.com/cometapi/E4FFvyMYmaOZoldp/images/integrations/810968_360289.png?fit=max&auto=format&n=E4FFvyMYmaOZoldp&q=85&s=f4a3fa5bf0e19ad96248a4b1dbfc2220" alt="CometAPI アプリが表示された Zapier の検索結果" width="1866" height="914" data-path="images/integrations/810968_360289.png" />
    </Frame>

    <Frame>
      <img src="https://mintcdn.com/cometapi/E4FFvyMYmaOZoldp/images/integrations/810968_360293.png?fit=max&auto=format&n=E4FFvyMYmaOZoldp&q=85&s=826cddfb18b75c459896d25e30ec69b4" alt="CometAPI アクション選択画面" width="845" height="791" data-path="images/integrations/810968_360293.png" />
    </Frame>
  </Step>

  <Step title="アクションを設定してアカウントを接続する">
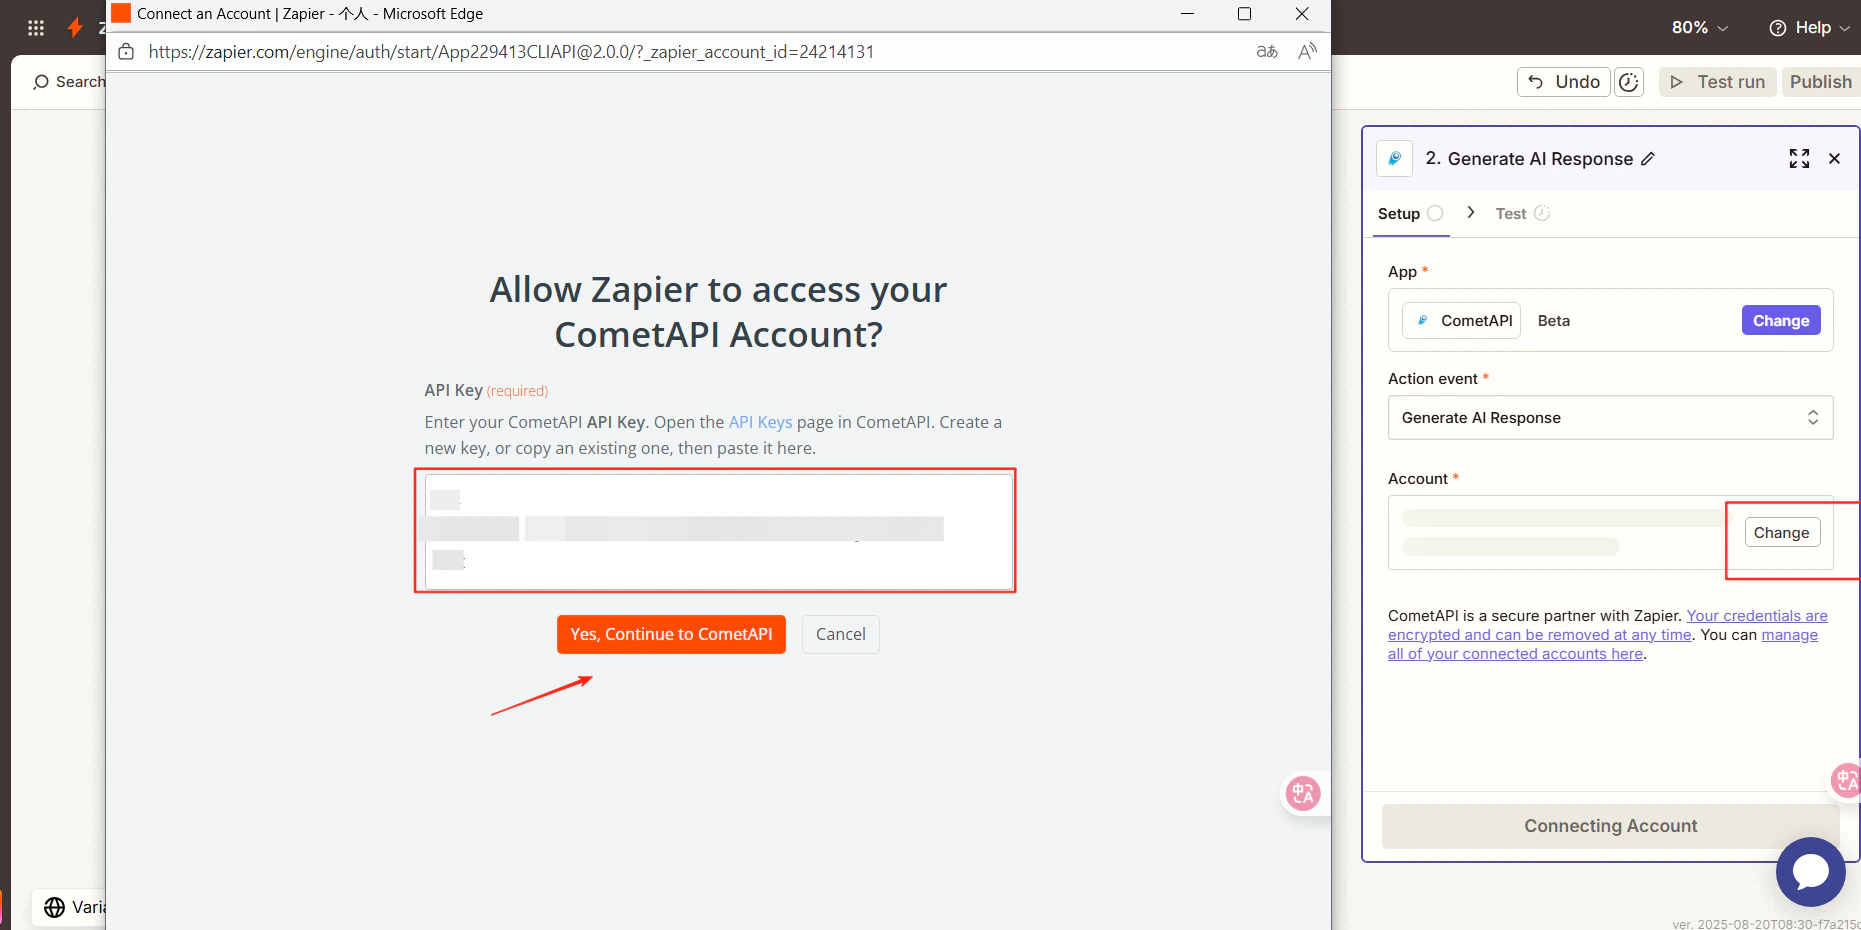
    * **Action Event**: **Generate AI Response** を選択
    * **Account**: **Connect a new account** をクリックし、CometAPI API キーを貼り付け
    <Frame>
      <img src="https://mintcdn.com/cometapi/E4FFvyMYmaOZoldp/images/integrations/810968_360290.png?fit=max&auto=format&n=E4FFvyMYmaOZoldp&q=85&s=7512d3317a69a9387b59799e064f0060" alt="API キー入力欄が表示された Zapier アカウント接続ダイアログ" width="1861" height="930" data-path="images/integrations/810968_360290.png" />
    </Frame>
  </Step>

  <Step title="モデルを選択してテストする">
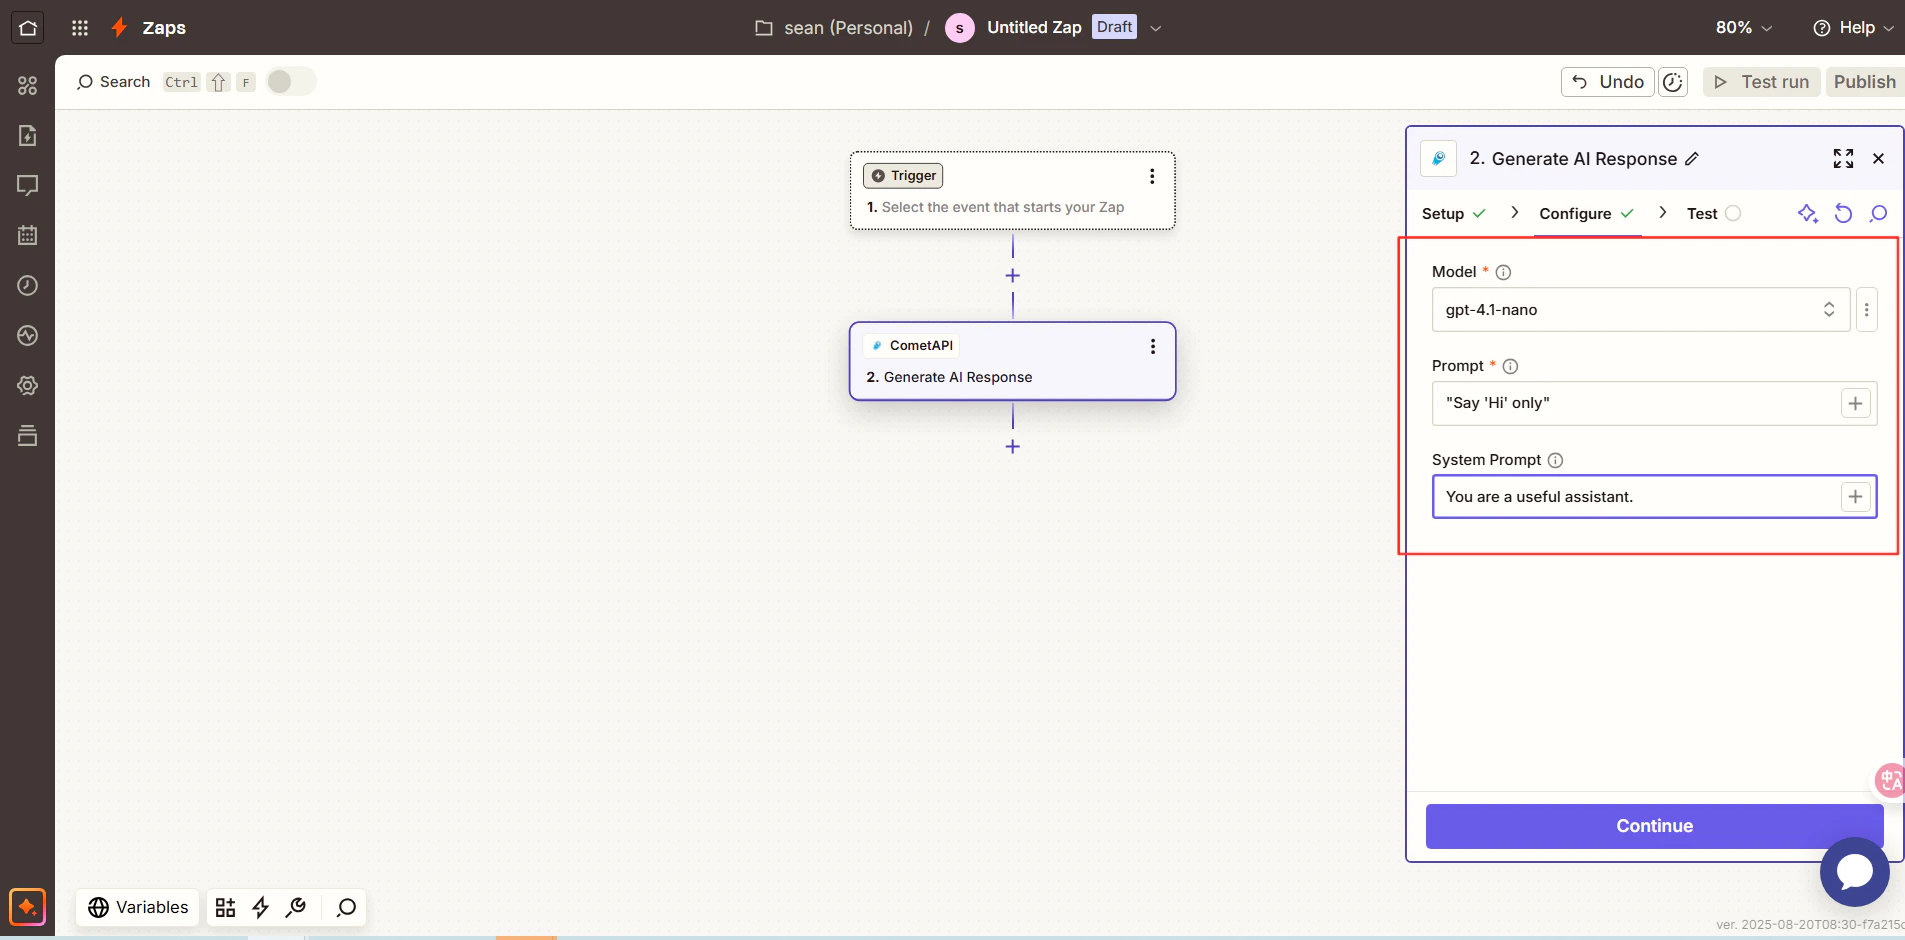
    **Continue** をクリックし、使用したい現在のモデルを選択します。その後もう一度 **Continue** をクリックして **Test Step** を実行します。
    <Frame>
      <img src="https://mintcdn.com/cometapi/E4FFvyMYmaOZoldp/images/integrations/810968_360291.png?fit=max&auto=format&n=E4FFvyMYmaOZoldp&q=85&s=478bf8b48bd4e762807eeec15eb11785" alt="Zapier のモデル選択ステップ" width="1905" height="940" data-path="images/integrations/810968_360291.png" />
    </Frame>

    <Frame>
      <img src="https://mintcdn.com/cometapi/E4FFvyMYmaOZoldp/images/integrations/810968_360292.png?fit=max&auto=format&n=E4FFvyMYmaOZoldp&q=85&s=18713a41c1a86a980c2bde6a6e072e48" alt="AI レスポンスの成功を示す Zapier のテスト結果" width="523" height="785" data-path="images/integrations/810968_360292.png" />
    </Frame>

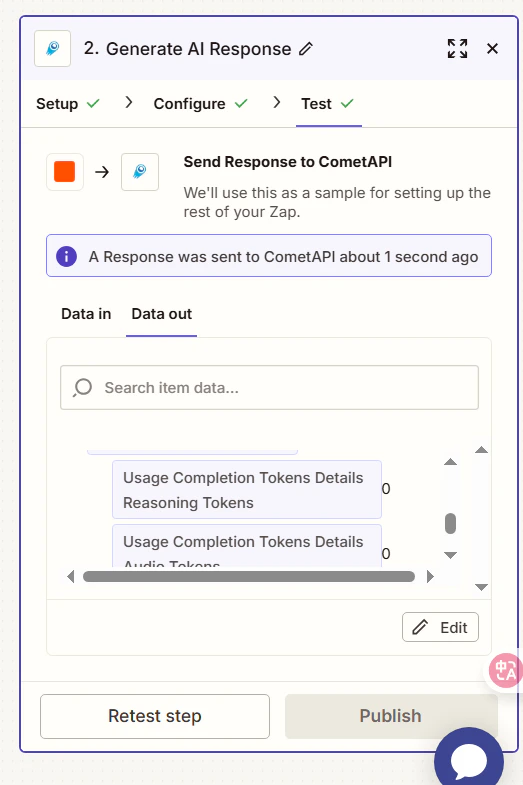
    テスト結果が成功すれば、統合は完了です。**Publish** をクリックして Zap を有効化します。

    呼び出しに失敗した場合は、API キーを再確認するか、[CometAPI サポート](https://www.cometapi.com)にお問い合わせください。
  </Step>
</Steps>

<Tip>
  CometAPI は Zapier のネイティブアプリとして表示されるため、カスタム HTTP アクションは不要です。Gmail、Google Sheets、Slack、その他数千の Zapier 連携と組み合わせて利用できます。
</Tip>

<script type="application/ld+json">
  {`
    {
    "@context": "https://schema.org",
    "@graph": [
      {
        "@type": "HowTo",
        "@id": "https://apidoc.cometapi.com/integrations/zapier#howto",
        "name": "Zapier を CometAPI に接続する",
        "description": "このガイドでは、base URL、API キー、モデルまたはプロバイダーのオプションを設定して Zapier を CometAPI に接続する方法を説明します。",
        "step": [
          {
            "@type": "HowToStep",
            "@id": "https://apidoc.cometapi.com/integrations/zapier#step-1",
            "position": 1,
            "name": "CometAPI API キーを取得する",
            "text": "CometAPI アカウントを作成または開き、ダッシュボードから有効な API キーをコピーします。"
          },
          {
            "@type": "HowToStep",
            "@id": "https://apidoc.cometapi.com/integrations/zapier#step-2",
            "position": 2,
            "name": "Zap ステップとして CometAPI を追加する",
            "text": "「Zapier を CometAPI に接続する」ガイドの「Zap ステップとして CometAPI を追加する」ステップを完了します。"
          },
          {
            "@type": "HowToStep",
            "@id": "https://apidoc.cometapi.com/integrations/zapier#step-3",
            "position": 3,
            "name": "アクションを設定してアカウントを接続する",
            "text": "「Zapier を CometAPI に接続する」ガイドの「アクションを設定してアカウントを接続する」ステップを完了します。"
          },
          {
            "@type": "HowToStep",
            "@id": "https://apidoc.cometapi.com/integrations/zapier#step-4",
            "position": 4,
            "name": "モデルを選択してテストする",
            "text": "「Zapier を CometAPI に接続する」ガイドの「モデルを選択してテストする」ステップを完了します。"
          }
        ]
      },
      {
        "@type": "BreadcrumbList",
        "itemListElement": [
          {
            "@type": "ListItem",
            "position": 1,
            "name": "CometAPI ドキュメント",
            "item": "https://apidoc.cometapi.com/"
          },
          {
            "@type": "ListItem",
            "position": 2,
            "name": "連携",
            "item": "https://apidoc.cometapi.com/integrations"
          },
          {
            "@type": "ListItem",
            "position": 3,
            "name": "Zapier を CometAPI に接続する",
            "item": "https://apidoc.cometapi.com/integrations/zapier"
          }
        ]
      }
    ]
    }
    `}
</script>