> ## Documentation Index
> Fetch the complete documentation index at: https://apidoc.cometapi.com/llms.txt
> Use this file to discover all available pages before exploring further.

# CometAPI와 함께 AnythingLLM 사용하기

> 이 가이드를 사용해 base URL, API key, model 또는 provider 옵션을 설정하여 AnythingLLM을 CometAPI와 함께 구성하세요.

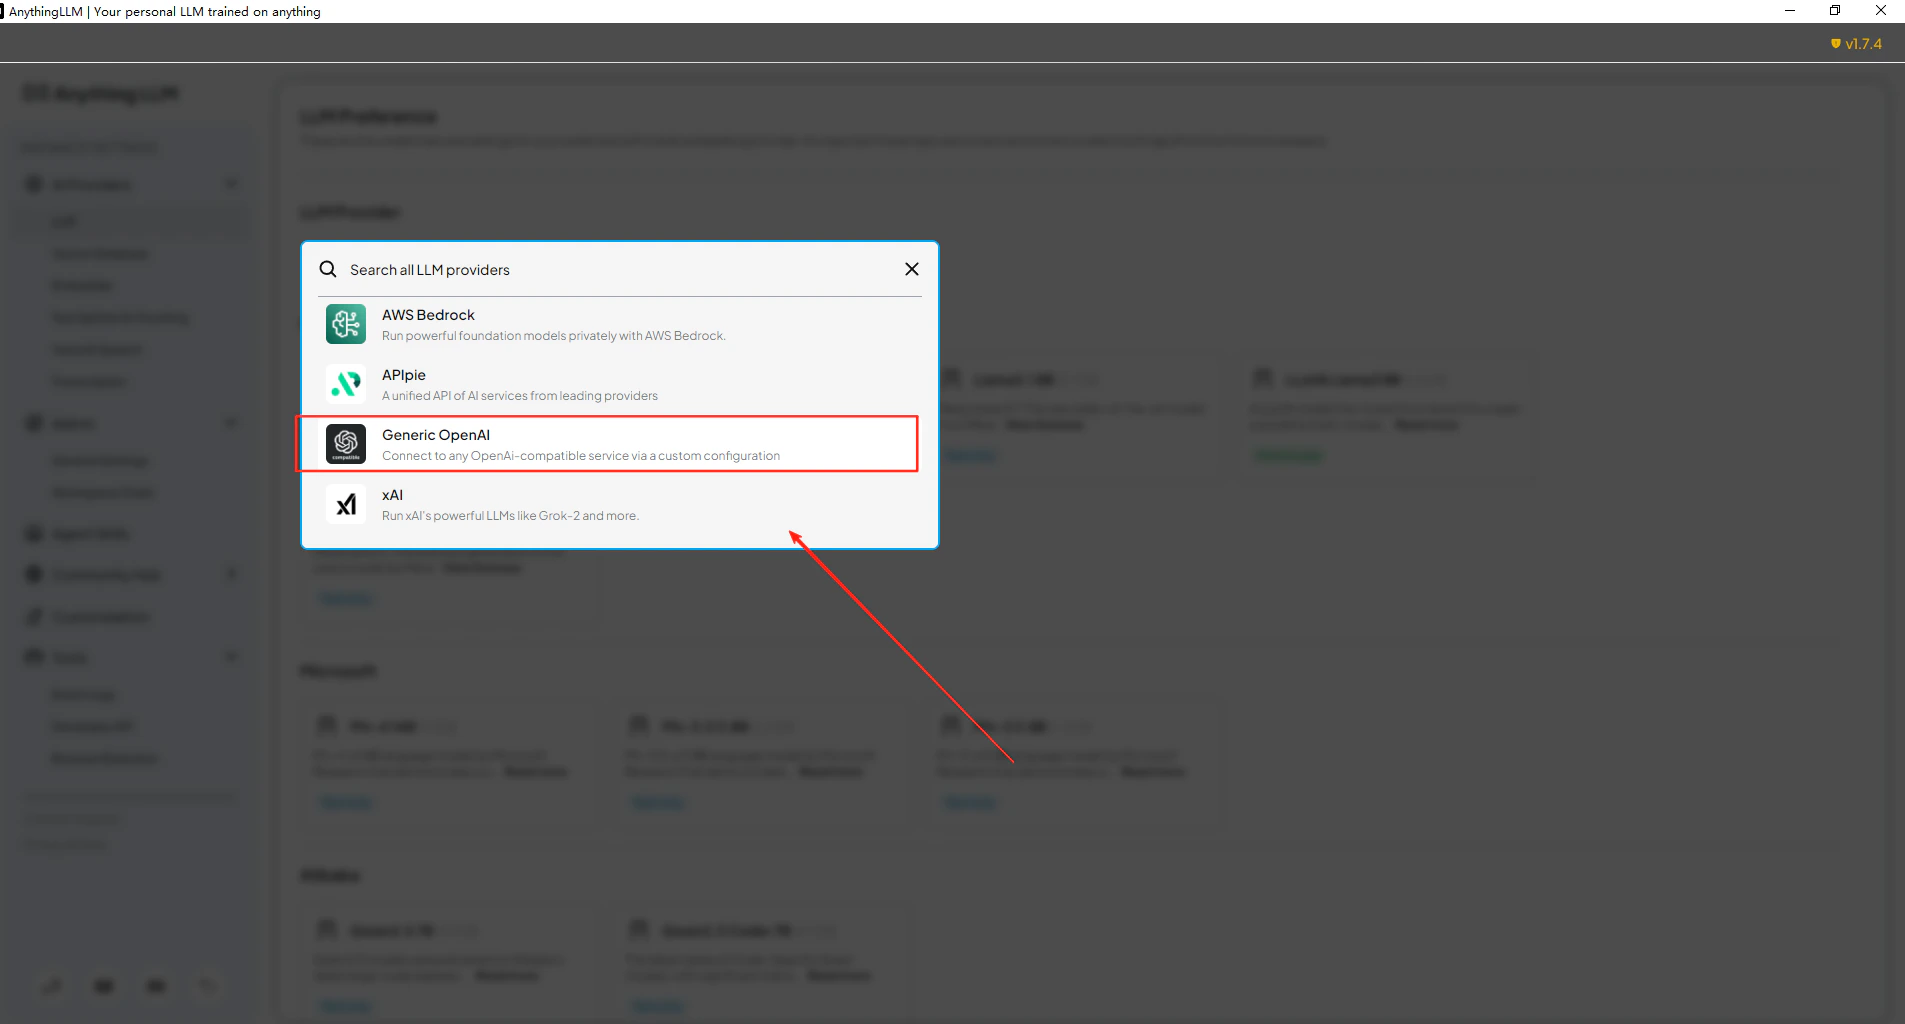
[AnythingLLM](https://anythingllm.com/)은 올인원 AI 데스크톱 앱입니다. provider로 **Generic OpenAI**를 선택하면 CometAPI에 연결하고 500개 이상의 모델에 액세스할 수 있습니다.

## 사전 요구 사항

* 사용 중인 컴퓨터에 [AnythingLLM](https://anythingllm.com/)이 설치되어 있어야 합니다
* 활성 API key가 있는 [CometAPI](https://www.cometapi.com) 계정

## 설정

<Steps>
  <Step title="CometAPI API 키 가져오기">
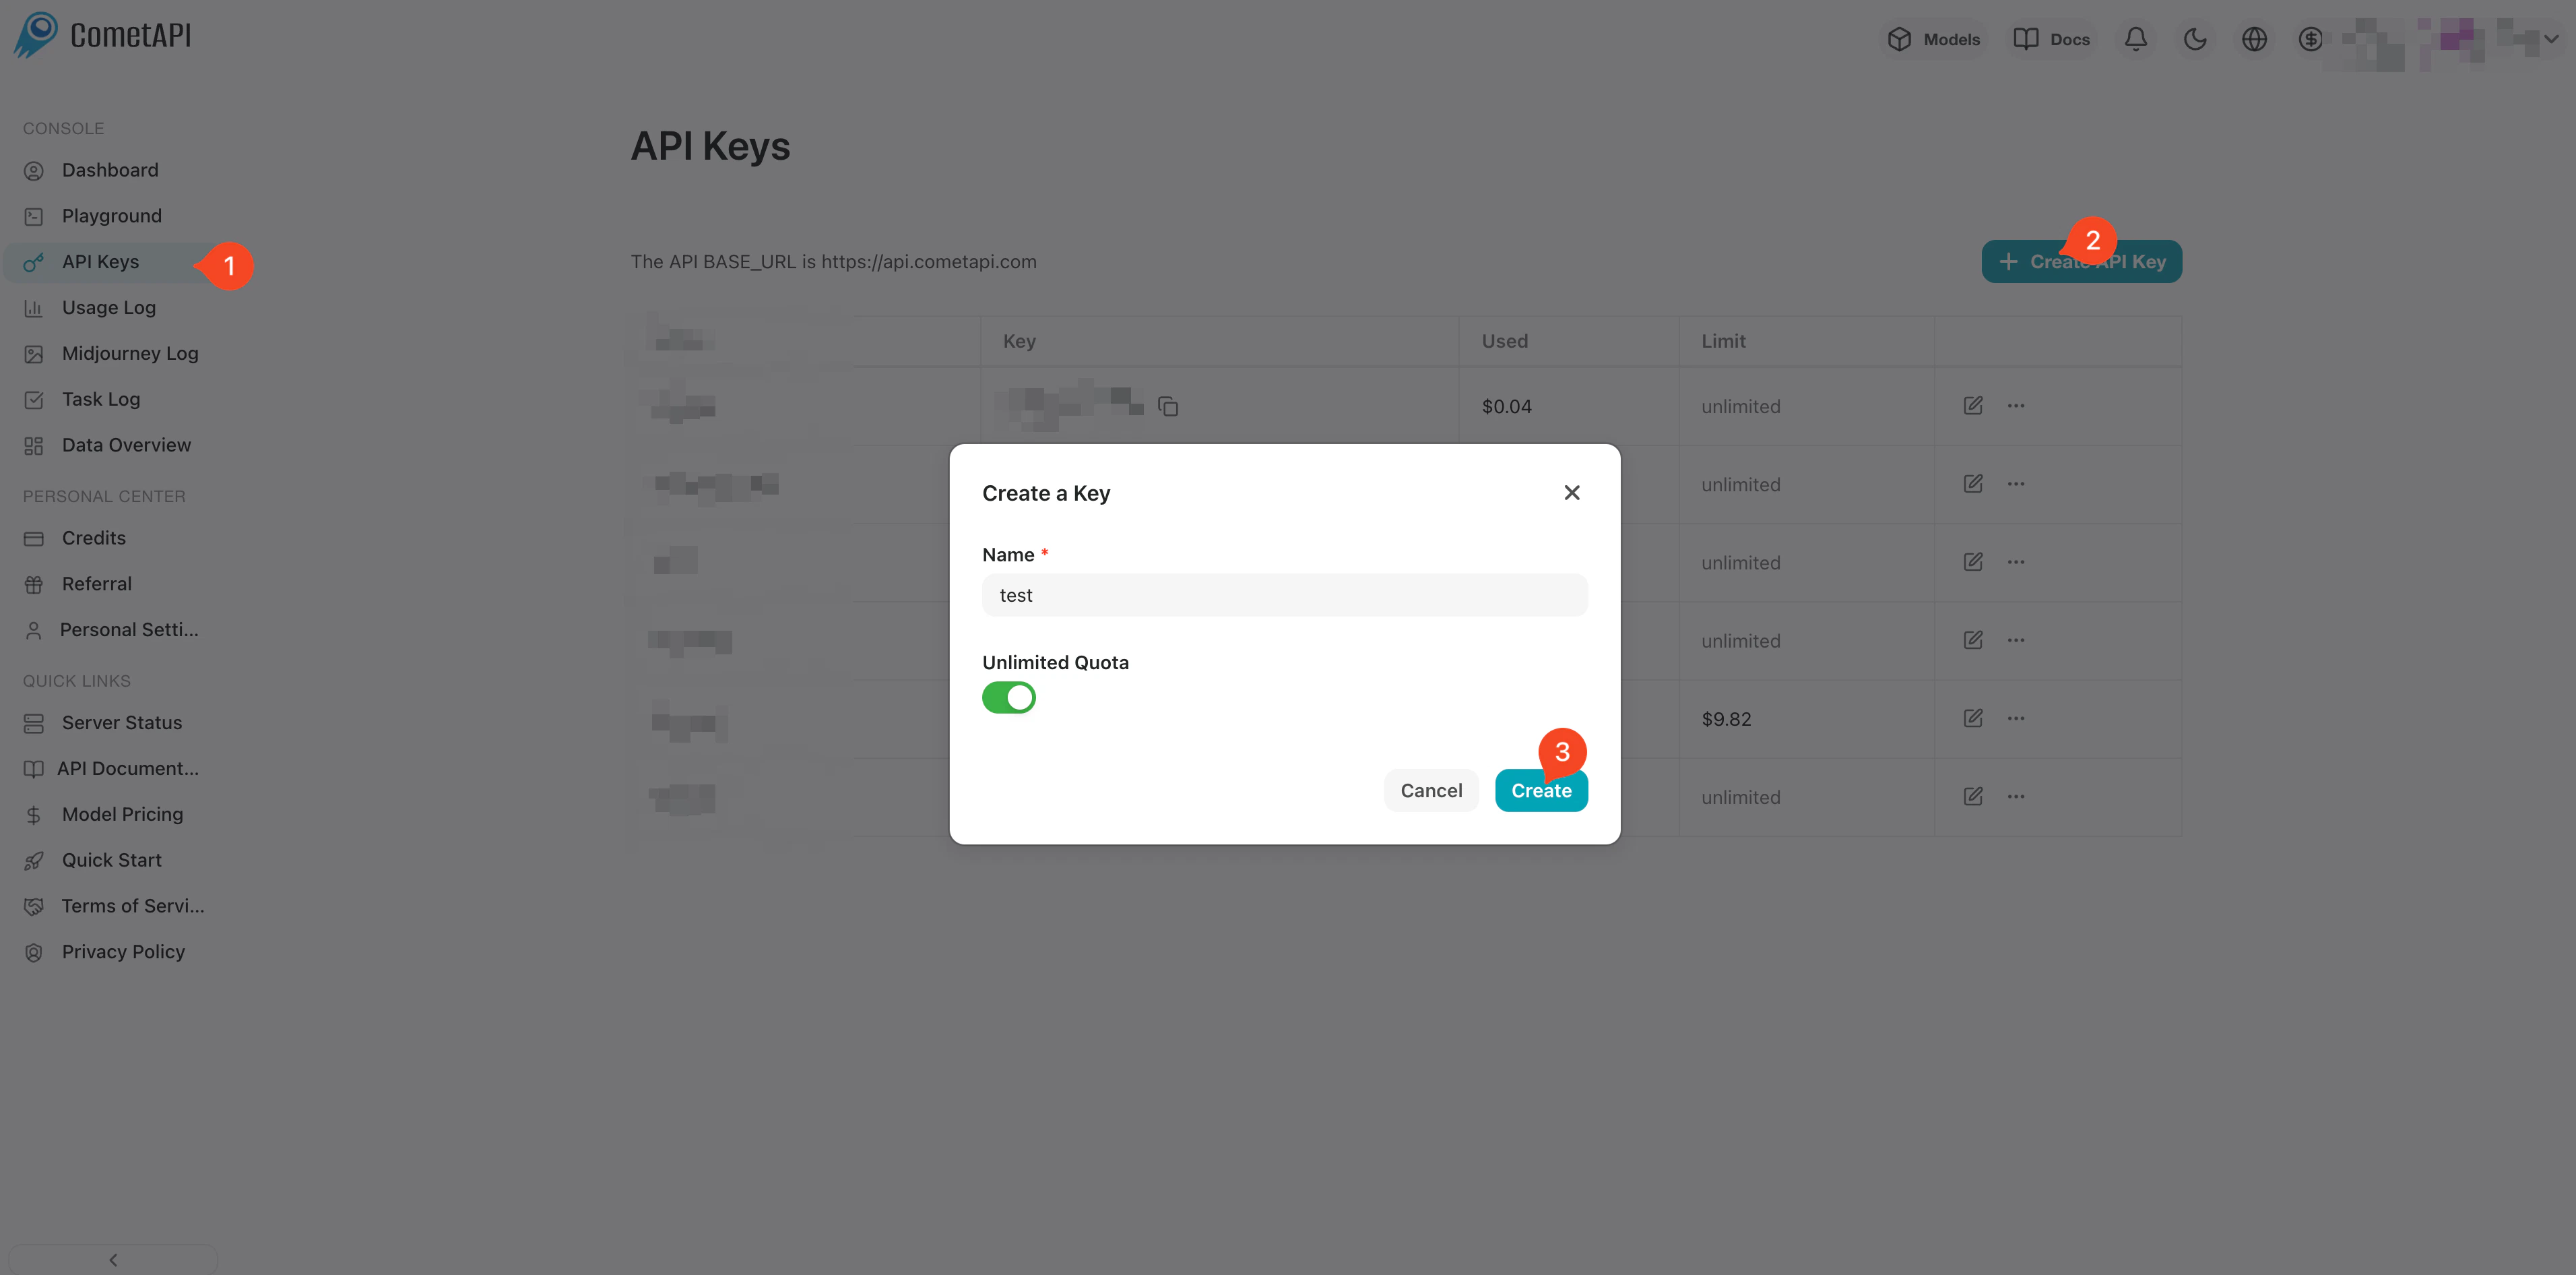
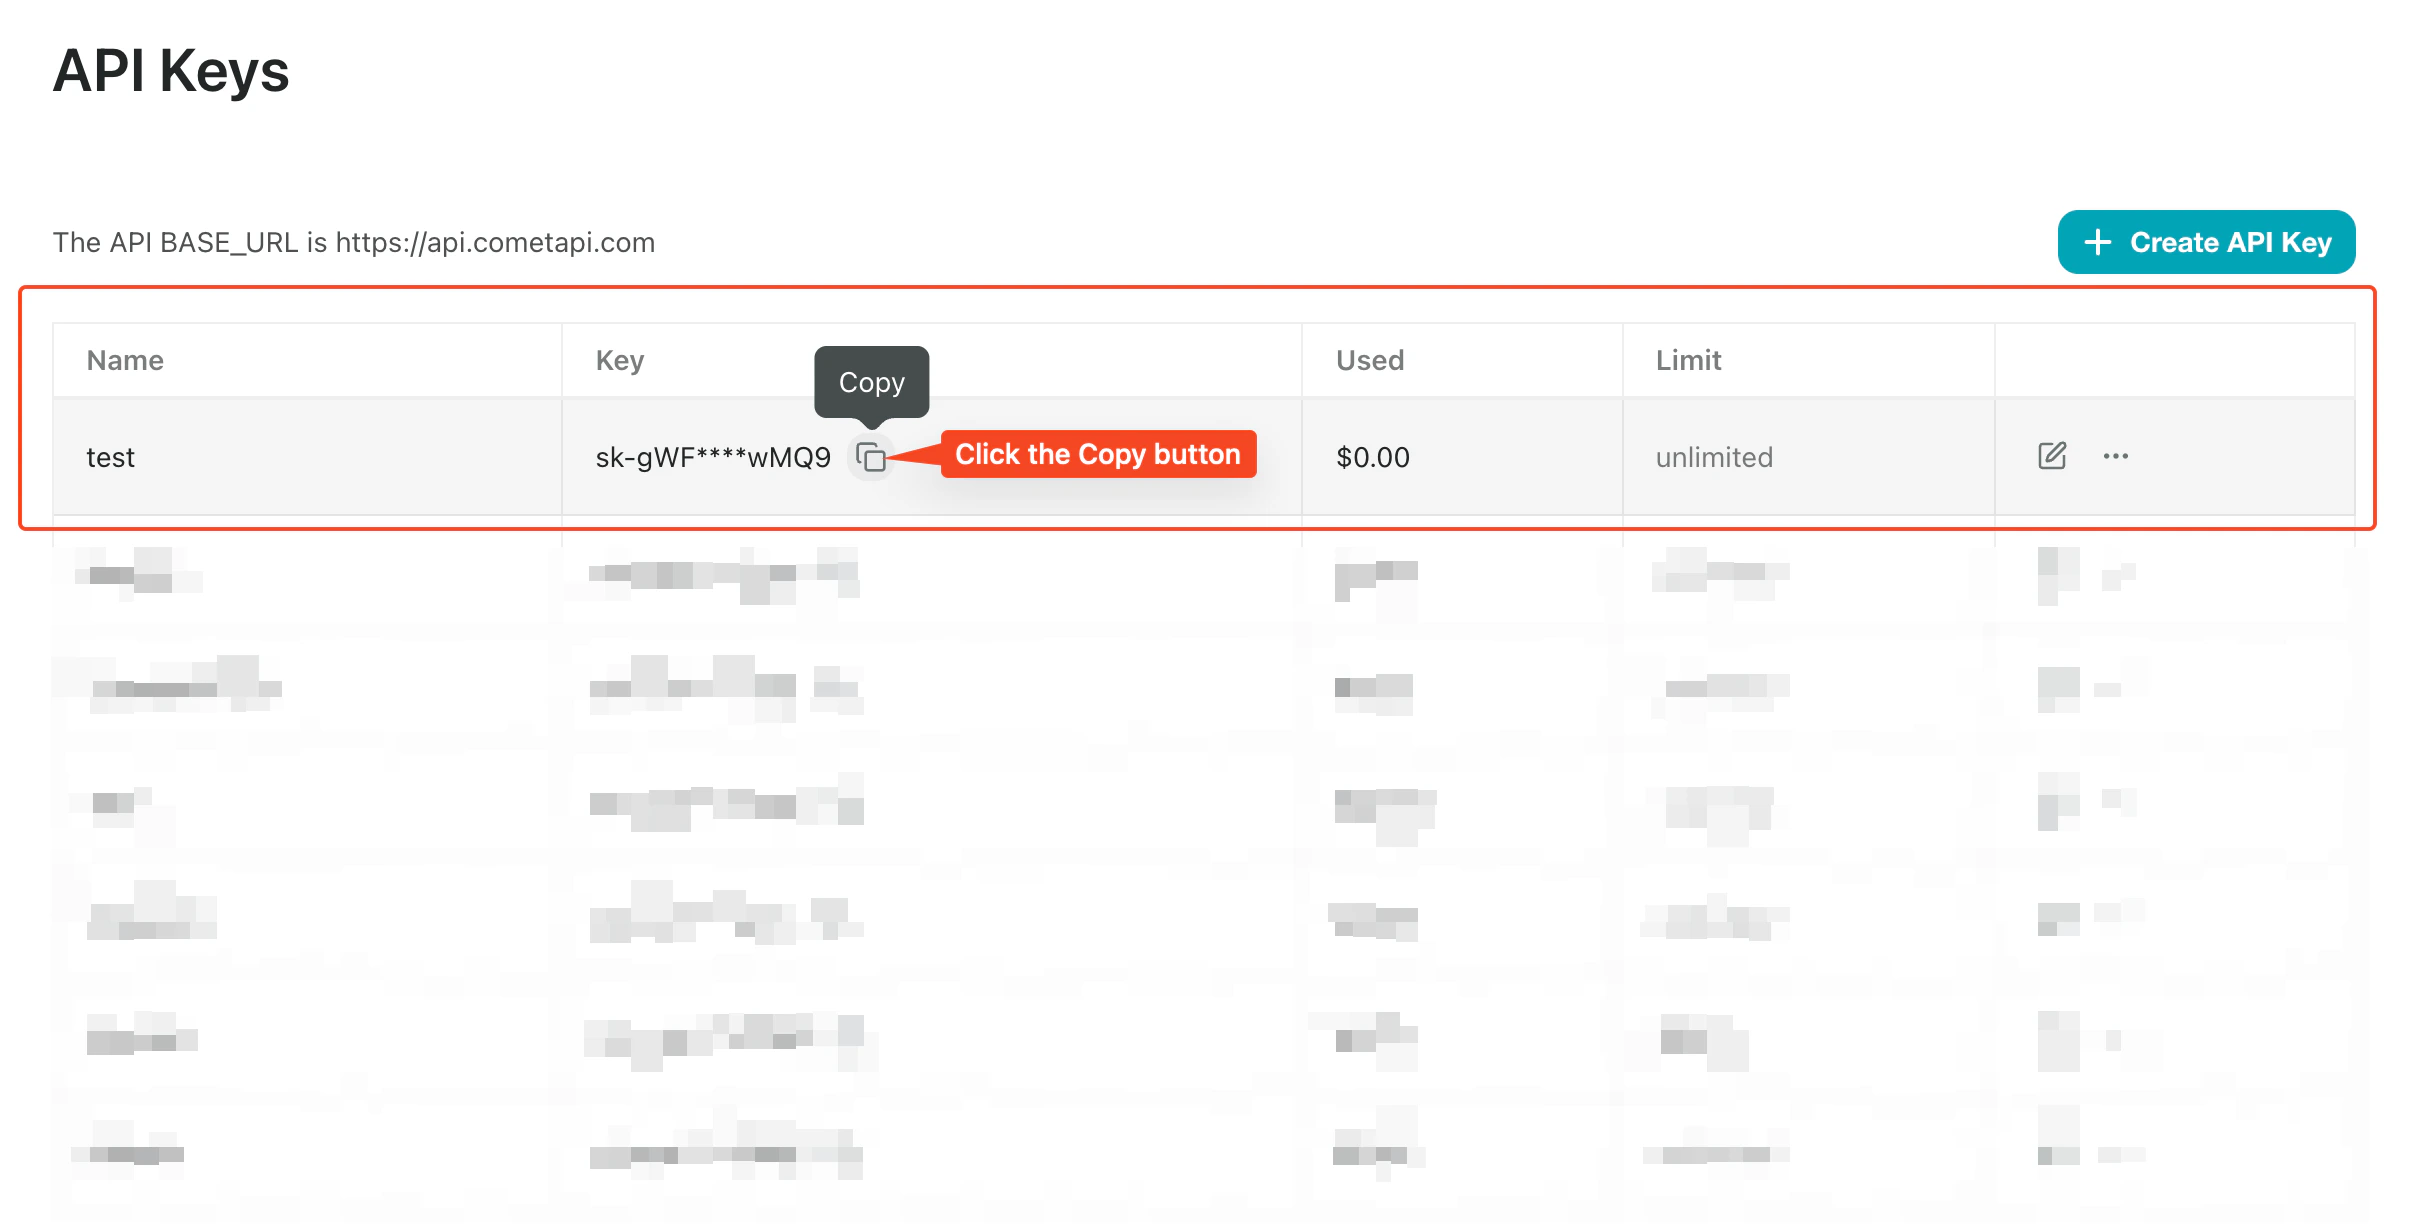
    [CometAPI 대시보드](https://www.cometapi.com/console)에 로그인합니다. **Add API Key**를 클릭한 다음 키와 base URL(`https://api.cometapi.com`)을 복사합니다.
    <Frame>
      <img src="https://mintcdn.com/cometapi/SZhlxZhCnMLn__BW/images/overview/810968_364191.png?fit=max&auto=format&n=SZhlxZhCnMLn__BW&q=85&s=aef81a83f29f8eb16655ed4060425f50" alt="CometAPI 대시보드 — API 키 추가" width="3824" height="1892" data-path="images/overview/810968_364191.png" />
    </Frame>

    <Frame>
      <img src="https://mintcdn.com/cometapi/HhtmQffktazbxUvS/images/overview/810968_364193.png?fit=max&auto=format&n=HhtmQffktazbxUvS&q=85&s=d893f659267150d0faf45f99eb5dffc1" alt="CometAPI API 키와 base URL" width="2434" height="1232" data-path="images/overview/810968_364193.png" />
    </Frame>
  </Step>

  <Step title="LLM provider 구성">
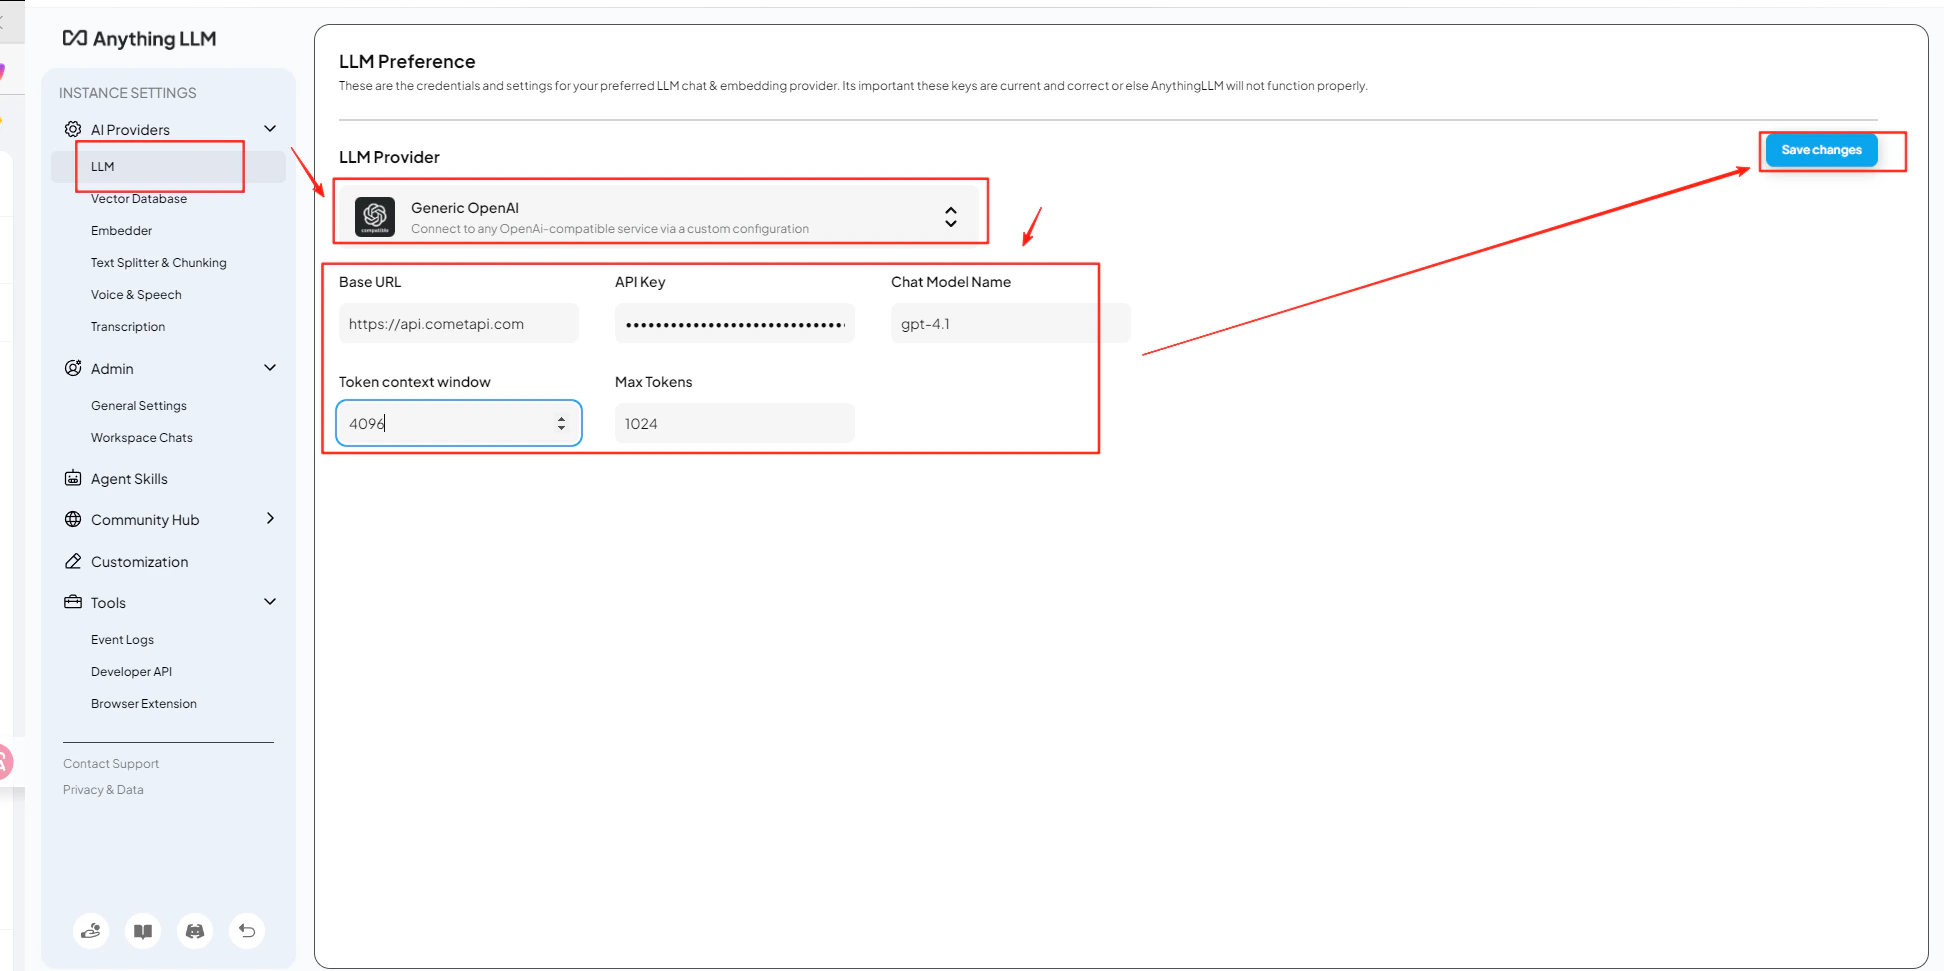
    AnythingLLM의 **Settings** → **AI Providers** → **LLM Preferences**를 엽니다. model provider로 **Generic OpenAI**를 선택하고 **URL** 필드에 `https://api.cometapi.com/v1`를 입력합니다.
  </Step>

  <Step title="API 키와 모델 추가">
    **API Key** 필드에 CometAPI 키를 붙여넣습니다. 선택한 모델에 맞게 **Token Context Window**와 **Max Tokens**를 설정한 다음, 사용하려는 현재 model ID를 입력합니다.
    <Frame>
      <img src="https://mintcdn.com/cometapi/E4FFvyMYmaOZoldp/images/integrations/810968_360336.png?fit=max&auto=format&n=E4FFvyMYmaOZoldp&q=85&s=499826a1508a3749bf0815fe3c7e03df" alt="Generic OpenAI가 선택된 AnythingLLM LLM Preferences" width="2014" height="985" data-path="images/integrations/810968_360336.png" />
    </Frame>

    <Frame>
      <img src="https://mintcdn.com/cometapi/E4FFvyMYmaOZoldp/images/integrations/810968_360337.png?fit=max&auto=format&n=E4FFvyMYmaOZoldp&q=85&s=0e882f3675ff64c5c688e95b9629a2d9" alt="Base URL 및 API 키 필드가 입력된 모습" width="1905" height="1024" data-path="images/integrations/810968_360337.png" />
    </Frame>

    <Frame>
      <img src="https://mintcdn.com/cometapi/E4FFvyMYmaOZoldp/images/integrations/810968_360338.png?fit=max&auto=format&n=E4FFvyMYmaOZoldp&q=85&s=7c1f49711b3c429b74c9934f69caa7d9" alt="모델 이름과 토큰 설정이 구성된 모습" width="1944" height="971" data-path="images/integrations/810968_360338.png" />
    </Frame>
  </Step>

  <Step title="연결 테스트">
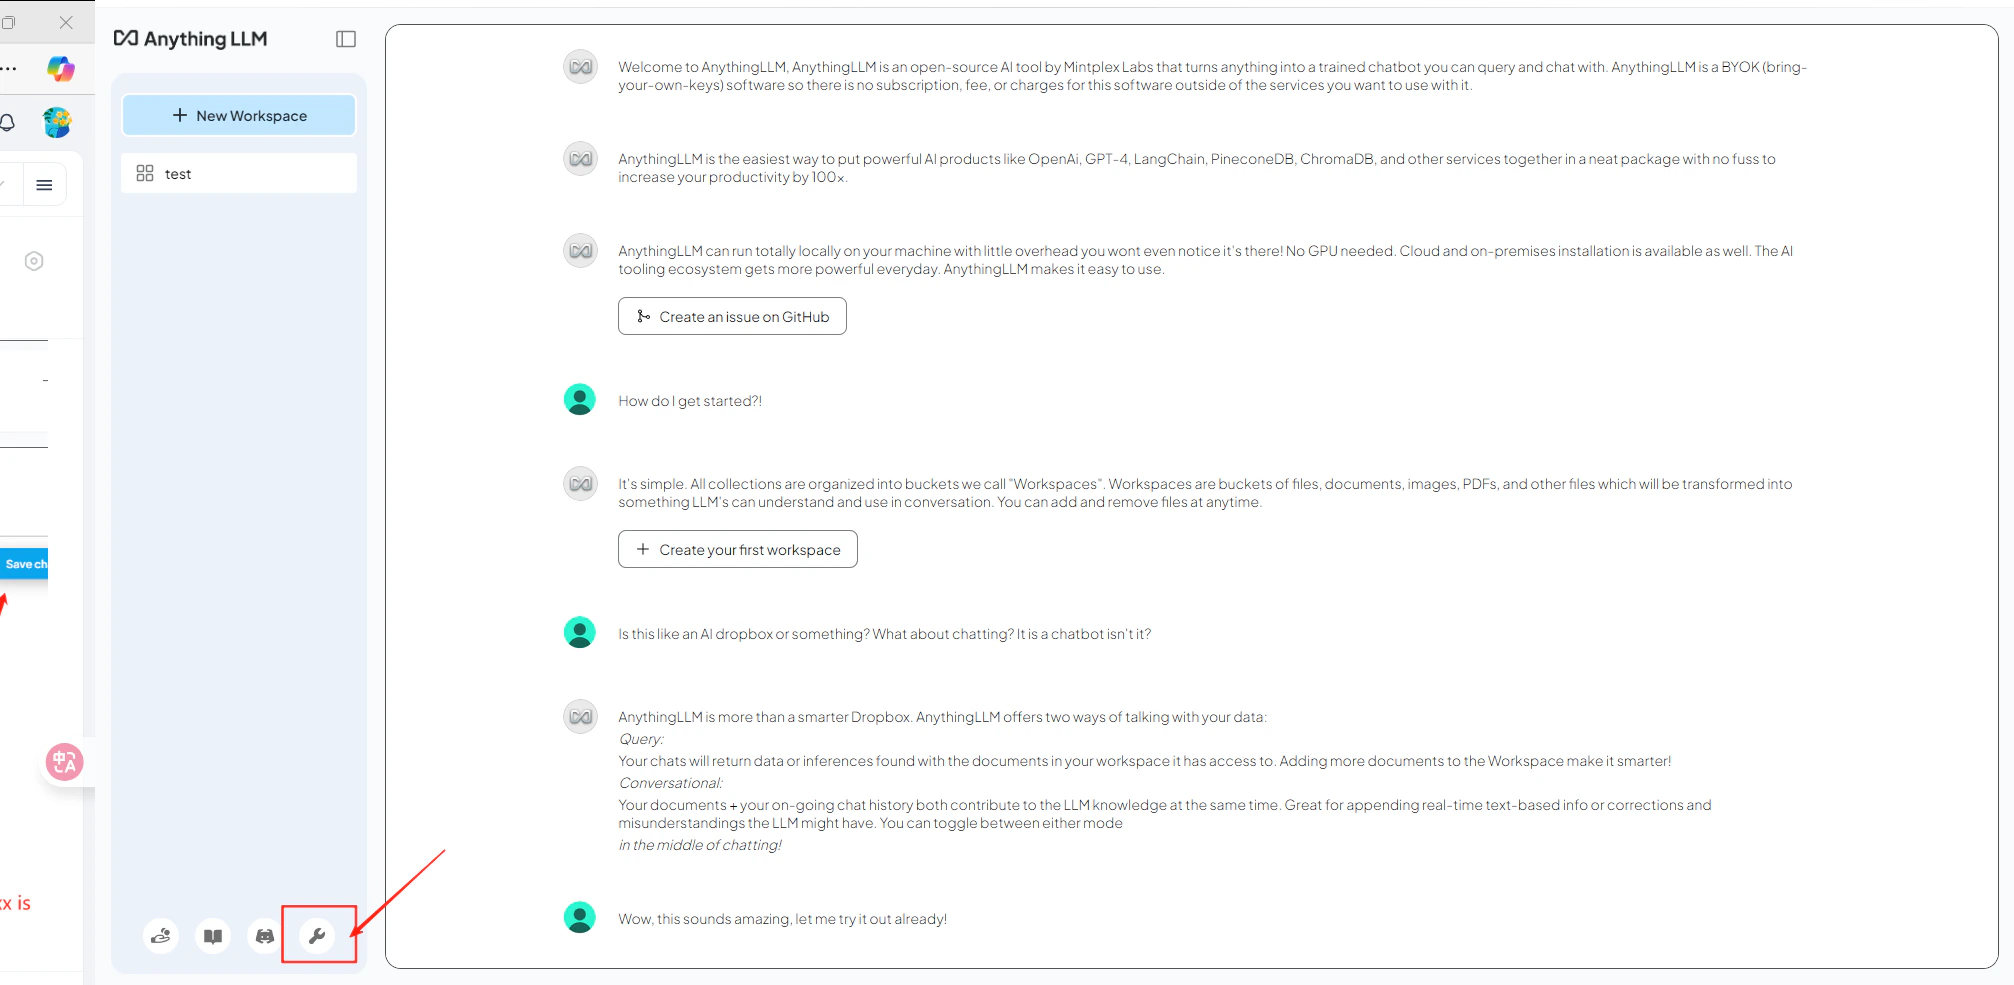
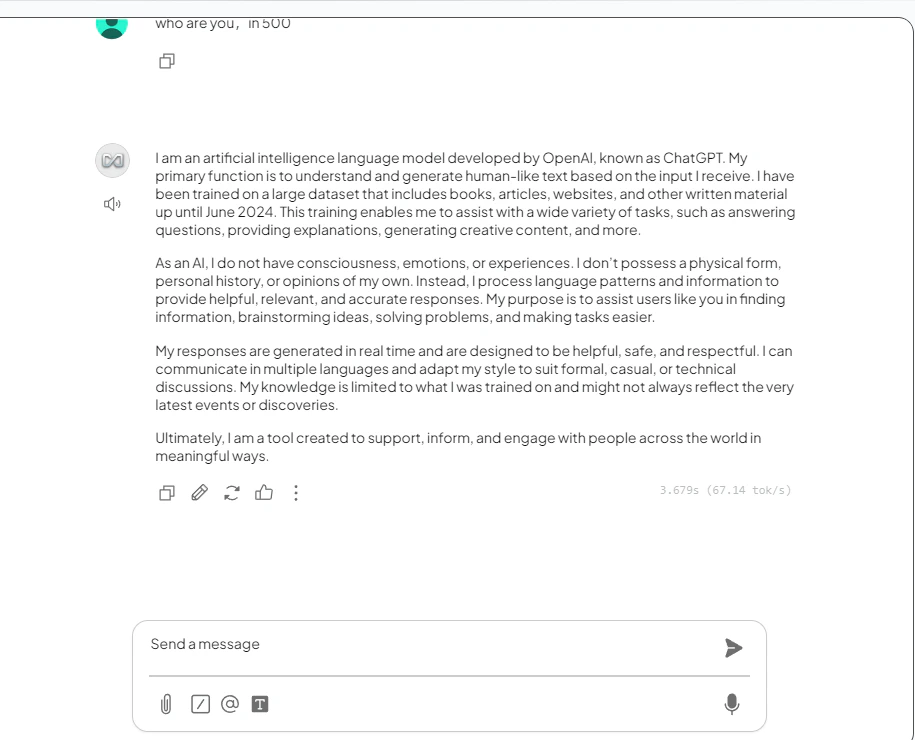
    워크스페이스를 열고 테스트 메시지를 보냅니다. 응답이 성공적으로 오면 통합이 정상적으로 작동하는 것입니다.
    <Frame>
      <img src="https://mintcdn.com/cometapi/E4FFvyMYmaOZoldp/images/integrations/810968_360340.png?fit=max&auto=format&n=E4FFvyMYmaOZoldp&q=85&s=8d084b71b4df10e71d4ae9c40baf7766" alt="성공적인 응답이 표시된 AnythingLLM 채팅" width="915" height="740" data-path="images/integrations/810968_360340.png" />
    </Frame>
  </Step>
</Steps>

<Tip>
  같은 구성 페이지에서 여러 모델 이름을 추가할 수 있습니다. 지원되는 식별자는 [CometAPI 모델 목록](/ko/overview/models)에서 확인하세요.
</Tip>

<script type="application/ld+json">
  {`
    {
    "@context": "https://schema.org",
    "@graph": [
      {
        "@type": "HowTo",
        "@id": "https://apidoc.cometapi.com/integrations/anythingllm#howto",
        "name": "CometAPI와 함께 AnythingLLM 사용하기",
        "description": "이 가이드를 사용해 base URL, API 키, 그리고 모델 또는 provider 옵션을 설정하여 AnythingLLM을 CometAPI와 함께 구성하세요.",
        "step": [
          {
            "@type": "HowToStep",
            "@id": "https://apidoc.cometapi.com/integrations/anythingllm#step-1",
            "position": 1,
            "name": "CometAPI API 키 가져오기",
            "text": "CometAPI 계정을 만들거나 연 다음, 대시보드에서 활성 API 키를 복사합니다."
          },
          {
            "@type": "HowToStep",
            "@id": "https://apidoc.cometapi.com/integrations/anythingllm#step-2",
            "position": 2,
            "name": "LLM provider 구성",
            "text": "CometAPI와 함께 AnythingLLM 사용하기 가이드의 LLM provider 구성 단계를 완료합니다."
          },
          {
            "@type": "HowToStep",
            "@id": "https://apidoc.cometapi.com/integrations/anythingllm#step-3",
            "position": 3,
            "name": "API 키와 모델 추가",
            "text": "CometAPI와 함께 AnythingLLM 사용하기 가이드의 API 키와 모델 추가 단계를 완료합니다."
          },
          {
            "@type": "HowToStep",
            "@id": "https://apidoc.cometapi.com/integrations/anythingllm#step-4",
            "position": 4,
            "name": "연결 테스트",
            "text": "CometAPI Models 페이지에서 현재 model ID를 선택한 다음, 통합에서 테스트 요청을 보냅니다."
          }
        ]
      },
      {
        "@type": "BreadcrumbList",
        "itemListElement": [
          {
            "@type": "ListItem",
            "position": 1,
            "name": "CometAPI 문서",
            "item": "https://apidoc.cometapi.com/"
          },
          {
            "@type": "ListItem",
            "position": 2,
            "name": "통합",
            "item": "https://apidoc.cometapi.com/integrations"
          },
          {
            "@type": "ListItem",
            "position": 3,
            "name": "CometAPI와 함께 AnythingLLM 사용하기",
            "item": "https://apidoc.cometapi.com/integrations/anythingllm"
          }
        ]
      }
    ]
    }
    `}
</script>