> ## Documentation Index
> Fetch the complete documentation index at: https://apidoc.cometapi.com/llms.txt
> Use this file to discover all available pages before exploring further.
# CometAPI와 함께 로컬에서 n8n 실행하기
> 이 가이드를 사용해 로컬 배포 설정, 자격 증명, 모델 액세스를 구성하여 CometAPI와 함께 n8n을 로컬에서 실행하세요.
자체 머신에 n8n을 배포하고 커뮤니티 노드를 통해 CometAPI에 연결하여 자동화된 AI 워크플로를 로컬에서 실행하세요.
## 사전 준비 사항
* Linux(Ubuntu/Debian/CentOS 등) 또는 macOS
* RAM 2GB 이상, 여유 디스크 공간 10GB 이상
* 공개 npm 레지스트리에 접근 가능한 셸 환경
* Node.js 18.x 또는 20.x LTS(1단계 참고)
* 활성 API 키가 있는 CometAPI 계정 — [여기에서 발급받기](https://www.cometapi.com/console/token)
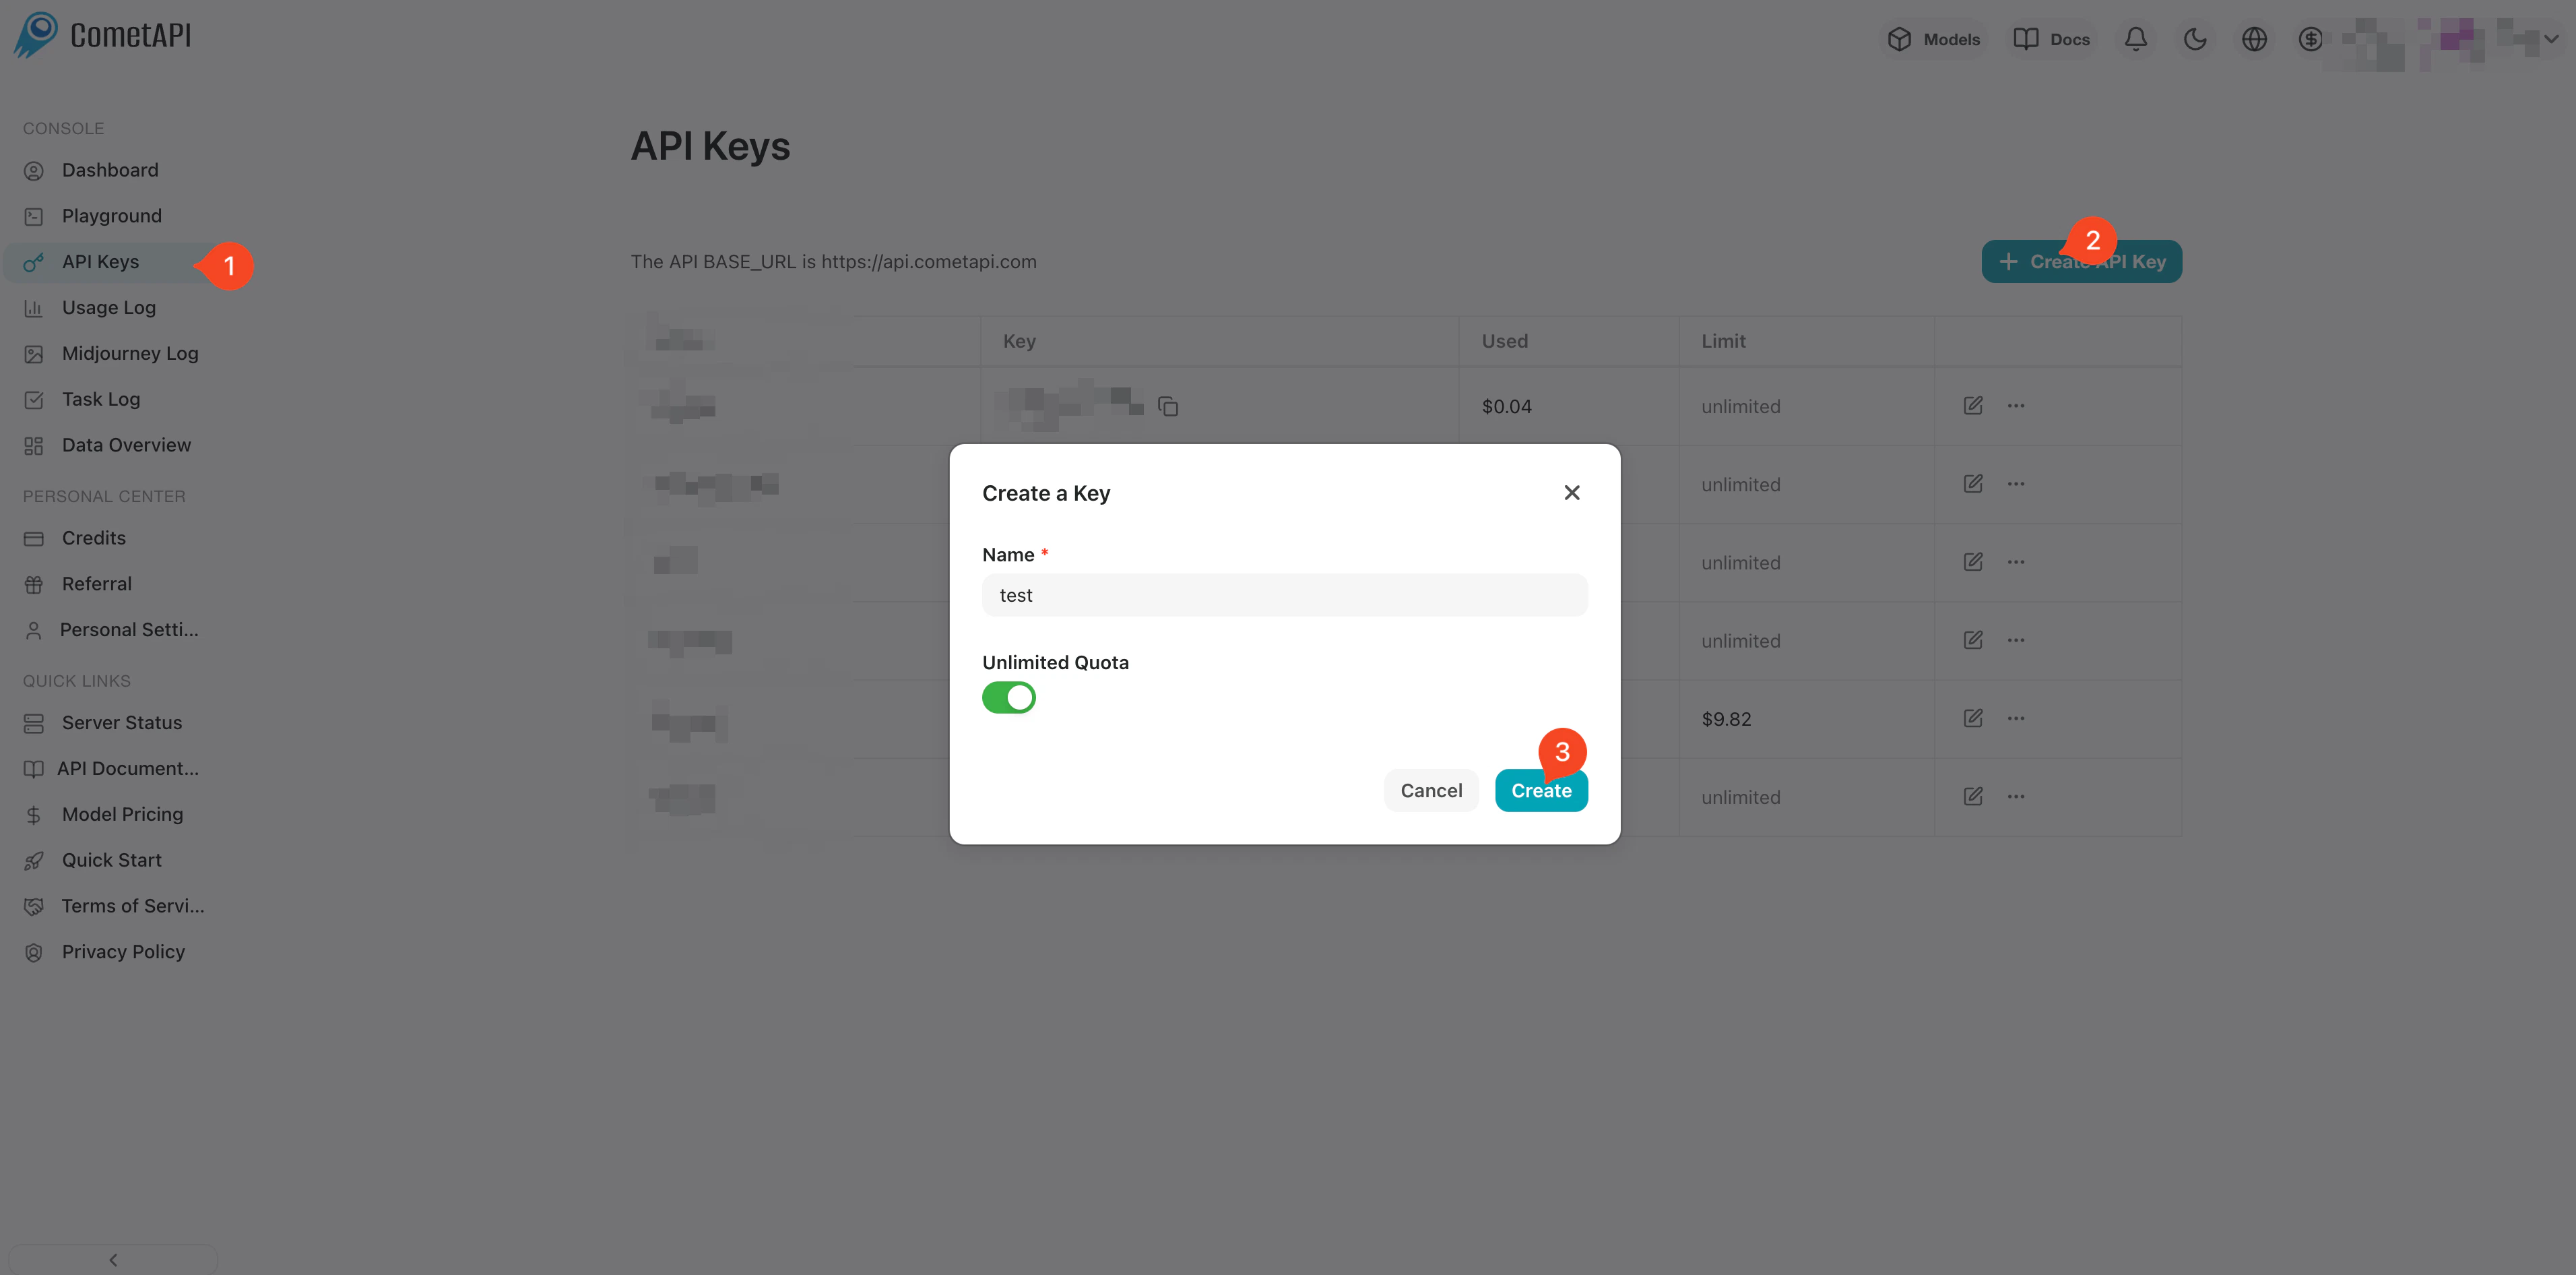
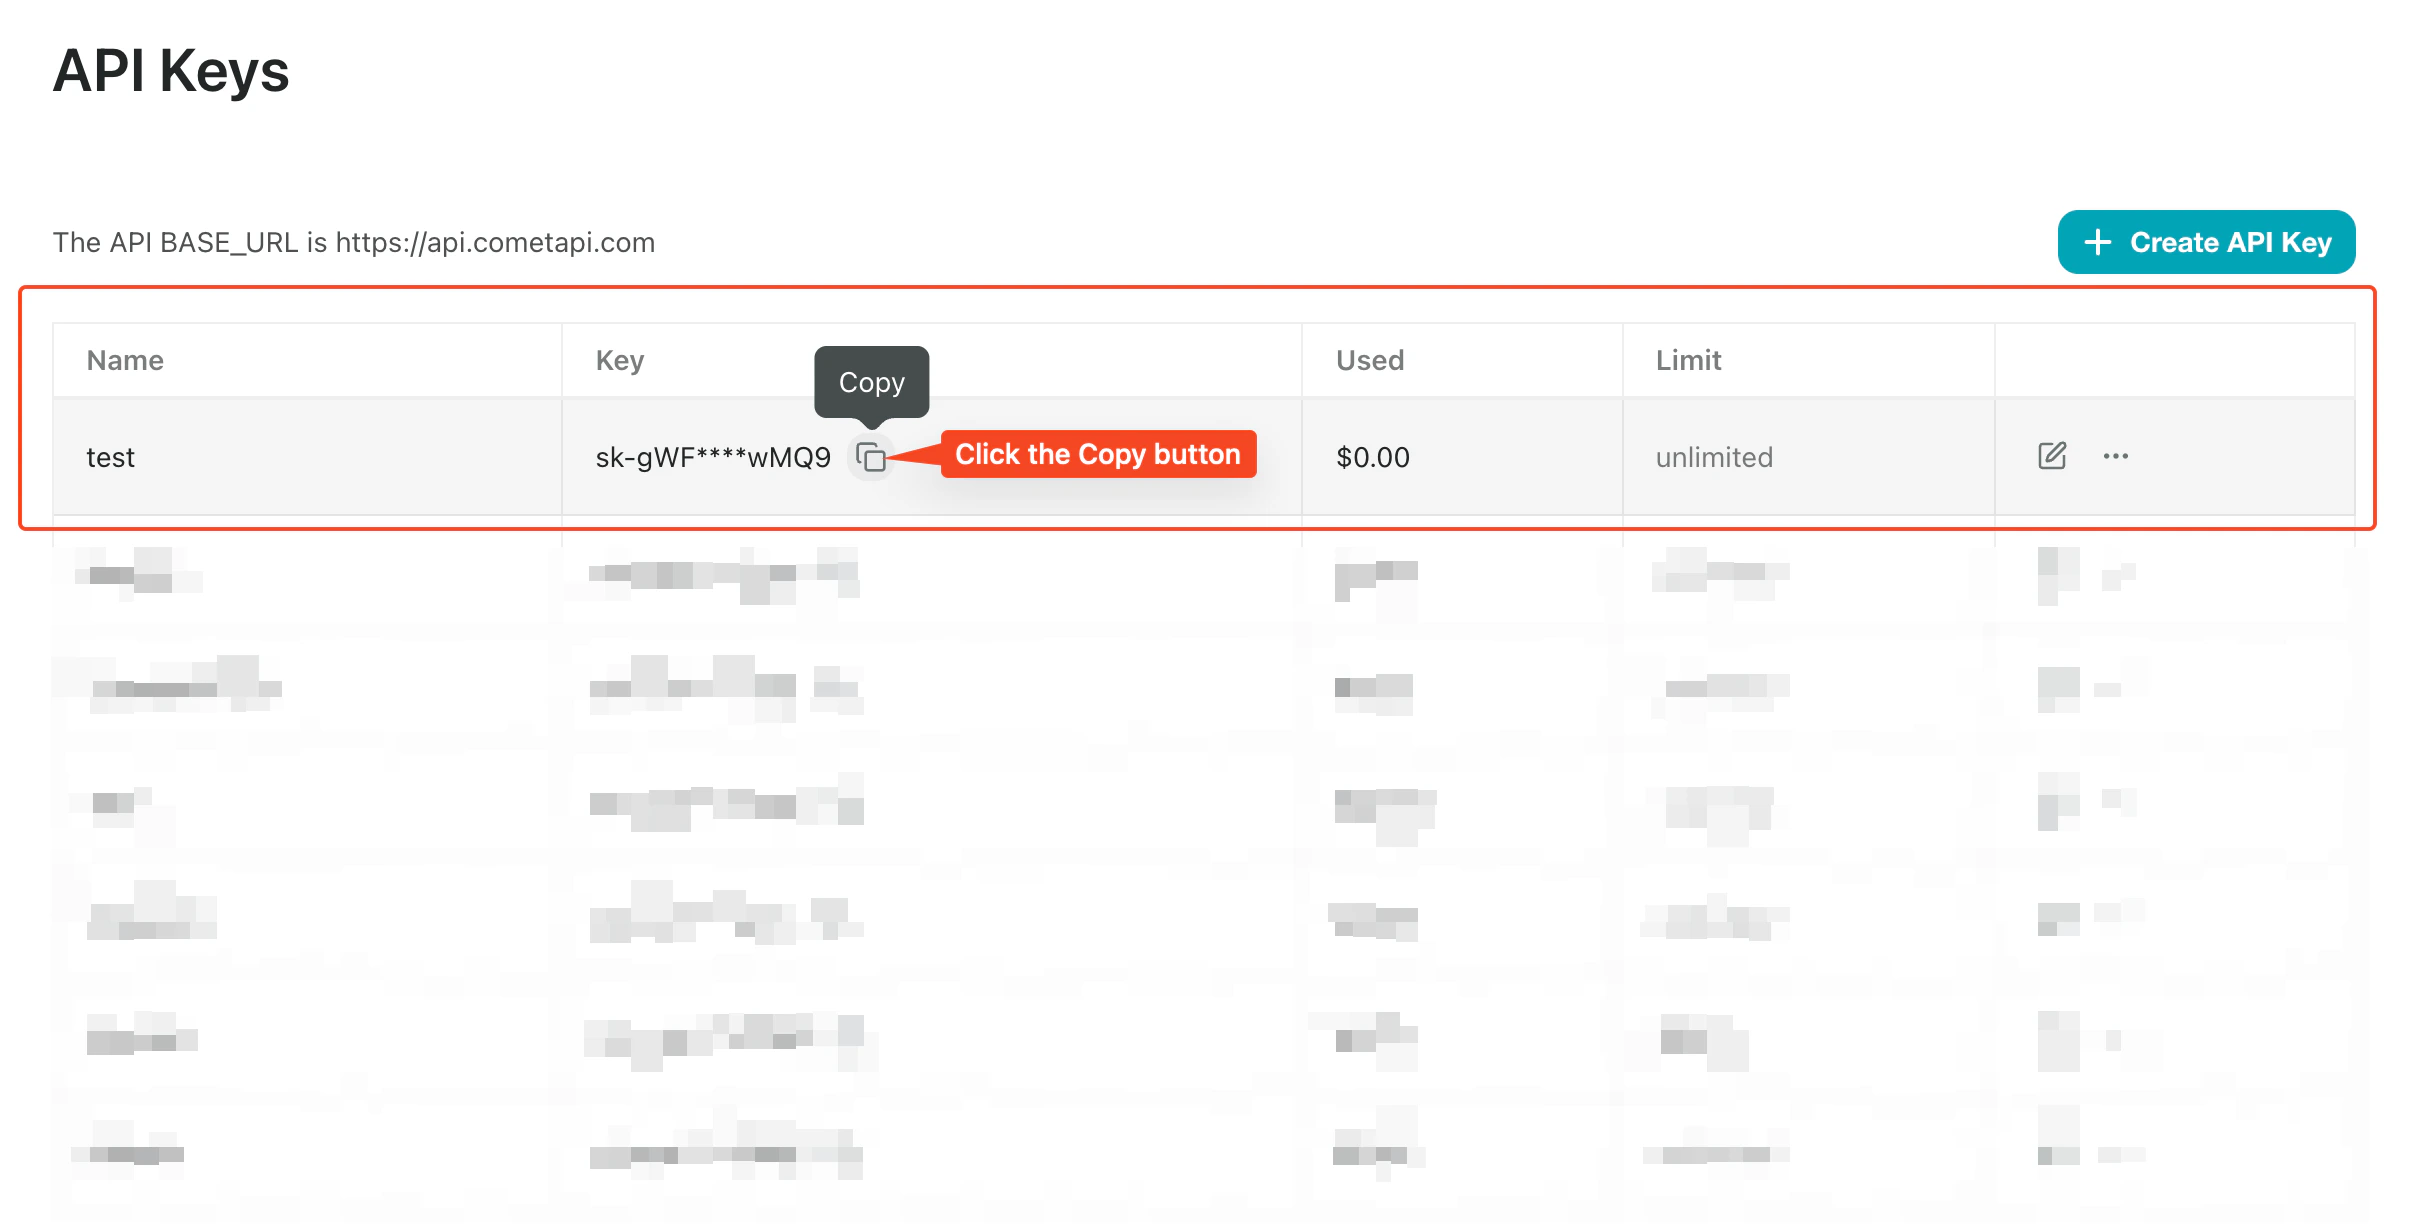
[CometAPI 콘솔](https://www.cometapi.com/console/token)에 로그인합니다. **Add API Key**를 클릭하고 CometAPI API 키를 복사합니다.
 n8n 1.x는 Node.js 18.x 또는 20.x가 필요합니다. 권장 방법은 [nvm](https://github.com/nvm-sh/nvm)입니다:
```bash theme={null}
# Install nvm
curl -o- https://raw.githubusercontent.com/nvm-sh/nvm/v0.39.7/install.sh | bash
# Reload your shell profile
source ~/.bashrc # or ~/.zshrc on macOS
# Install and activate the LTS version
nvm install --lts
nvm use --lts
# Verify
node -v
npm -v
```
나중에 `n8n: command not found`가 표시되면 터미널을 다시 시작하거나, nvm이 관리하는 npm 전역 bin 디렉터리가 `PATH`에 포함되어 있는지 확인하세요.
```bash theme={null}
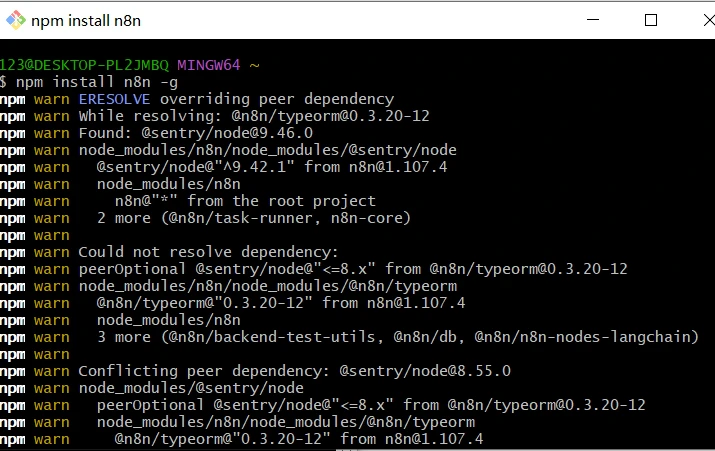
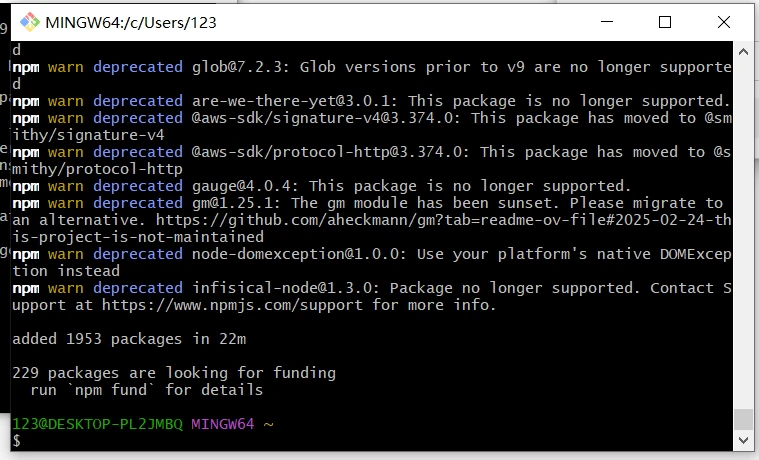
npm install -g n8n
n8n -v # verify the installed version
n8n start # runs on http://localhost:5678/
```
포트 5678이 이미 사용 중인 경우:
```bash theme={null}
export N8N_PORT=5679
n8n start
```
터미널을 닫은 뒤에도 n8n이 계속 실행되도록 하려면:
```bash theme={null}
npm install -g pm2
pm2 start "n8n" --name n8n
pm2 save
pm2 status
```
n8n 1.x는 Node.js 18.x 또는 20.x가 필요합니다. 권장 방법은 [nvm](https://github.com/nvm-sh/nvm)입니다:
```bash theme={null}
# Install nvm
curl -o- https://raw.githubusercontent.com/nvm-sh/nvm/v0.39.7/install.sh | bash
# Reload your shell profile
source ~/.bashrc # or ~/.zshrc on macOS
# Install and activate the LTS version
nvm install --lts
nvm use --lts
# Verify
node -v
npm -v
```
나중에 `n8n: command not found`가 표시되면 터미널을 다시 시작하거나, nvm이 관리하는 npm 전역 bin 디렉터리가 `PATH`에 포함되어 있는지 확인하세요.
```bash theme={null}
npm install -g n8n
n8n -v # verify the installed version
n8n start # runs on http://localhost:5678/
```
포트 5678이 이미 사용 중인 경우:
```bash theme={null}
export N8N_PORT=5679
n8n start
```
터미널을 닫은 뒤에도 n8n이 계속 실행되도록 하려면:
```bash theme={null}
npm install -g pm2
pm2 start "n8n" --name n8n
pm2 save
pm2 status
```
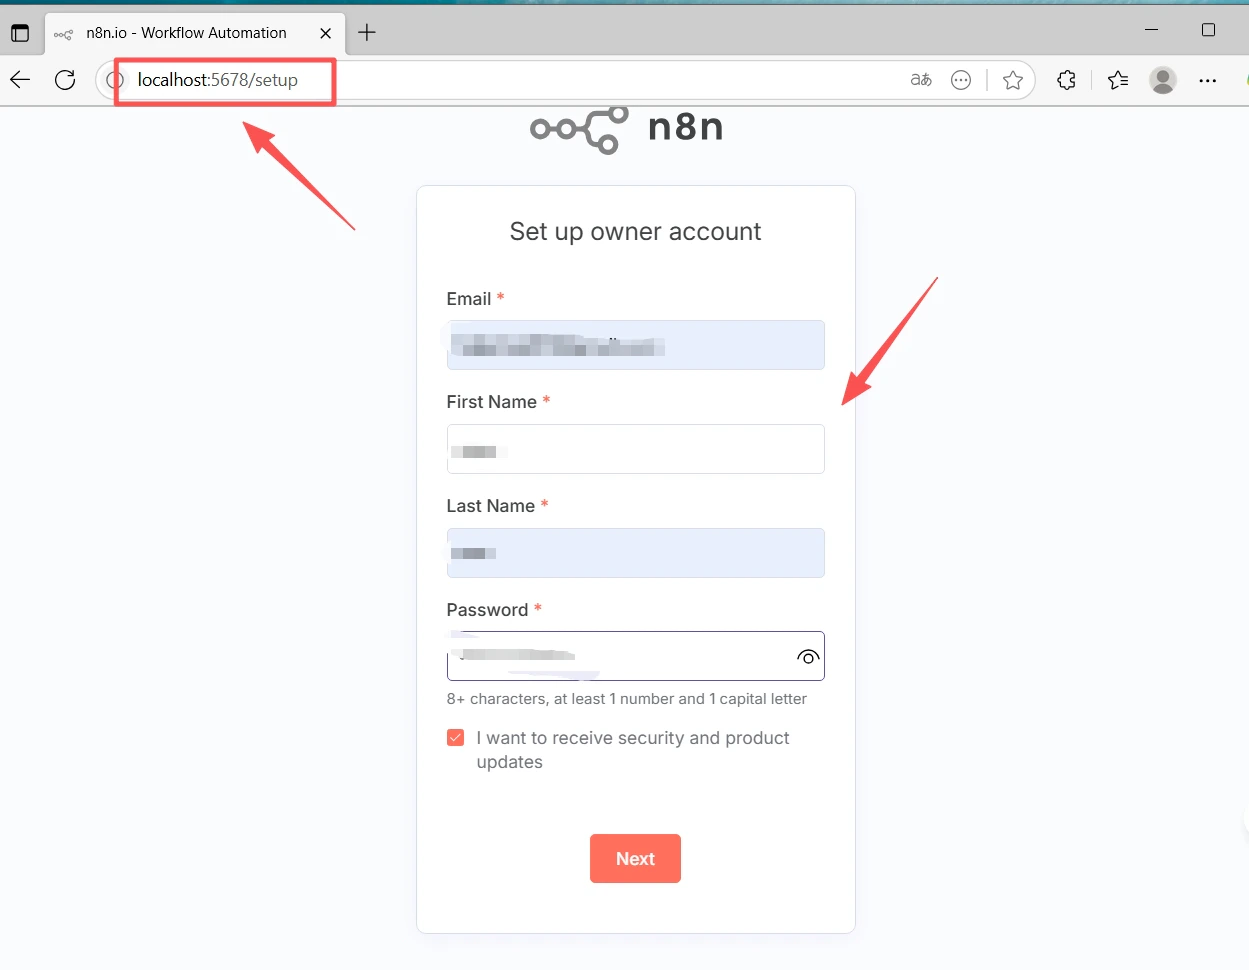
 브라우저에서 [http://localhost:5678/](http://localhost:5678/)을 엽니다. 처음 실행하면 설정 마법사에서 **Owner** 계정(이메일 + 비밀번호)을 만들도록 요청합니다. 이 과정을 완료하고 로그인하세요.
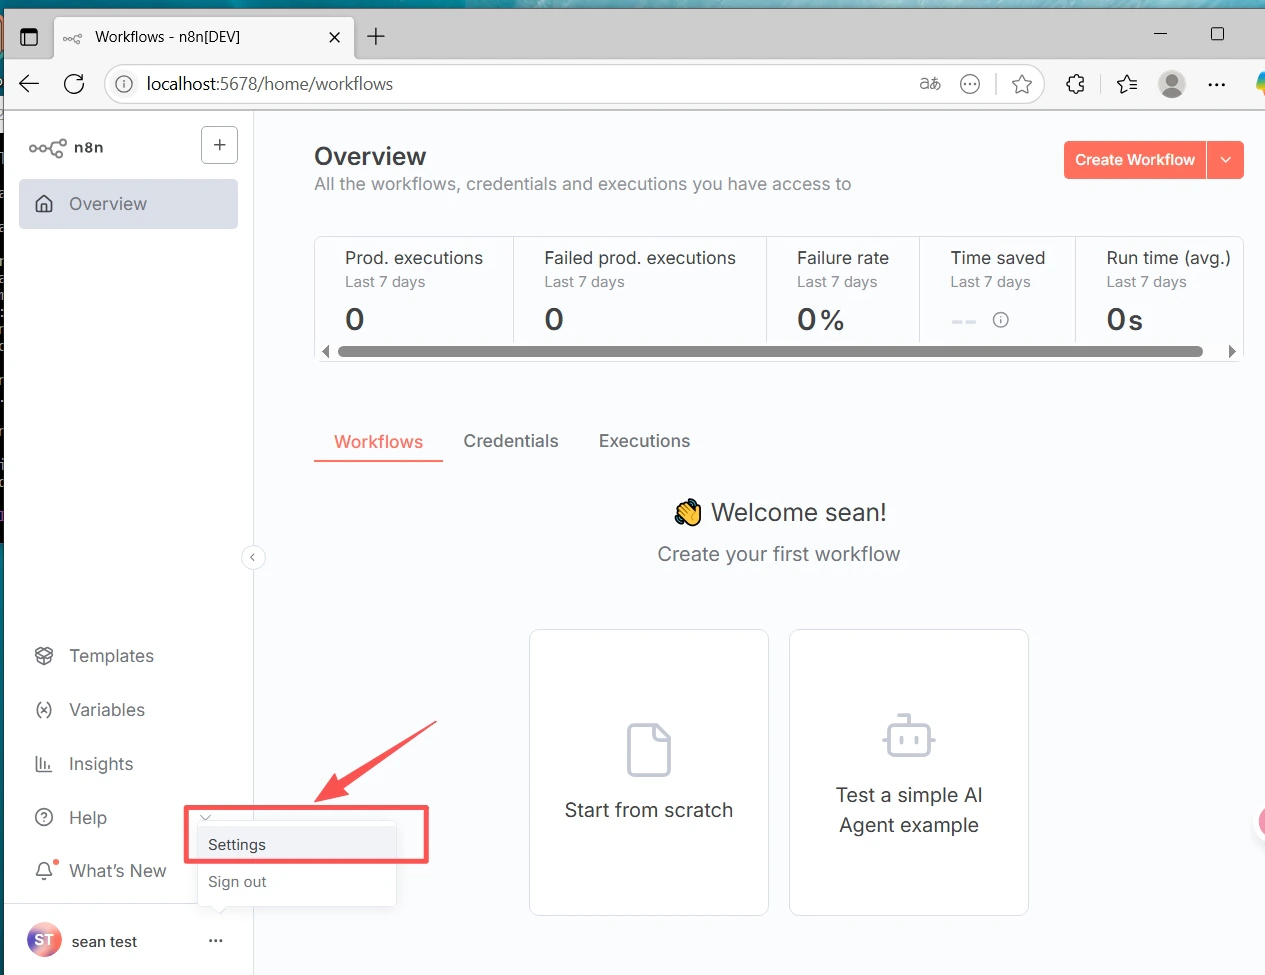
 1. **Settings**(좌측 하단) → **Community nodes**로 이동합니다.
2. **Install a community node**를 클릭합니다.
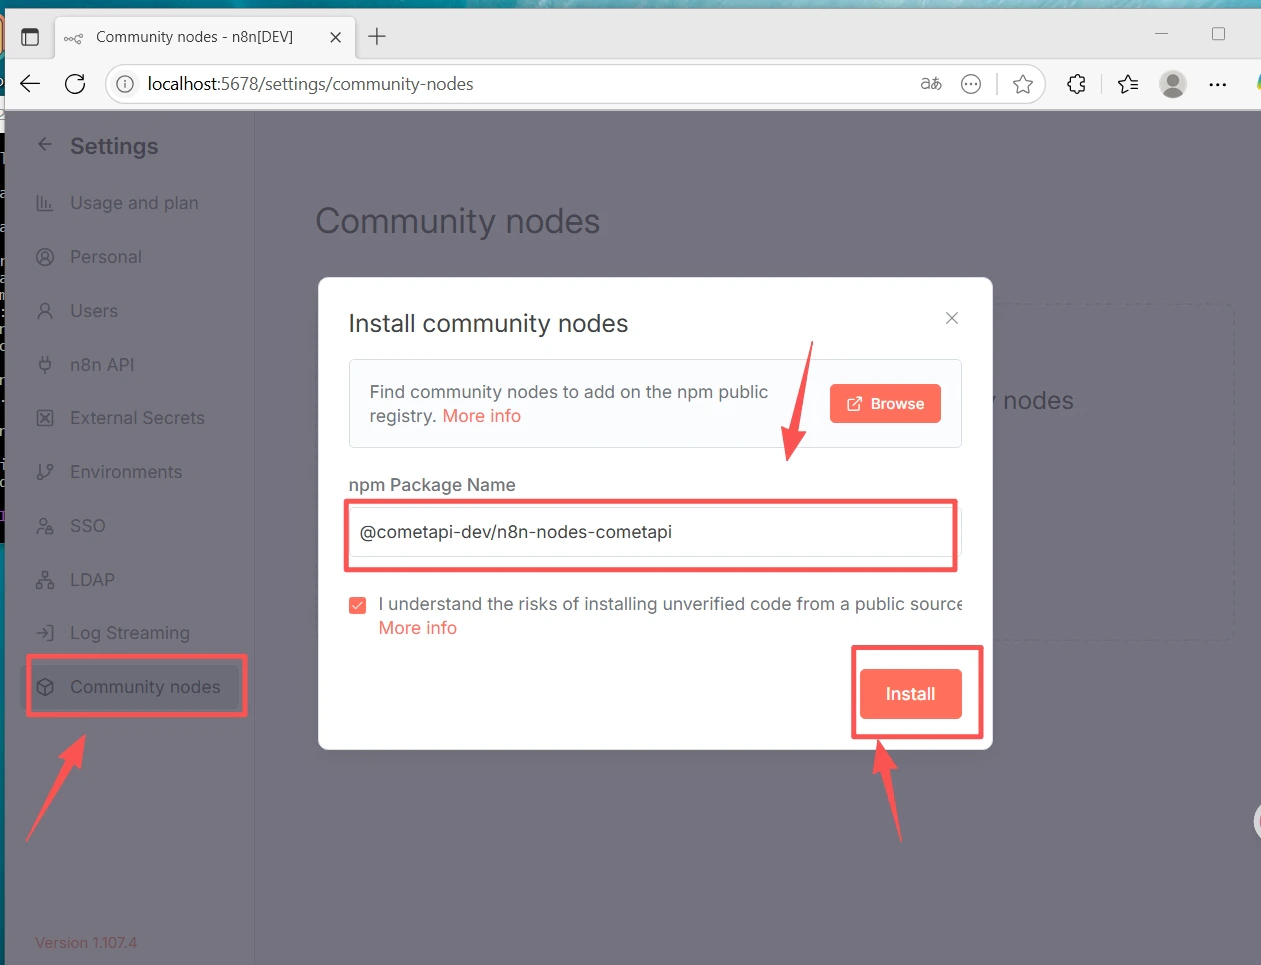
3. 패키지 이름 `@cometapi-dev/n8n-nodes-cometapi`를 입력합니다.
4. 위험 고지 확인란을 선택하고 **Install**을 클릭합니다.
설치가 완료되면 노드 패널에서 **CometAPI**를 검색할 수 있습니다.
1. **Settings**(좌측 하단) → **Community nodes**로 이동합니다.
2. **Install a community node**를 클릭합니다.
3. 패키지 이름 `@cometapi-dev/n8n-nodes-cometapi`를 입력합니다.
4. 위험 고지 확인란을 선택하고 **Install**을 클릭합니다.
설치가 완료되면 노드 패널에서 **CometAPI**를 검색할 수 있습니다.
 Community Nodes 섹션이 보이지 않는 경우: **Owner** 계정으로 로그인했는지 확인하고, **Settings → Security**에서 커뮤니티 노드 설치가 활성화되어 있는지 확인하세요.
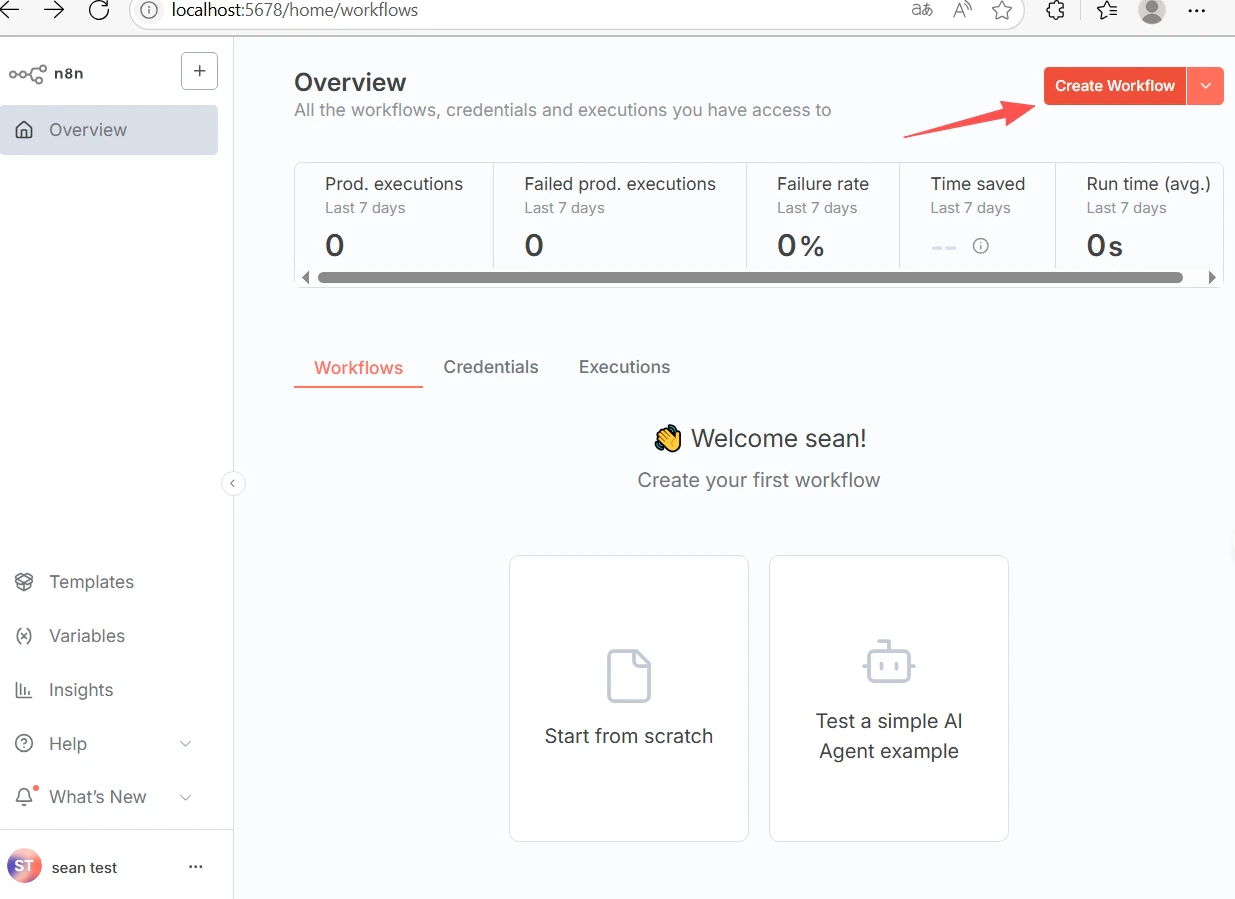
1. 상단의 **+ New**를 클릭해 워크플로를 생성합니다.
2. 캔버스에서 \*\*+\*\*를 클릭하고 **CometAPI**를 검색해 노드를 추가합니다.
Community Nodes 섹션이 보이지 않는 경우: **Owner** 계정으로 로그인했는지 확인하고, **Settings → Security**에서 커뮤니티 노드 설치가 활성화되어 있는지 확인하세요.
1. 상단의 **+ New**를 클릭해 워크플로를 생성합니다.
2. 캔버스에서 \*\*+\*\*를 클릭하고 **CometAPI**를 검색해 노드를 추가합니다.
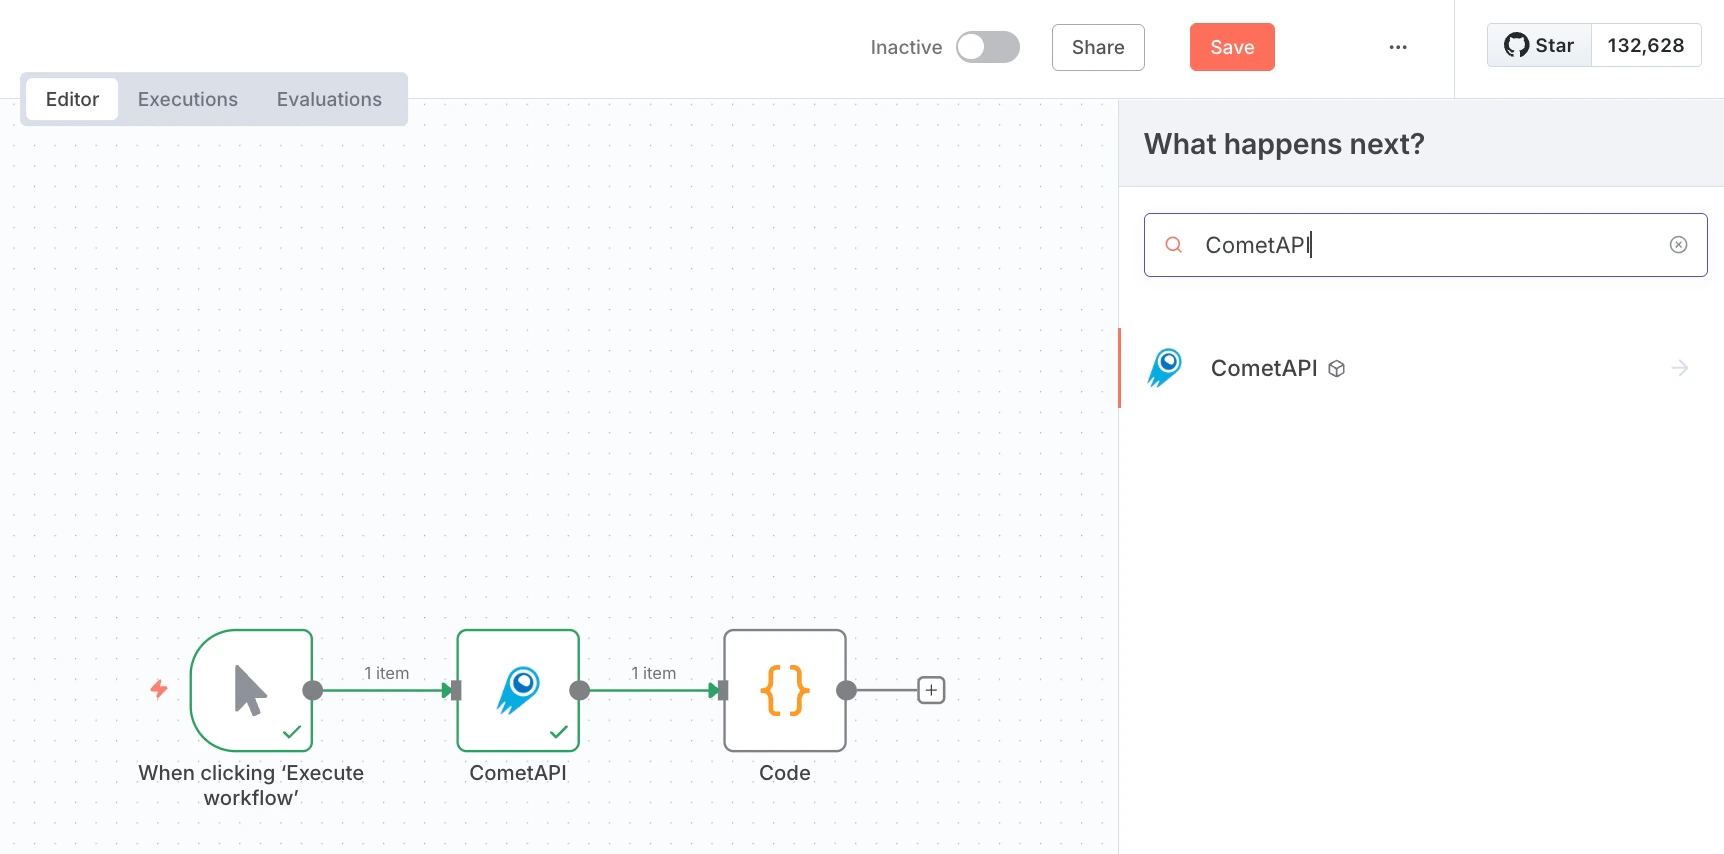 3. **Manual Trigger** 노드를 추가하고 CometAPI 노드에 연결합니다.
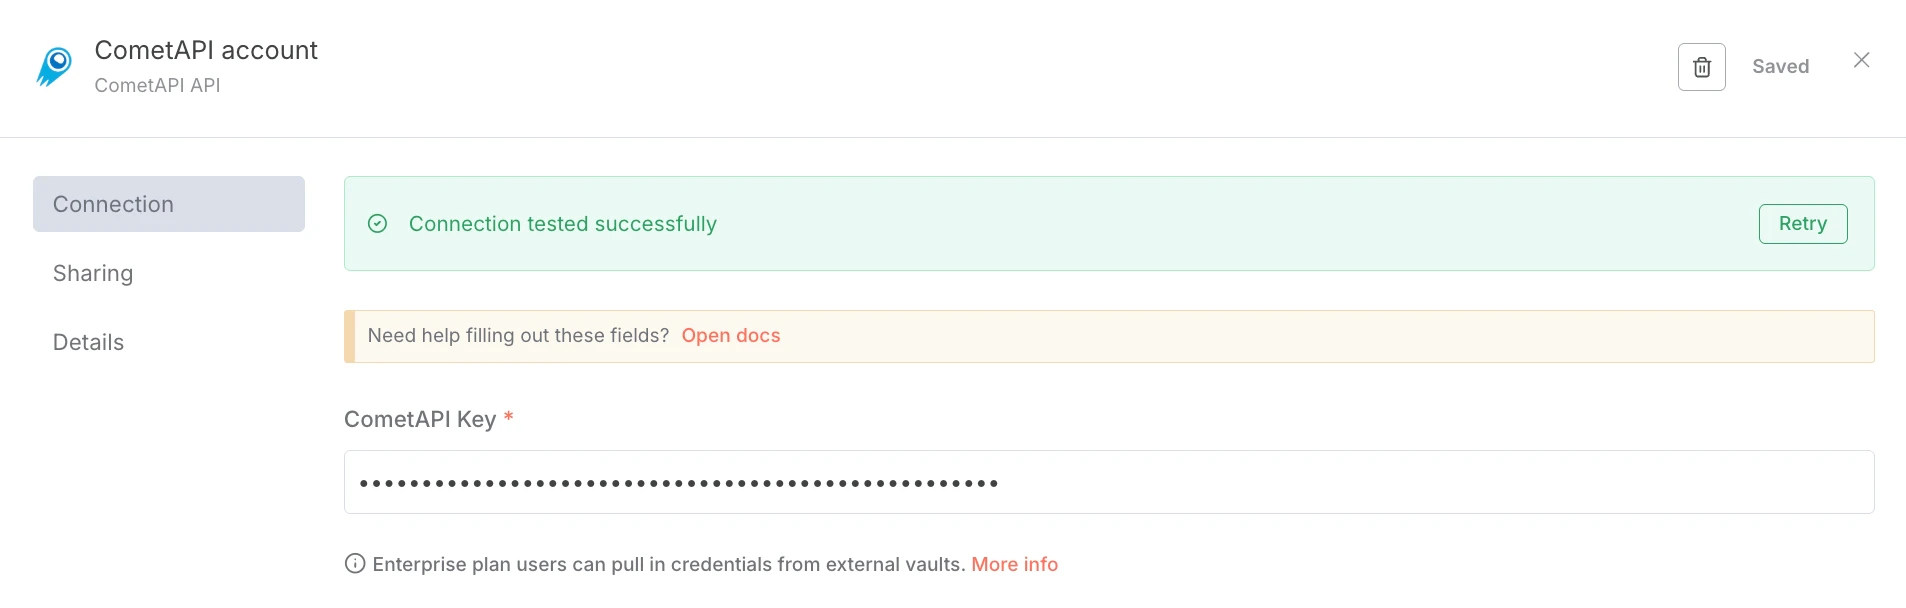
4. CometAPI 노드에서 **Credential to connect with** 아래의 **Create new**를 선택합니다. **CometAPI Key**에 CometAPI API 키를 붙여넣고 **Save**를 클릭합니다. Base URL은 기본값으로 `https://api.cometapi.com`이 설정되며, 일반적으로 변경할 필요가 없습니다.
3. **Manual Trigger** 노드를 추가하고 CometAPI 노드에 연결합니다.
4. CometAPI 노드에서 **Credential to connect with** 아래의 **Create new**를 선택합니다. **CometAPI Key**에 CometAPI API 키를 붙여넣고 **Save**를 클릭합니다. Base URL은 기본값으로 `https://api.cometapi.com`이 설정되며, 일반적으로 변경할 필요가 없습니다.
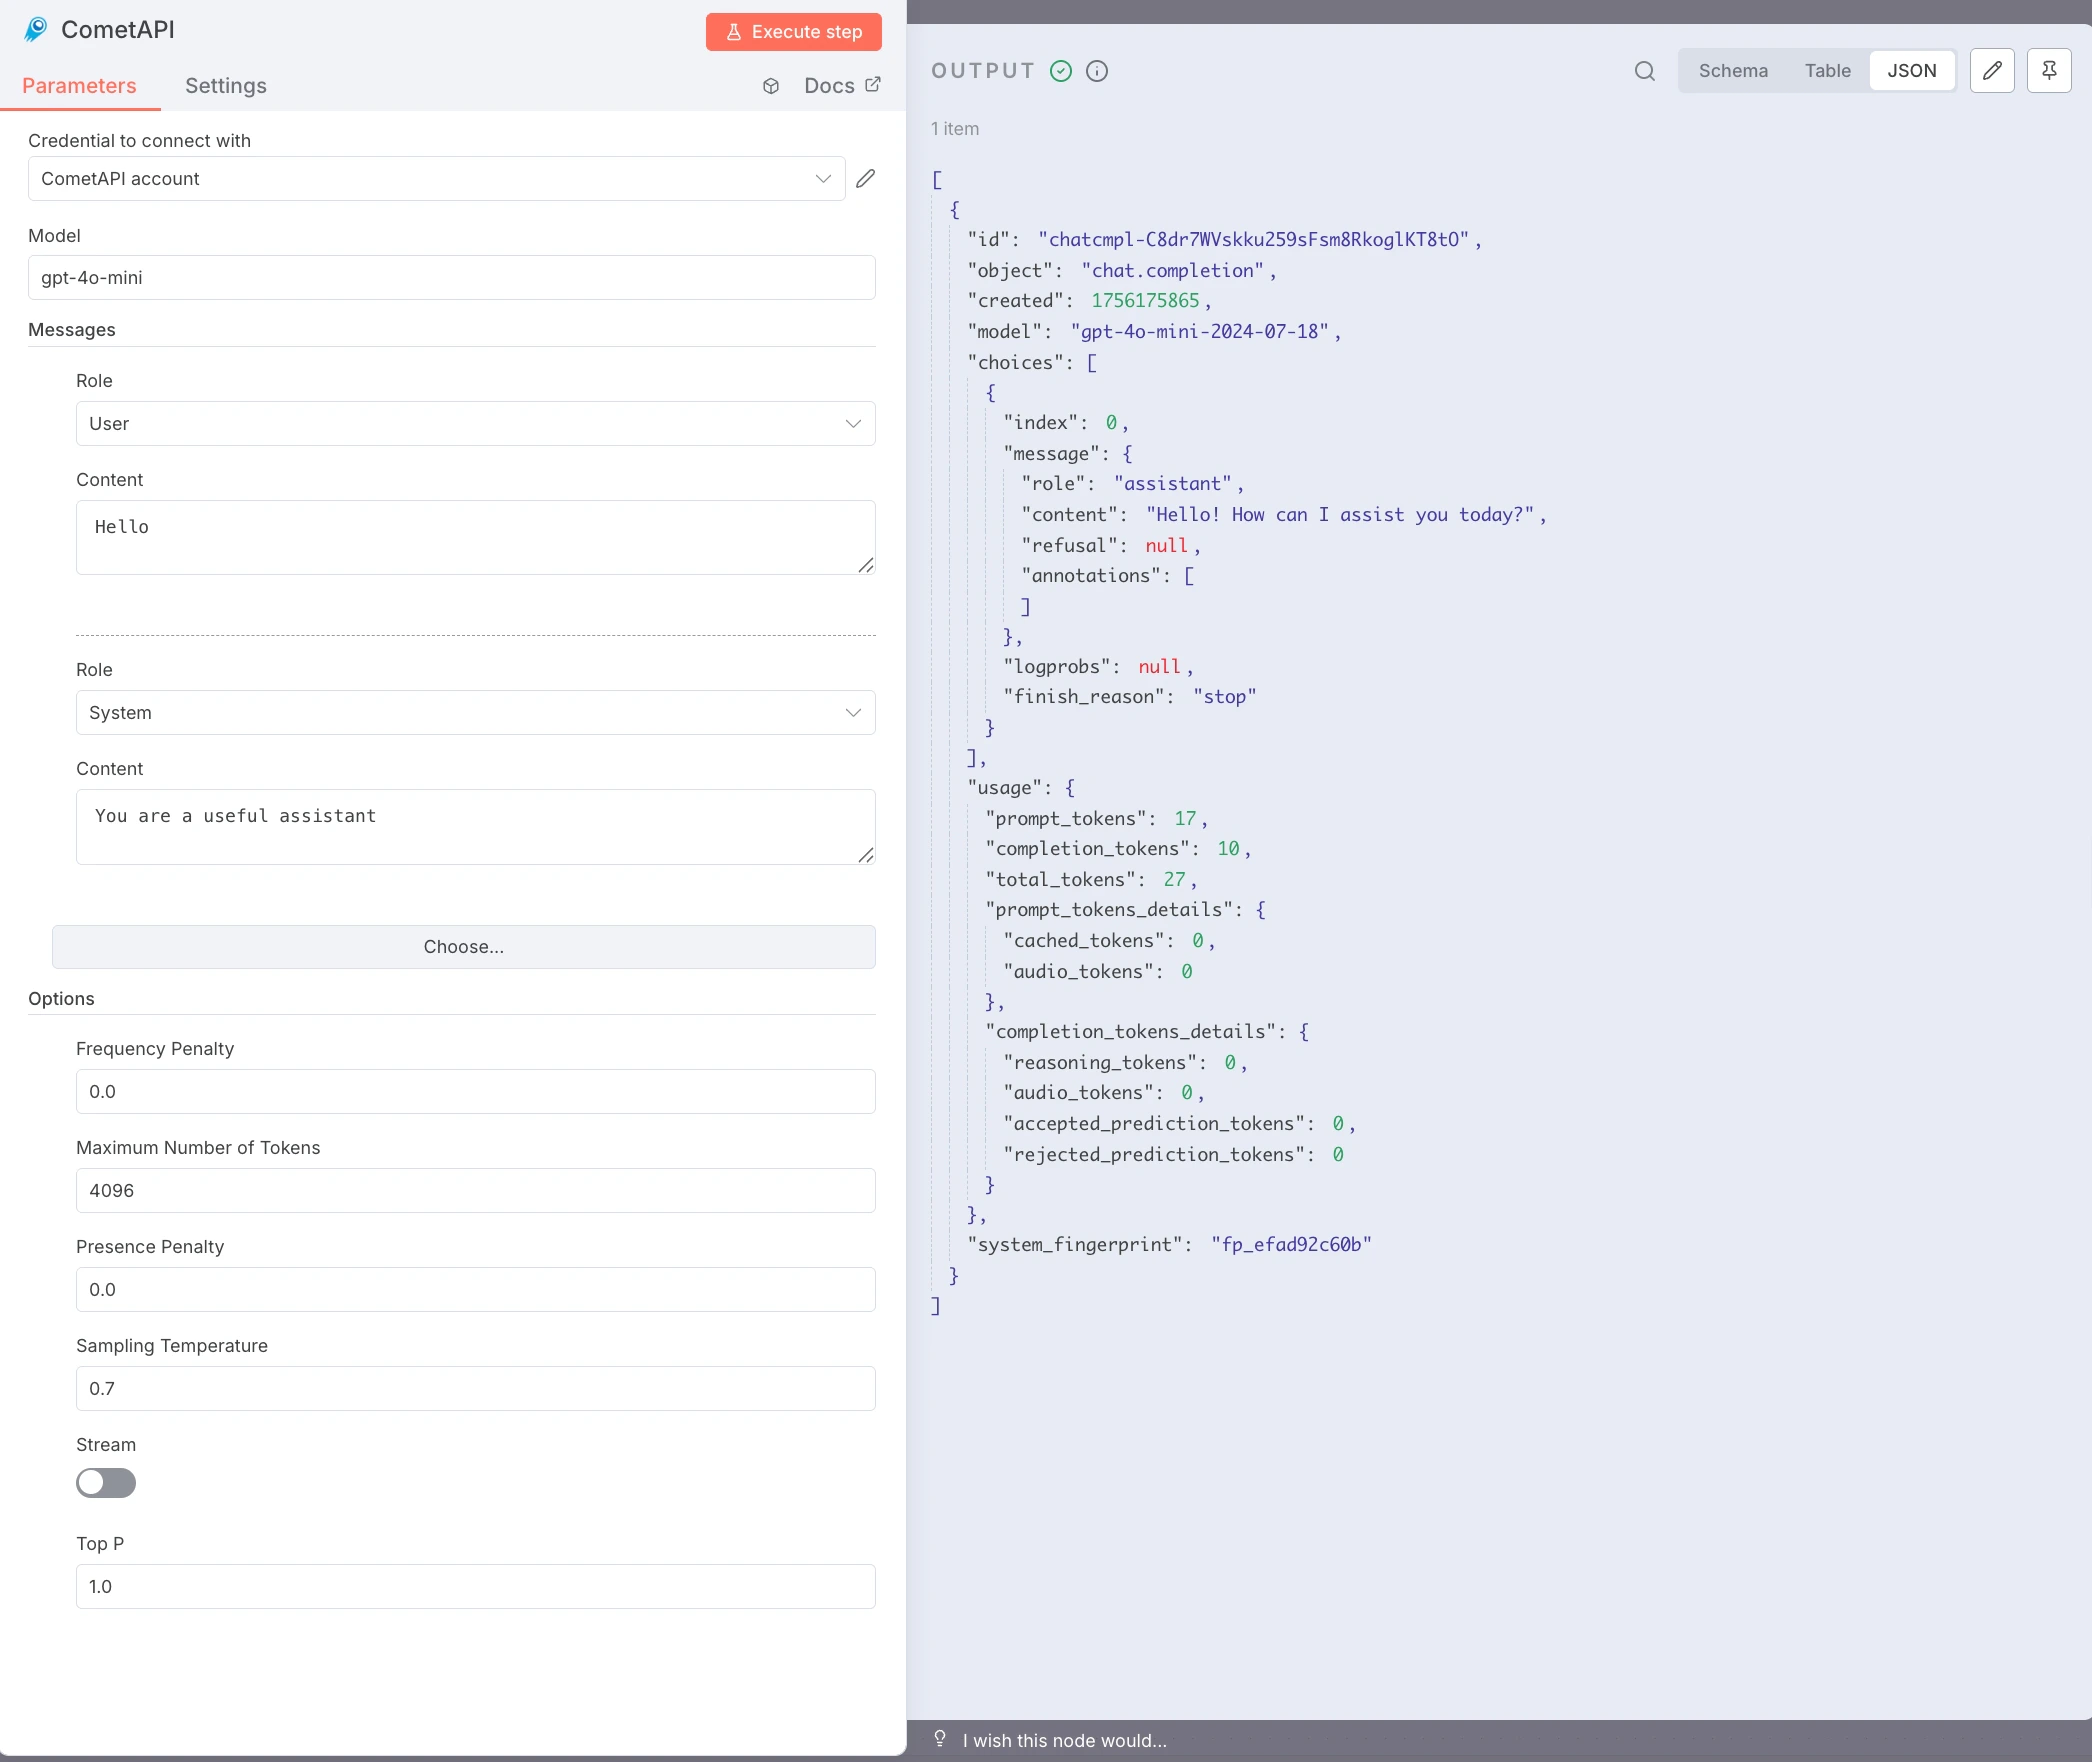
 5. 노드를 구성합니다:
* **Model**: 사용하려는 현재 model ID를 입력합니다
* **Messages**: Role을 `user`로 설정하고, Content에 테스트 프롬프트(Prompt)(예: `Hello`)를 입력합니다
* 선택 사항: `system` 메시지를 추가하고, **Max Tokens**, **Temperature** 등을 설정합니다
6. **Execute step**을 클릭해 노드를 실행합니다. **Output** 패널에 JSON 응답이 표시됩니다.
5. 노드를 구성합니다:
* **Model**: 사용하려는 현재 model ID를 입력합니다
* **Messages**: Role을 `user`로 설정하고, Content에 테스트 프롬프트(Prompt)(예: `Hello`)를 입력합니다
* 선택 사항: `system` 메시지를 추가하고, **Max Tokens**, **Temperature** 등을 설정합니다
6. **Execute step**을 클릭해 노드를 실행합니다. **Output** 패널에 JSON 응답이 표시됩니다.
 * **`node-gyp` 또는 네이티브 빌드 오류** — 빌드 도구를 설치하세요: `sudo apt install build-essential python3` (Debian/Ubuntu) 또는 Xcode Command Line Tools(macOS).
* **npm 권한 오류(EACCES)** — 사용자 수준 Node.js 설치를 위해 nvm을 사용하세요. `sudo`는 필요하지 않습니다.
* **포트 충돌(`localhost:5678` 사용 불가)** — `n8n start`를 실행하기 전에 `N8N_PORT=5679`(또는 다른 사용 가능한 포트)로 설정하세요.
* **Community Nodes 섹션 누락** — **Owner** 계정으로 로그인하고 **Settings → Security**를 확인하세요.
* **사내 네트워크에서 npm install 실패** — 프록시를 구성하세요: `npm config set proxy http://user:pass@host:port`
* **CometAPI 노드가 401/403 반환** — API 키가 올바른지, 그리고 해당 model이 CometAPI 요금제에서 접근 가능한지 확인하세요.
* **빈 응답 또는 토큰(Token) 제한 오류** — **Max Tokens**를 늘리세요. 필요에 따라 **Temperature**와 **Top P**를 조정하세요.
* **터미널을 닫으면 n8n 중지됨** — pm2를 사용하세요: `pm2 start "n8n" --name n8n && pm2 save`.
* **`node-gyp` 또는 네이티브 빌드 오류** — 빌드 도구를 설치하세요: `sudo apt install build-essential python3` (Debian/Ubuntu) 또는 Xcode Command Line Tools(macOS).
* **npm 권한 오류(EACCES)** — 사용자 수준 Node.js 설치를 위해 nvm을 사용하세요. `sudo`는 필요하지 않습니다.
* **포트 충돌(`localhost:5678` 사용 불가)** — `n8n start`를 실행하기 전에 `N8N_PORT=5679`(또는 다른 사용 가능한 포트)로 설정하세요.
* **Community Nodes 섹션 누락** — **Owner** 계정으로 로그인하고 **Settings → Security**를 확인하세요.
* **사내 네트워크에서 npm install 실패** — 프록시를 구성하세요: `npm config set proxy http://user:pass@host:port`
* **CometAPI 노드가 401/403 반환** — API 키가 올바른지, 그리고 해당 model이 CometAPI 요금제에서 접근 가능한지 확인하세요.
* **빈 응답 또는 토큰(Token) 제한 오류** — **Max Tokens**를 늘리세요. 필요에 따라 **Temperature**와 **Top P**를 조정하세요.
* **터미널을 닫으면 n8n 중지됨** — pm2를 사용하세요: `pm2 start "n8n" --name n8n && pm2 save`.