> ## Documentation Index
> Fetch the complete documentation index at: https://apidoc.cometapi.com/llms.txt
> Use this file to discover all available pages before exploring further.
# 使用 CometAPI 在本地运行 n8n
> 使用本指南,通过配置本地部署设置、凭证和模型访问,在本地借助 CometAPI 运行 n8n。
在你自己的机器上部署 n8n,并通过社区节点将其连接到 CometAPI,以在本地运行自动化 AI 工作流。
## 先决条件
* Linux(Ubuntu/Debian/CentOS 等)或 macOS
* 2 GB 以上内存,10 GB 以上可用磁盘空间
* 可访问公共 npm 注册表的 Shell 环境
* Node.js 18.x 或 20.x LTS(见步骤 1)
* 一个拥有有效 API key 的 CometAPI 账户——[在此获取](https://www.cometapi.com/console/token)
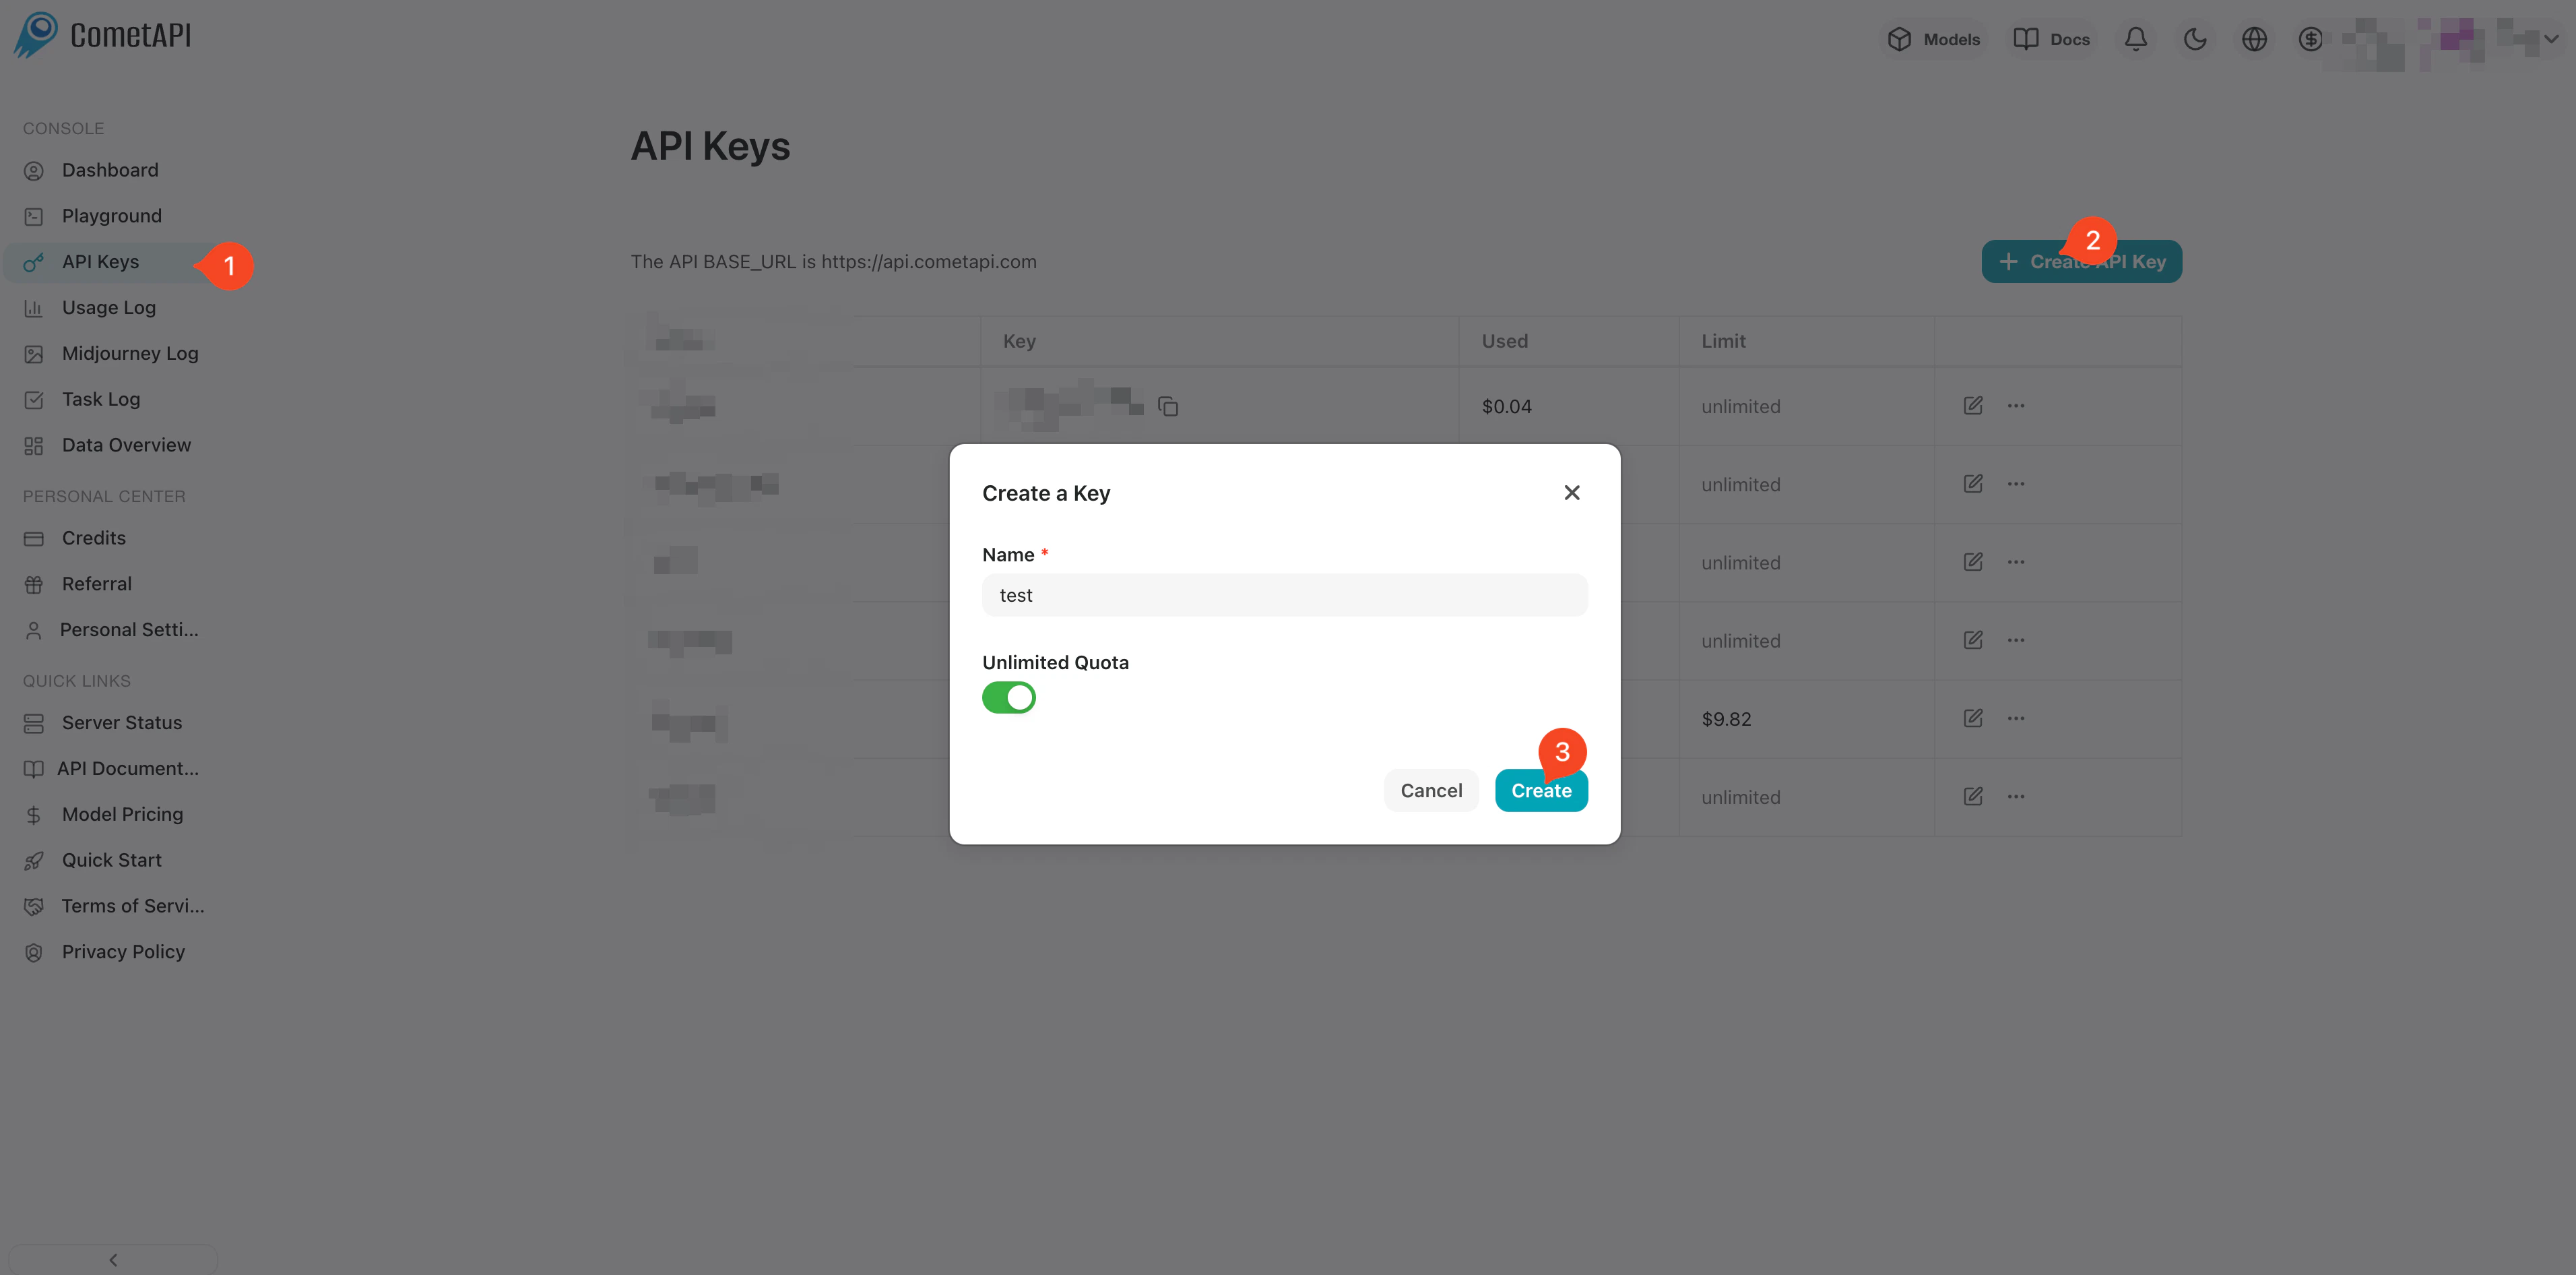
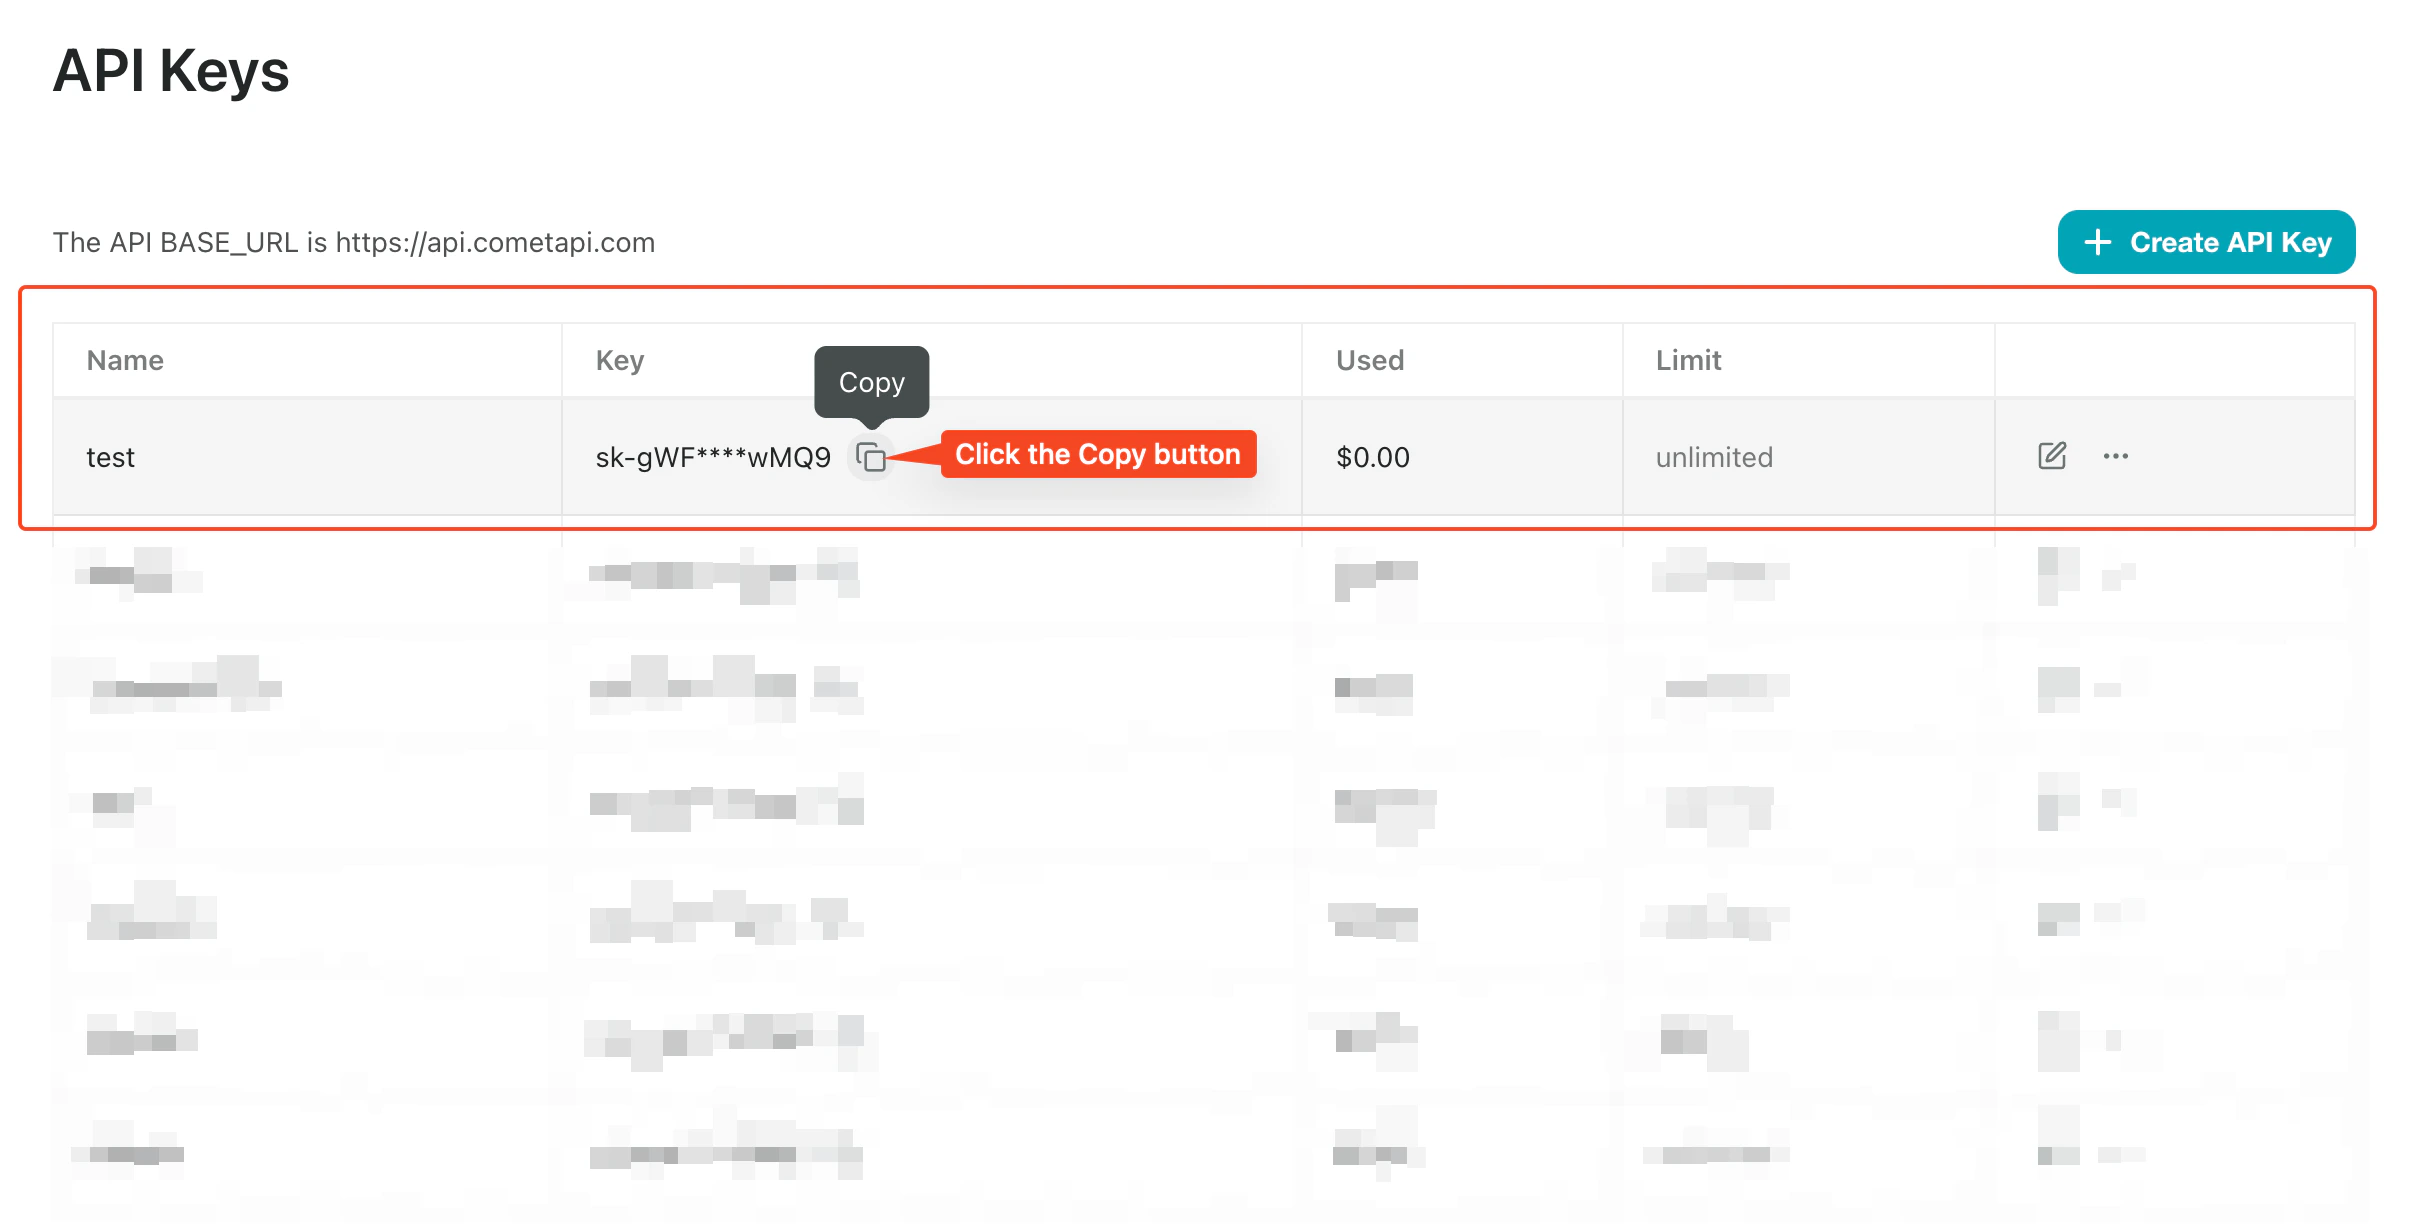
登录 [CometAPI 控制台](https://www.cometapi.com/console/token)。点击 **Add API Key** 并复制你的 CometAPI API key。
 n8n 1.x 需要 Node.js 18.x 或 20.x。推荐使用 [nvm](https://github.com/nvm-sh/nvm):
```bash theme={null}
# Install nvm
curl -o- https://raw.githubusercontent.com/nvm-sh/nvm/v0.39.7/install.sh | bash
# Reload your shell profile
source ~/.bashrc # or ~/.zshrc on macOS
# Install and activate the LTS version
nvm install --lts
nvm use --lts
# Verify
node -v
npm -v
```
如果你之后看到 `n8n: command not found`,请重启终端,或确保由 nvm 管理的 npm 全局 bin 目录已加入你的 `PATH`。
```bash theme={null}
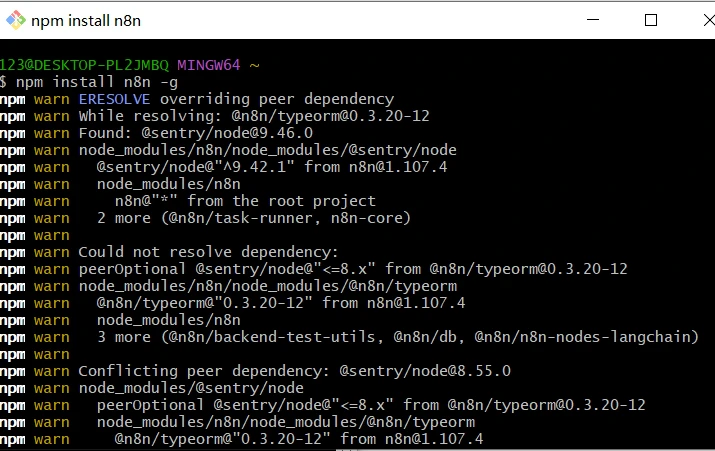
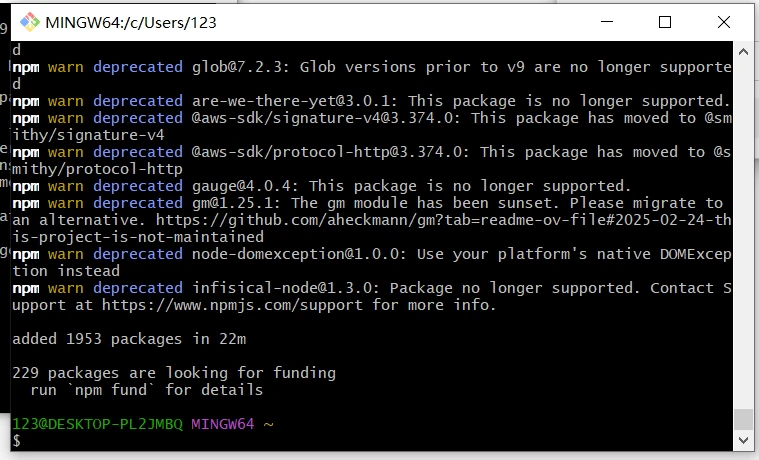
npm install -g n8n
n8n -v # verify the installed version
n8n start # runs on http://localhost:5678/
```
如果端口 5678 已被占用:
```bash theme={null}
export N8N_PORT=5679
n8n start
```
要在关闭终端后仍保持 n8n 运行:
```bash theme={null}
npm install -g pm2
pm2 start "n8n" --name n8n
pm2 save
pm2 status
```
n8n 1.x 需要 Node.js 18.x 或 20.x。推荐使用 [nvm](https://github.com/nvm-sh/nvm):
```bash theme={null}
# Install nvm
curl -o- https://raw.githubusercontent.com/nvm-sh/nvm/v0.39.7/install.sh | bash
# Reload your shell profile
source ~/.bashrc # or ~/.zshrc on macOS
# Install and activate the LTS version
nvm install --lts
nvm use --lts
# Verify
node -v
npm -v
```
如果你之后看到 `n8n: command not found`,请重启终端,或确保由 nvm 管理的 npm 全局 bin 目录已加入你的 `PATH`。
```bash theme={null}
npm install -g n8n
n8n -v # verify the installed version
n8n start # runs on http://localhost:5678/
```
如果端口 5678 已被占用:
```bash theme={null}
export N8N_PORT=5679
n8n start
```
要在关闭终端后仍保持 n8n 运行:
```bash theme={null}
npm install -g pm2
pm2 start "n8n" --name n8n
pm2 save
pm2 status
```
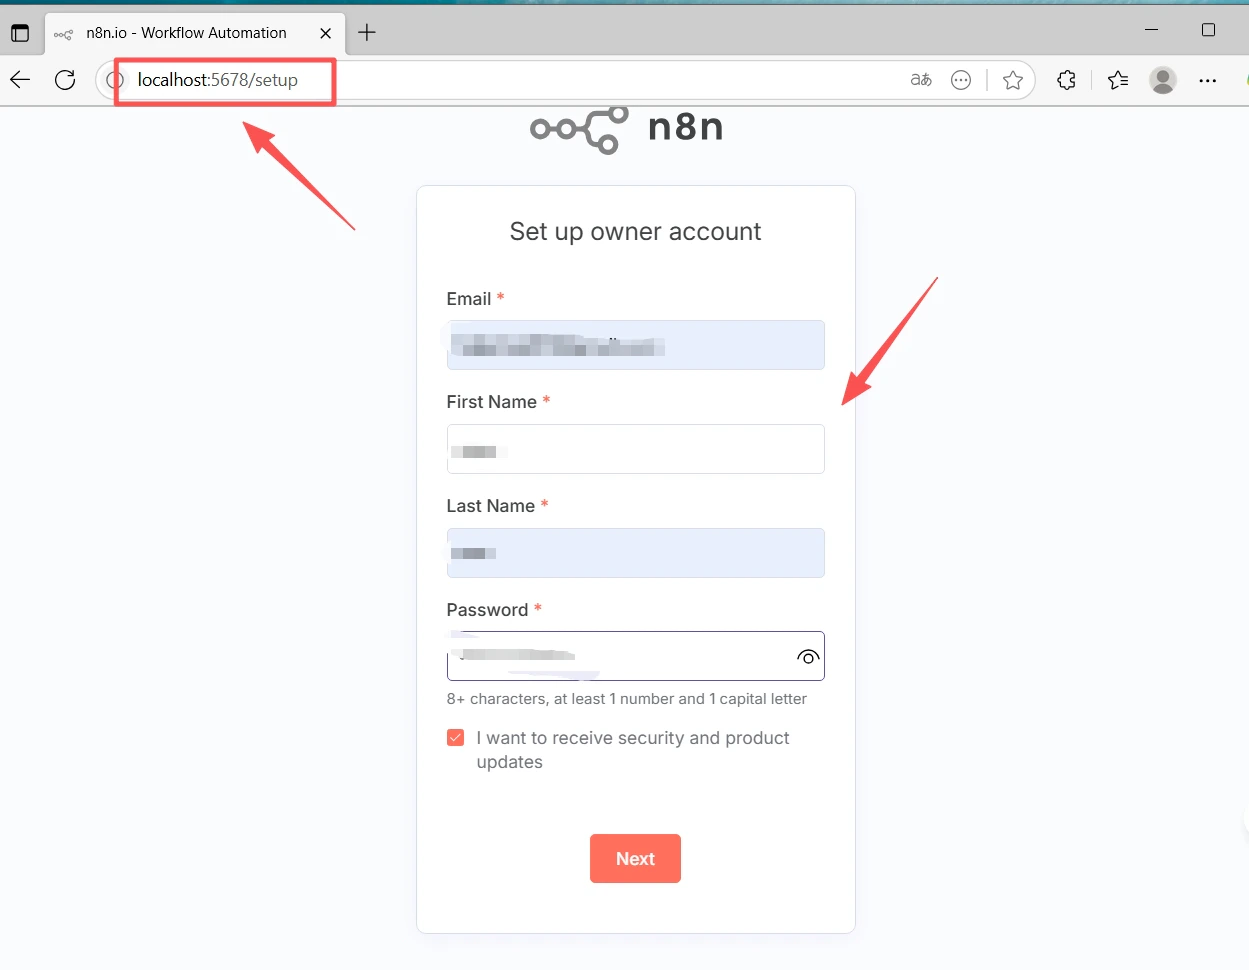
 在浏览器中打开 [http://localhost:5678/](http://localhost:5678/)。首次运行时,设置向导会要求你创建一个 **Owner** 账户(邮箱 + 密码)。完成后登录。
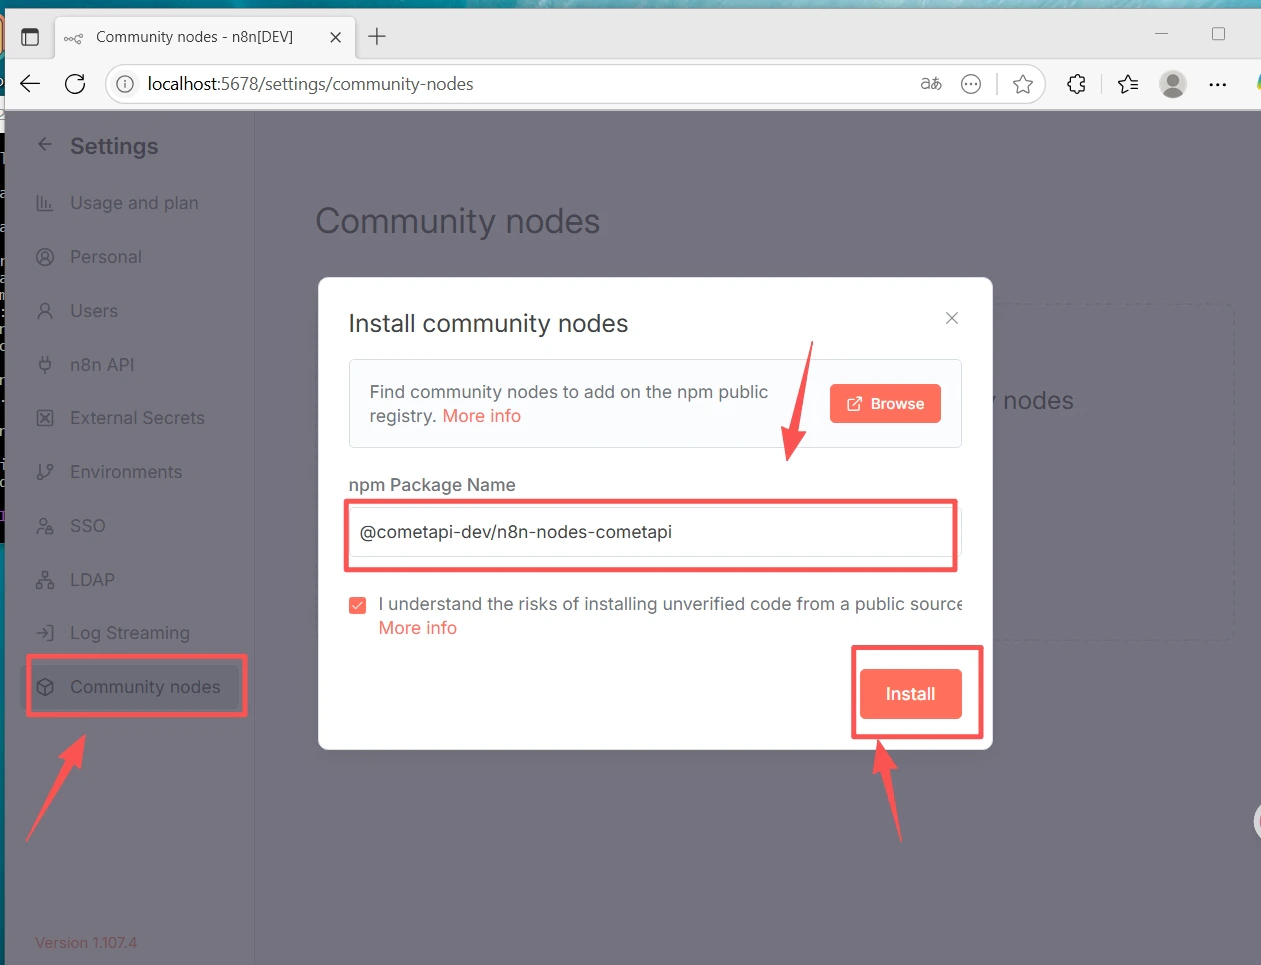
 1. 前往 **Settings**(左下角)→ **Community nodes**
2. 点击 **Install a community node**
3. 输入包名:`@cometapi-dev/n8n-nodes-cometapi`
4. 勾选风险确认框并点击 **Install**
安装完成后,你可以在节点面板中搜索 **CometAPI**。
1. 前往 **Settings**(左下角)→ **Community nodes**
2. 点击 **Install a community node**
3. 输入包名:`@cometapi-dev/n8n-nodes-cometapi`
4. 勾选风险确认框并点击 **Install**
安装完成后,你可以在节点面板中搜索 **CometAPI**。
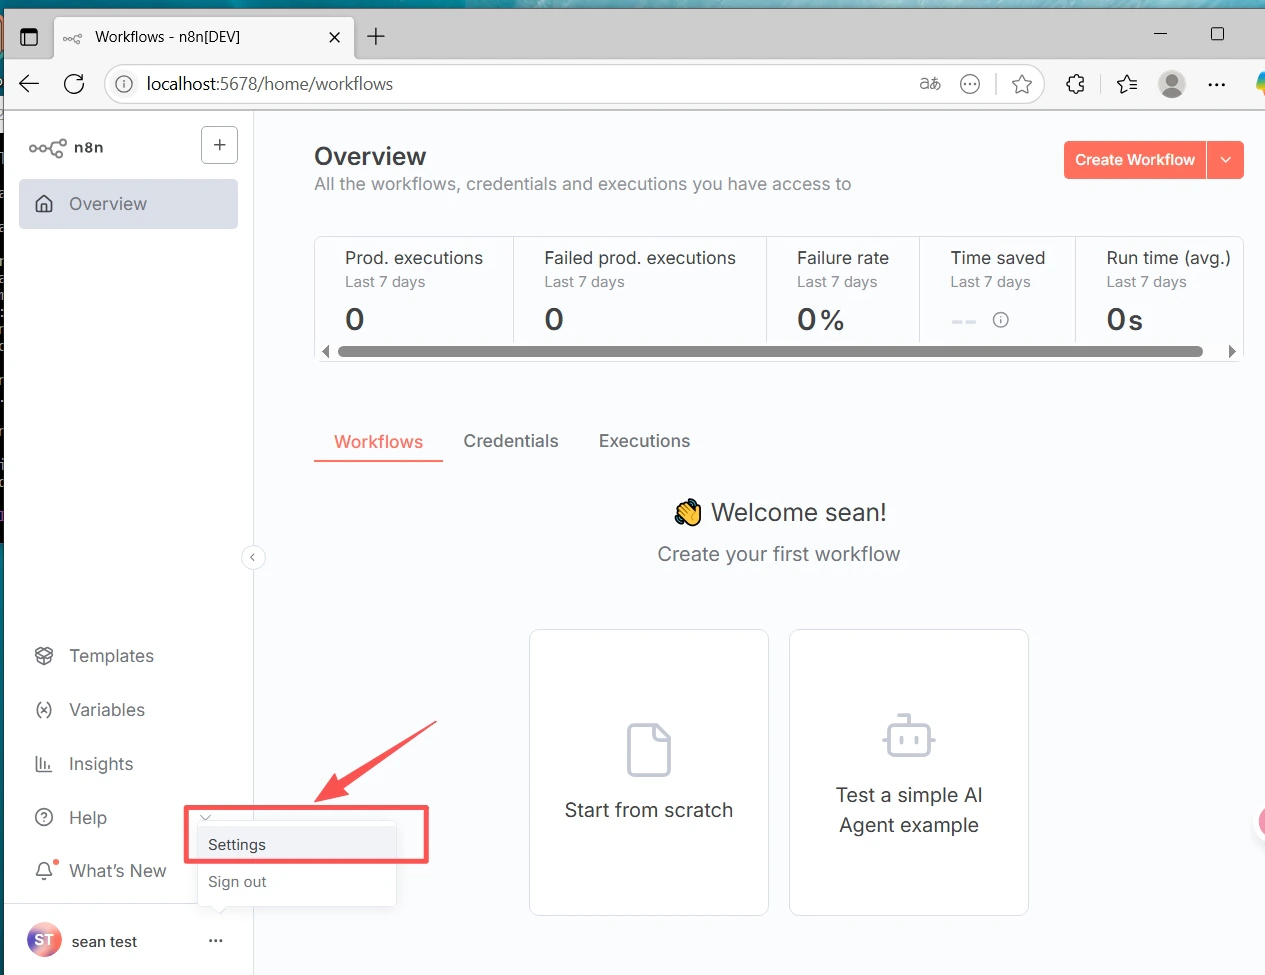
 如果看不到 Community Nodes 部分:请确认你是以 **Owner** 账户登录,并检查 **Settings → Security** 以确认已启用社区节点安装。
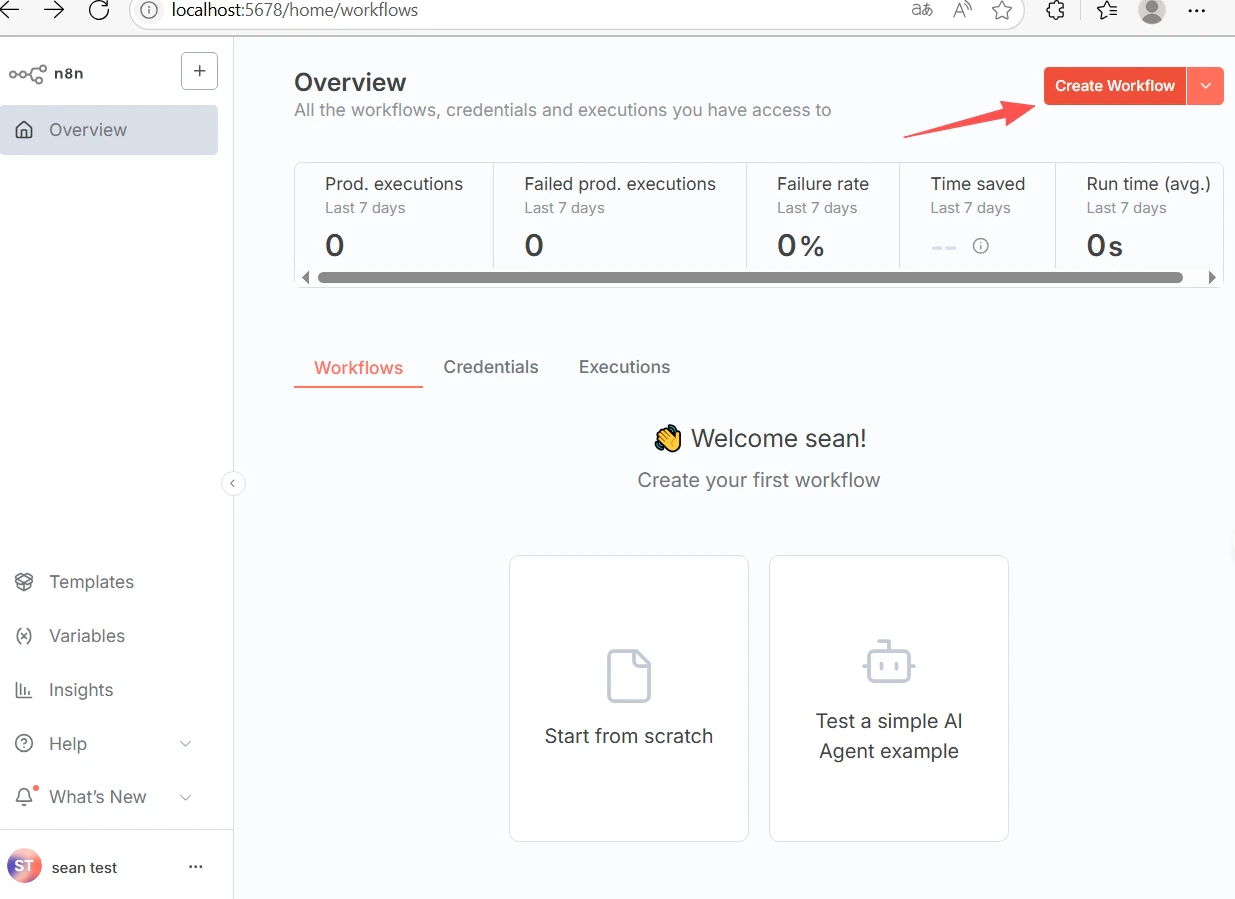
1. 点击顶部的 **+ New** 创建一个工作流。
2. 点击画布上的 **+**,搜索 **CometAPI** 并添加该节点。
如果看不到 Community Nodes 部分:请确认你是以 **Owner** 账户登录,并检查 **Settings → Security** 以确认已启用社区节点安装。
1. 点击顶部的 **+ New** 创建一个工作流。
2. 点击画布上的 **+**,搜索 **CometAPI** 并添加该节点。
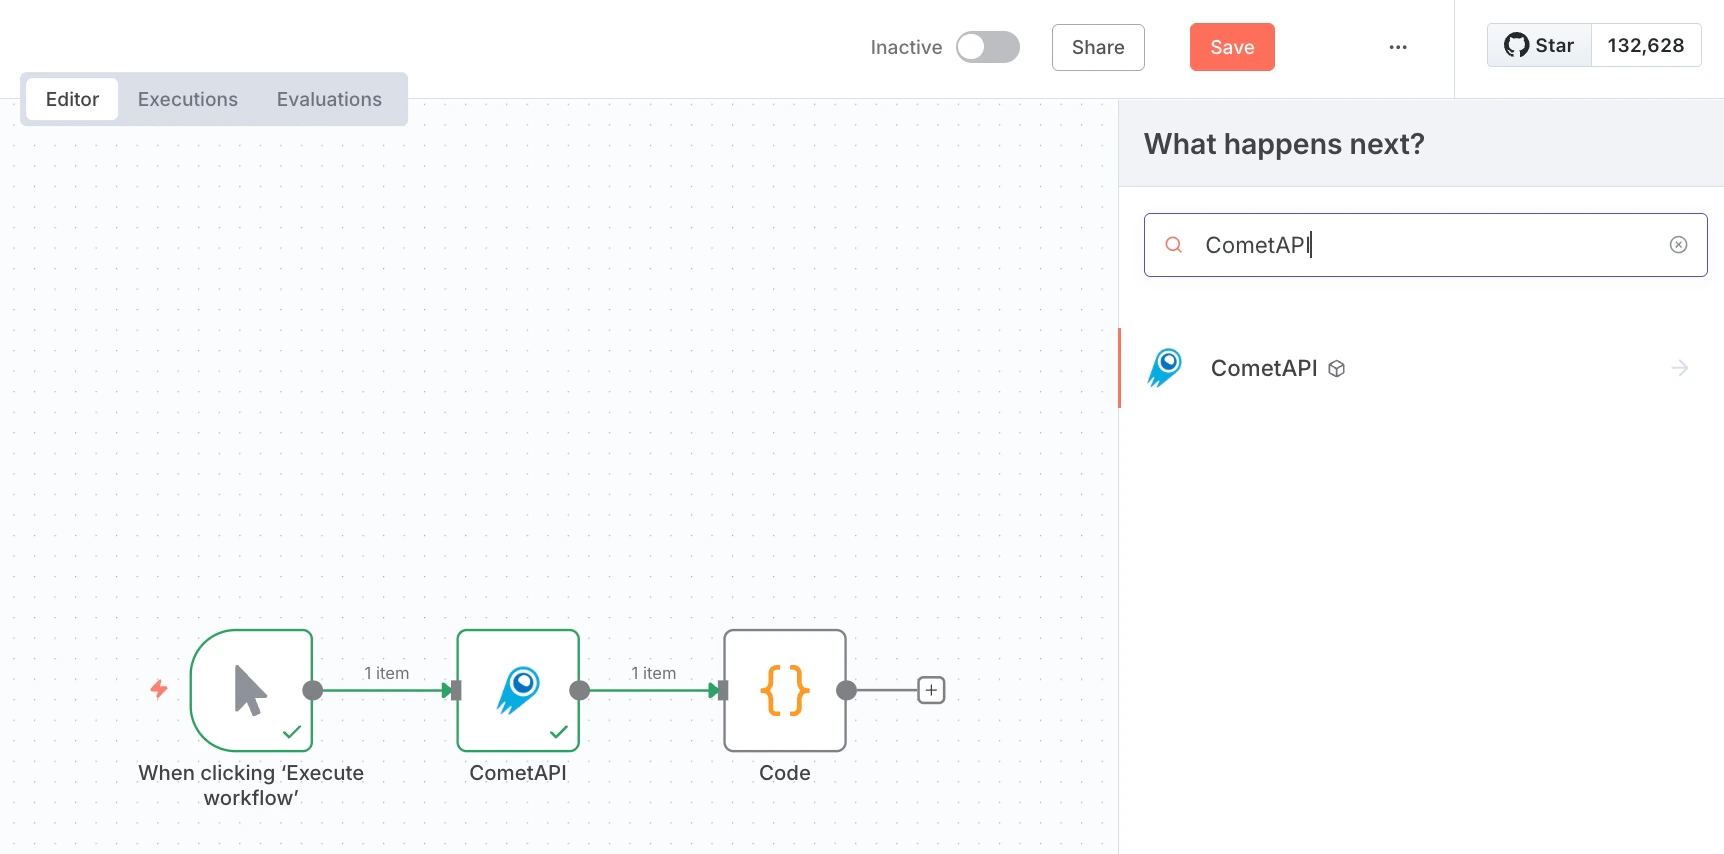 3. 添加一个 **Manual Trigger** 节点,并将其连接到 CometAPI 节点。
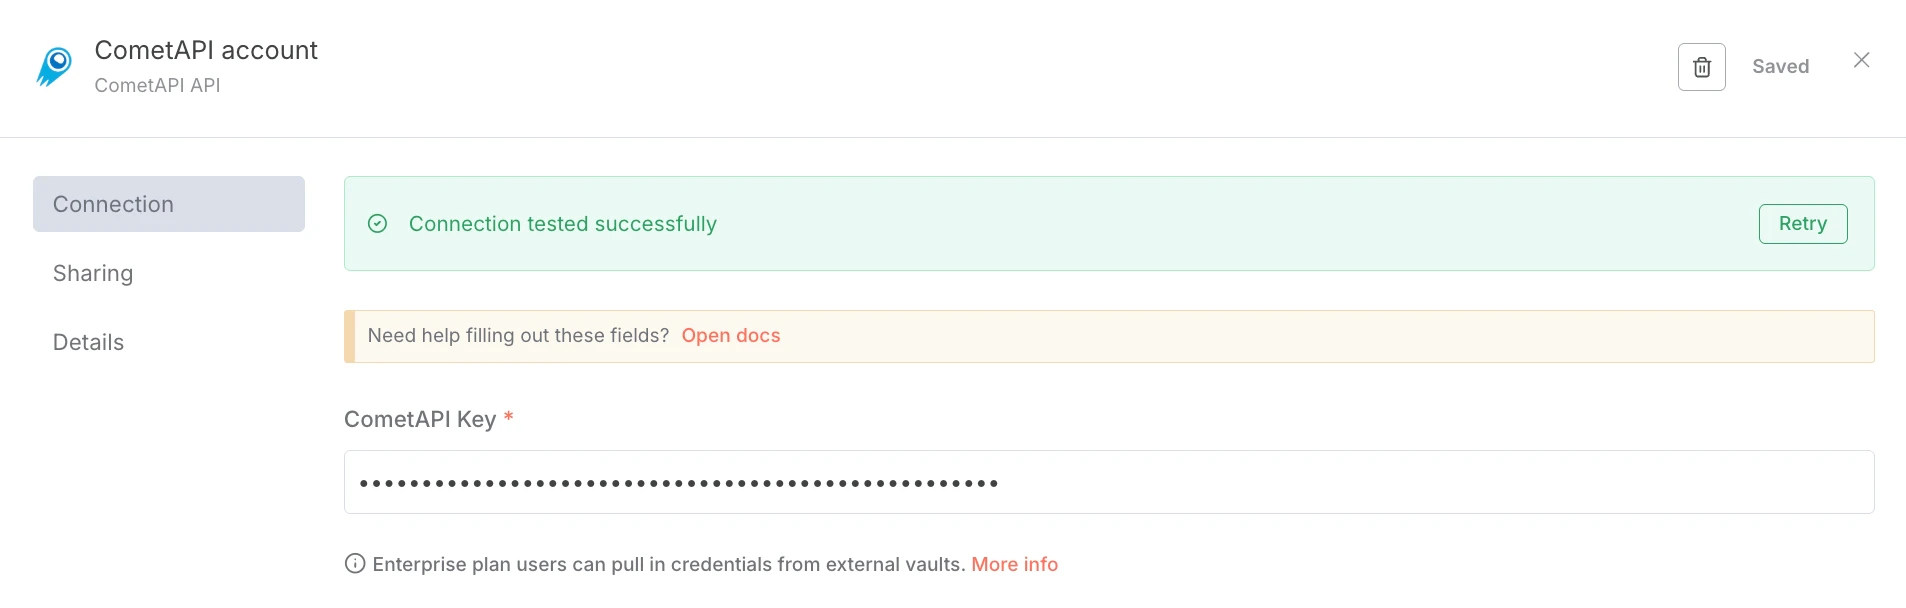
4. 在 CometAPI 节点中,于 **Credential to connect with** 下选择 **Create new**。将你的 CometAPI API key 粘贴到 **CometAPI Key** 中,然后点击 **Save**。Base URL 默认为 `https://api.cometapi.com`,通常无需修改。
3. 添加一个 **Manual Trigger** 节点,并将其连接到 CometAPI 节点。
4. 在 CometAPI 节点中,于 **Credential to connect with** 下选择 **Create new**。将你的 CometAPI API key 粘贴到 **CometAPI Key** 中,然后点击 **Save**。Base URL 默认为 `https://api.cometapi.com`,通常无需修改。
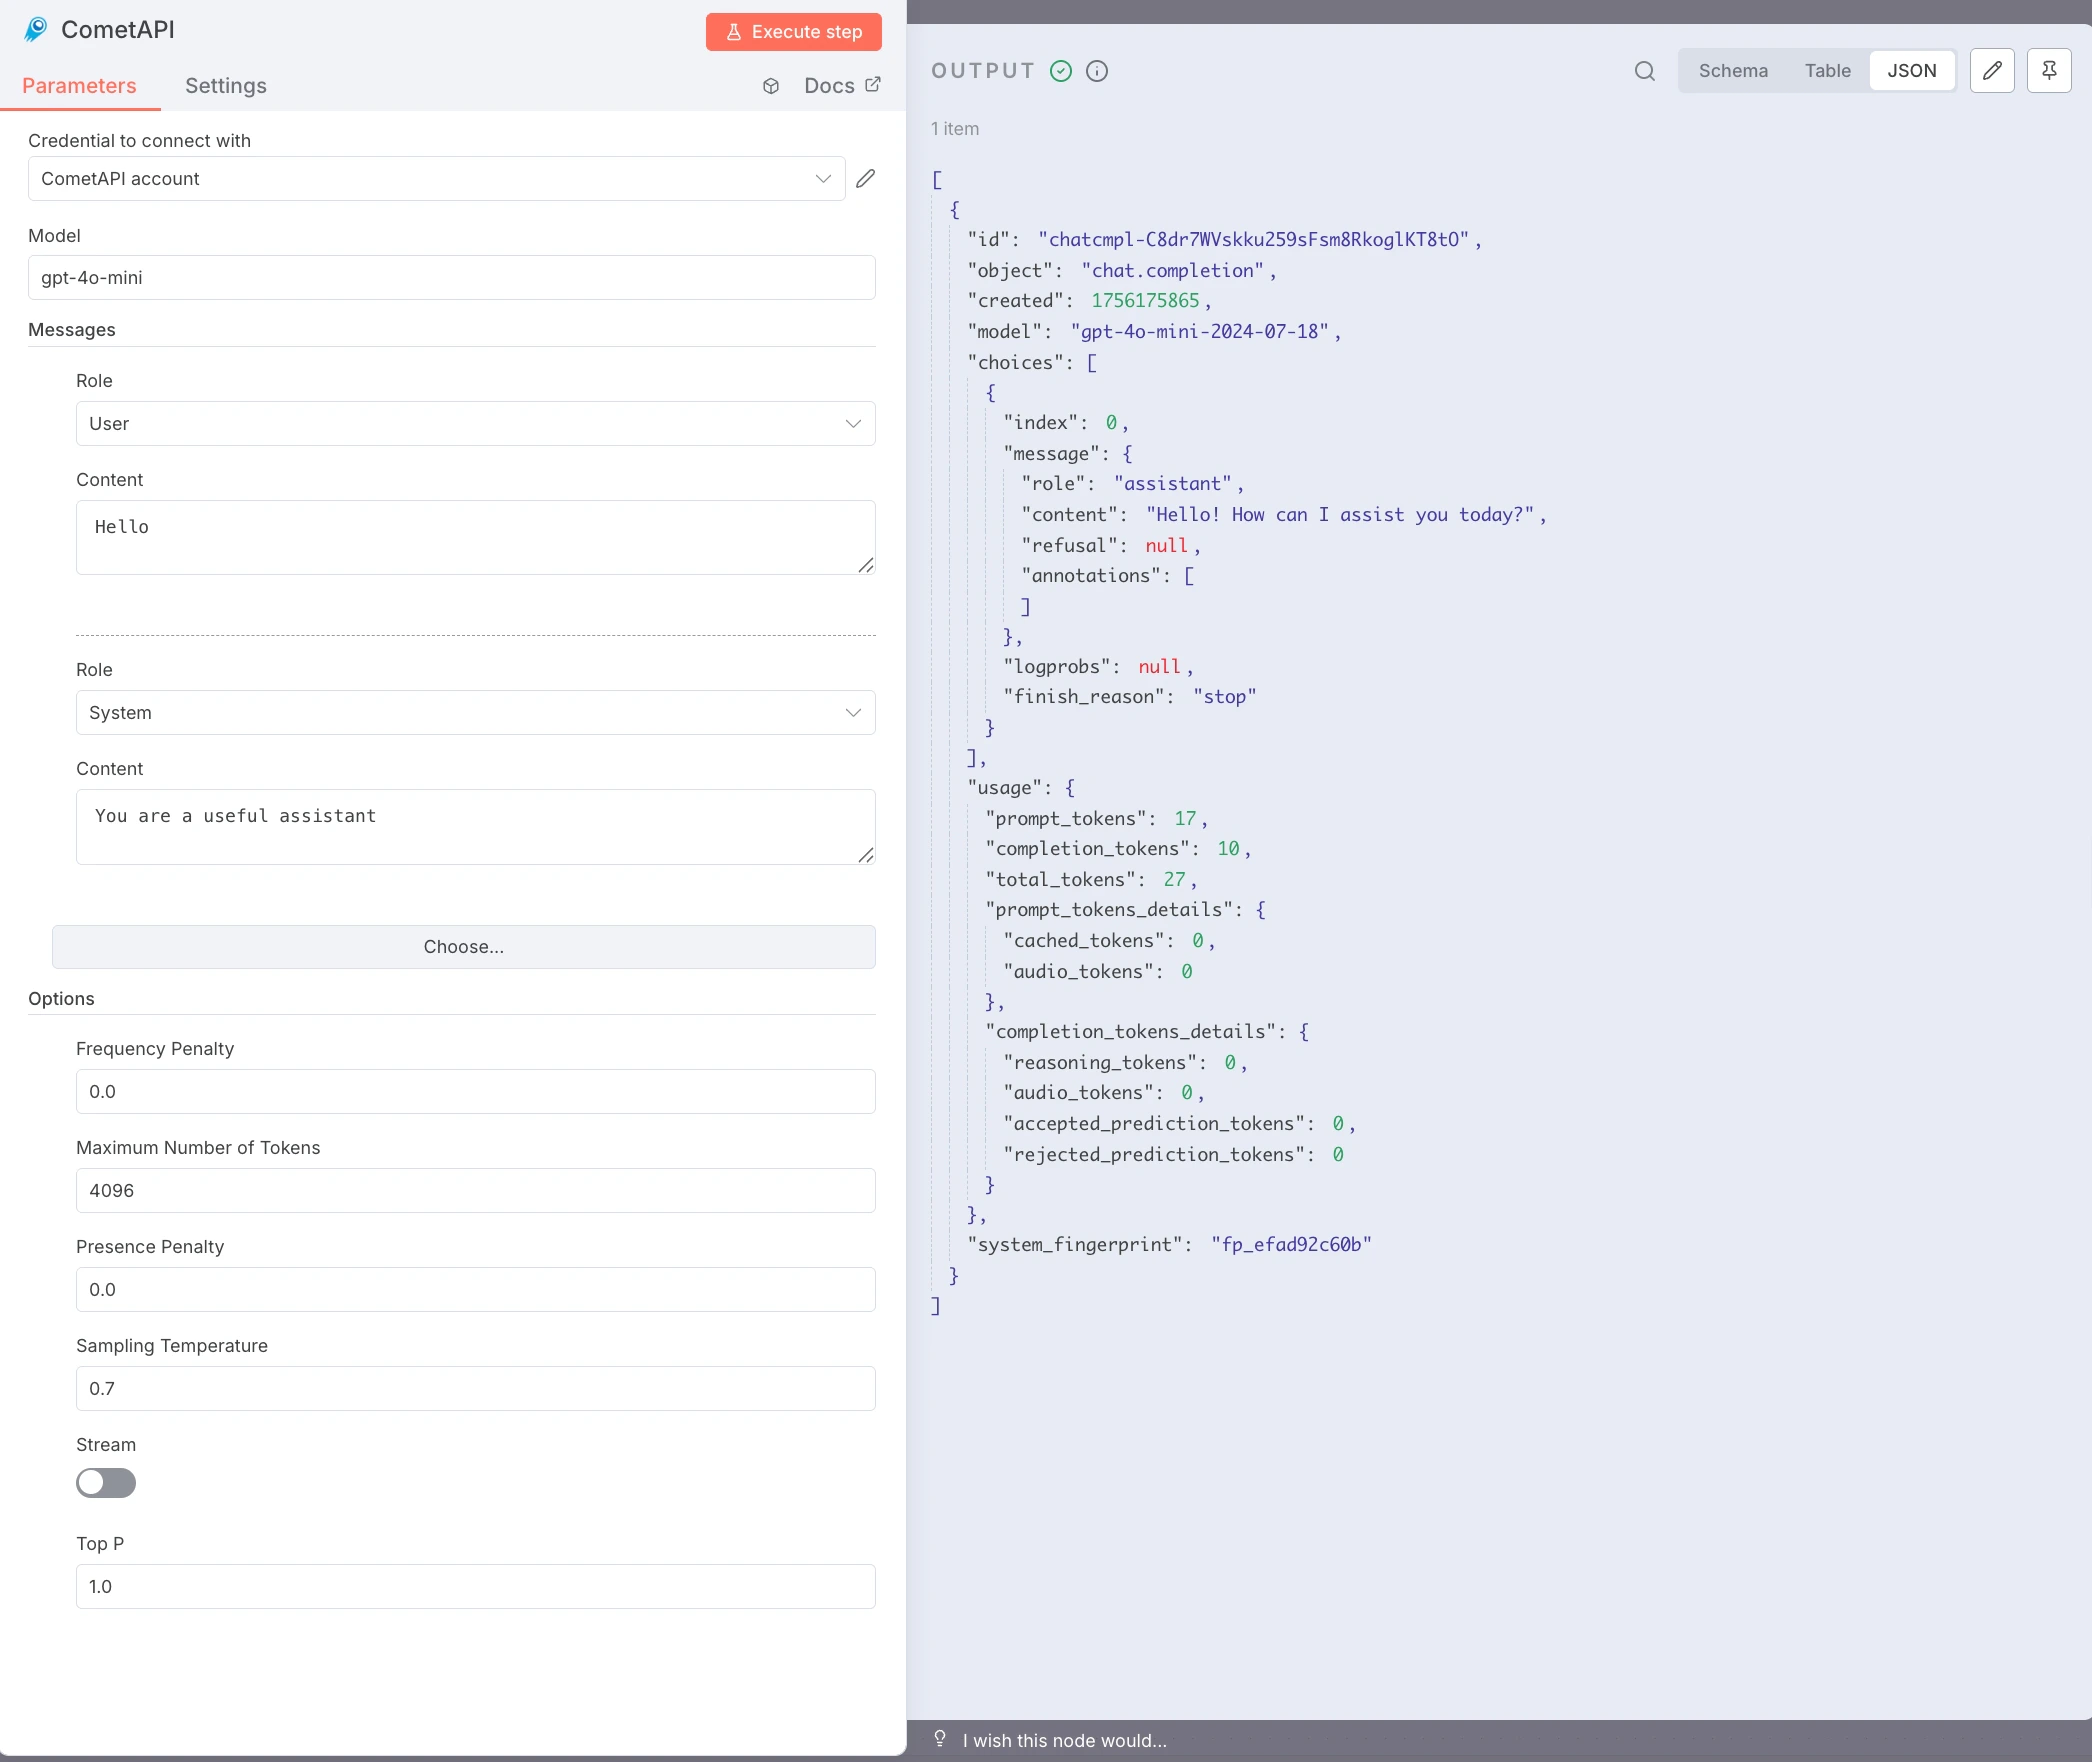
 5. 配置该节点:
* **Model**:输入你想使用的当前 model ID
* **Messages**:将 Role 设为 `user`,Content 设为你的测试 Prompt(例如 `Hello`)
* 可选:添加 `system` 消息,设置 **Max Tokens**、**Temperature** 等
6. 点击 **Execute step** 运行该节点。**Output** 面板会显示 JSON 响应。
5. 配置该节点:
* **Model**:输入你想使用的当前 model ID
* **Messages**:将 Role 设为 `user`,Content 设为你的测试 Prompt(例如 `Hello`)
* 可选:添加 `system` 消息,设置 **Max Tokens**、**Temperature** 等
6. 点击 **Execute step** 运行该节点。**Output** 面板会显示 JSON 响应。
 * **`node-gyp` 或原生构建错误** — 安装构建工具:`sudo apt install build-essential python3`(Debian/Ubuntu)或 Xcode Command Line Tools(macOS)。
* **npm 权限错误(EACCES)** — 使用 nvm 进行用户级 Node.js 安装;无需 `sudo`。
* **端口冲突(`localhost:5678` 不可用)** — 在运行 `n8n start` 前设置 `N8N_PORT=5679`(或其他空闲端口)。
* **缺少 Community Nodes 部分** — 以 **Owner** 账户登录,并检查 **Settings → Security**。
* **公司网络环境下 npm install 失败** — 配置代理:`npm config set proxy http://user:pass@host:port`
* **CometAPI 节点返回 401/403** — 验证你的 API key,并确认你的 CometAPI 套餐可访问该模型。
* **响应为空或 Token 限制错误** — 增加 **Max Tokens**;根据需要调整 **Temperature** 和 **Top P**。
* **关闭终端后 n8n 停止运行** — 使用 pm2:`pm2 start "n8n" --name n8n && pm2 save`。
* **`node-gyp` 或原生构建错误** — 安装构建工具:`sudo apt install build-essential python3`(Debian/Ubuntu)或 Xcode Command Line Tools(macOS)。
* **npm 权限错误(EACCES)** — 使用 nvm 进行用户级 Node.js 安装;无需 `sudo`。
* **端口冲突(`localhost:5678` 不可用)** — 在运行 `n8n start` 前设置 `N8N_PORT=5679`(或其他空闲端口)。
* **缺少 Community Nodes 部分** — 以 **Owner** 账户登录,并检查 **Settings → Security**。
* **公司网络环境下 npm install 失败** — 配置代理:`npm config set proxy http://user:pass@host:port`
* **CometAPI 节点返回 401/403** — 验证你的 API key,并确认你的 CometAPI 套餐可访问该模型。
* **响应为空或 Token 限制错误** — 增加 **Max Tokens**;根据需要调整 **Temperature** 和 **Top P**。
* **关闭终端后 n8n 停止运行** — 使用 pm2:`pm2 start "n8n" --name n8n && pm2 save`。