メインコンテンツへスキップ
このガイドでは、Google Gen AI SDK を使用して CometAPI 経由で Gemini 画像モデルを利用する方法を紹介します。対象内容は次のとおりです。
  • テキストから画像の生成
  • 画像から画像への編集
  • 複数画像の合成
  • 生成した画像の保存
  • Base URL: https://api.cometapi.com
  • SDK のインストール: pip install google-genai(Python)または npm install @google/genai(Node.js)

セットアップ

CometAPI の base URL を使ってクライアントを初期化します。
from google import genai
from google.genai import types
import os

COMETAPI_KEY = os.environ.get("COMETAPI_KEY") or "<YOUR_COMETAPI_KEY>"

client = genai.Client(
    http_options={"api_version": "v1beta", "base_url": "https://api.cometapi.com"},
    api_key=COMETAPI_KEY,
)

テキストから画像を生成

テキストプロンプトから画像を生成し、ファイルに保存します。
from google import genai
from google.genai import types
from PIL import Image
import os

client = genai.Client(
    http_options={"api_version": "v1beta", "base_url": "https://api.cometapi.com"},
    api_key=os.environ.get("COMETAPI_KEY"),
)

response = client.models.generate_content(
    model="gemini-3.1-flash-image-preview",
    contents="Create a picture of a nano banana dish in a fancy restaurant with a Gemini theme",
    config=types.GenerateContentConfig(
        response_modalities=["TEXT", "IMAGE"],
    ),
)

for part in response.parts:
    if part.text is not None:
        print(part.text)
    elif part.inline_data is not None:
        image = part.as_image()
        image.save("generated_image.png")
        print("Image saved to generated_image.png")
レスポンス構造: 画像データは candidates[0].content.parts にあり、ここにはテキストパートおよび/または画像パートが含まれる場合があります。
{
  "candidates": [{
    "content": {
      "parts": [
        { "text": "Here is your image..." },
        {
          "inlineData": {
            "mimeType": "image/png",
            "data": "<base64-encoded-image>"
          }
        }
      ]
    }
  }]
}

画像から画像への生成

入力画像をアップロードし、テキストプロンプトで変換します。
from google import genai
from google.genai import types
from PIL import Image
import os

client = genai.Client(
    http_options={"api_version": "v1beta", "base_url": "https://api.cometapi.com"},
    api_key=os.environ.get("COMETAPI_KEY"),
)

# Load the source image
source_image = Image.open("source.jpg")

response = client.models.generate_content(
    model="gemini-3.1-flash-image-preview",
    contents=["Transform this into a watercolor painting", source_image],
    config=types.GenerateContentConfig(
        response_modalities=["TEXT", "IMAGE"],
    ),
)

for part in response.parts:
    if part.text is not None:
        print(part.text)
    elif part.inline_data is not None:
        image = part.as_image()
        image.save("watercolor_output.png")
  • Python SDK は PIL.Image オブジェクトを直接受け付けるため、手動で Base64 エンコードする必要はありません。
  • 生の Base64 文字列を渡す際は、data:image/jpeg;base64, のプレフィックスを含めないでください

複数画像の合成

複数の入力画像から新しい画像を生成します。CometAPI は2つのアプローチをサポートしています。

方法1: 単一のコラージュ画像

複数の元画像を1つのコラージュにまとめ、その後で希望する出力内容を記述します。
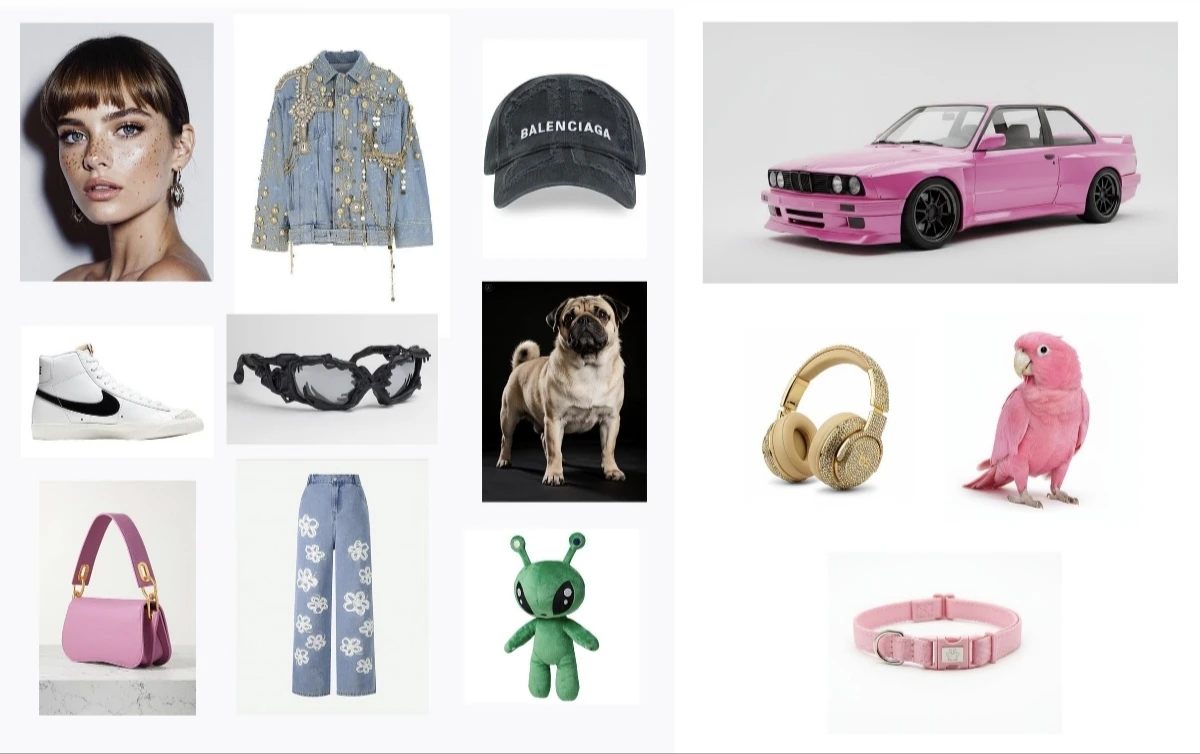
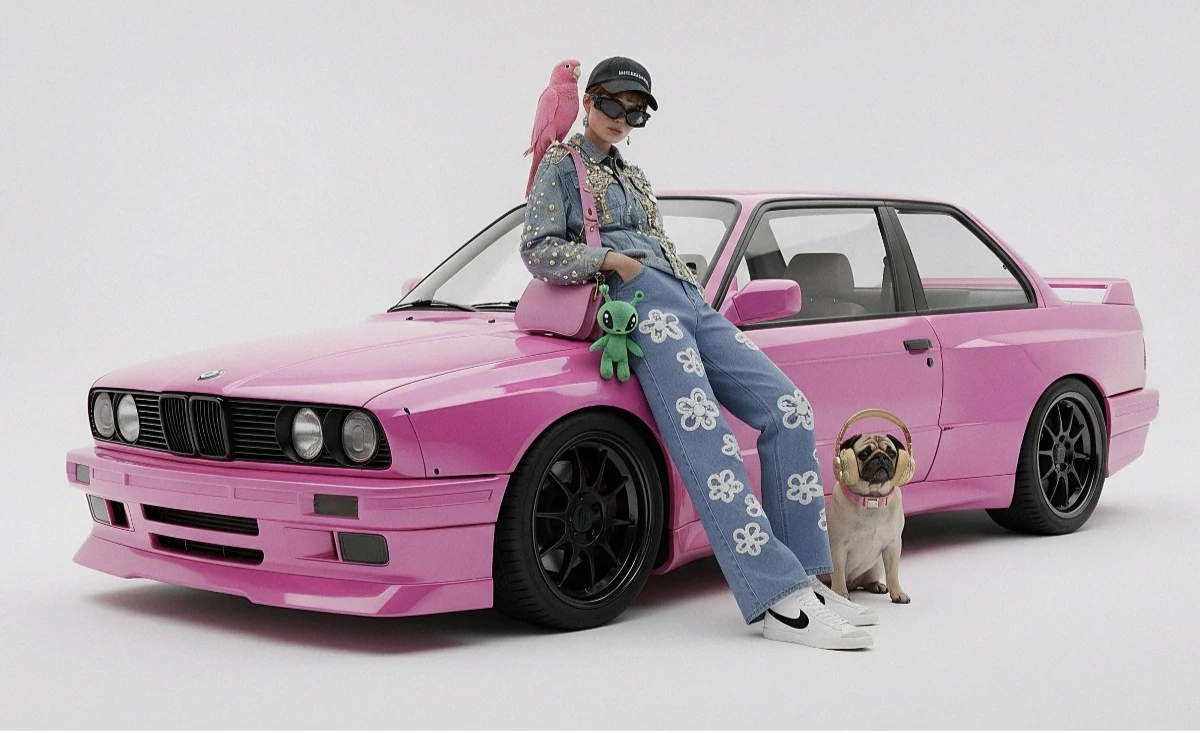
入力コラージュの例
生成された出力
from google import genai
from google.genai import types
from PIL import Image
import os

client = genai.Client(
    http_options={"api_version": "v1beta", "base_url": "https://api.cometapi.com"},
    api_key=os.environ.get("COMETAPI_KEY"),
)

collage = Image.open("collage.jpg")

response = client.models.generate_content(
    model="gemini-3.1-flash-image-preview",
    contents=[
        "A model is posing and leaning against a pink BMW with a green alien keychain attached to a pink handbag, a pink parrot on her shoulder, and a pug wearing a pink collar and gold headphones",
        collage,
    ],
    config=types.GenerateContentConfig(
        response_modalities=["TEXT", "IMAGE"],
    ),
)

for part in response.parts:
    if part.inline_data is not None:
        part.as_image().save("composition_output.png")

方法2: 複数の個別画像(最大14枚)

複数の画像を直接渡します。Gemini 3 モデルは最大14枚の参照画像(オブジェクト + キャラクター)をサポートします。
from google import genai
from google.genai import types
from PIL import Image
import os

client = genai.Client(
    http_options={"api_version": "v1beta", "base_url": "https://api.cometapi.com"},
    api_key=os.environ.get("COMETAPI_KEY"),
)

image1 = Image.open("image1.jpg")
image2 = Image.open("image2.jpg")
image3 = Image.open("image3.jpg")

response = client.models.generate_content(
    model="gemini-3.1-flash-image-preview",
    contents=["Merge the three images", image1, image2, image3],
    config=types.GenerateContentConfig(
        response_modalities=["TEXT", "IMAGE"],
    ),
)

for part in response.parts:
    if part.inline_data is not None:
        part.as_image().save("merged_output.png")
複数画像生成の結果

4K画像生成

高解像度出力を行うには、aspect_ratioimage_size を含む image_config を指定します。
from google import genai
from google.genai import types
import os

client = genai.Client(
    http_options={"api_version": "v1beta", "base_url": "https://api.cometapi.com"},
    api_key=os.environ.get("COMETAPI_KEY"),
)

response = client.models.generate_content(
    model="gemini-3.1-flash-image-preview",
    contents="Da Vinci style anatomical sketch of a Monarch butterfly on textured parchment",
    config=types.GenerateContentConfig(
        response_modalities=["TEXT", "IMAGE"],
        image_config=types.ImageConfig(
            aspect_ratio="1:1",
            image_size="4K",
        ),
    ),
)

for part in response.parts:
    if part.text is not None:
        print(part.text)
    elif image := part.as_image():
        image.save("butterfly_4k.png")

マルチターン画像編集(チャット)

SDK のチャット機能を使用して、画像を反復的にブラッシュアップできます。
from google import genai
from google.genai import types
import os

client = genai.Client(
    http_options={"api_version": "v1beta", "base_url": "https://api.cometapi.com"},
    api_key=os.environ.get("COMETAPI_KEY"),
)

chat = client.chats.create(
    model="gemini-3.1-flash-image-preview",
    config=types.GenerateContentConfig(
        response_modalities=["TEXT", "IMAGE"],
    ),
)

# First turn: generate
response = chat.send_message(
    "Create a vibrant infographic explaining photosynthesis as a recipe, styled like a colorful kids cookbook"
)

for part in response.parts:
    if part.text is not None:
        print(part.text)
    elif image := part.as_image():
        image.save("photosynthesis.png")

# Second turn: refine
response = chat.send_message("Update this infographic to be in Spanish. Do not change any other elements.")

for part in response.parts:
    if part.text is not None:
        print(part.text)
    elif image := part.as_image():
        image.save("photosynthesis_spanish.png")

ヒント

スタイルのキーワード(例: “cyberpunk, film grain, low contrast”)、アスペクト比、被写体、背景、ライティング、ディテールのレベルを指定します。
生の HTTP を使用する場合は、data:image/png;base64, プレフィックスを含めず、Base64 の生文字列のみを使用してください。Python SDK では、PIL.Image オブジェクトによってこれが自動的に処理されます。
テキストなしで画像出力を確実に行うには、"responseModalities"["IMAGE"] のみに設定します。
詳細については、API Reference を参照してください。 公式ドキュメント: Gemini Image Generation