

先決條件
- Linux(Ubuntu/Debian/CentOS 等)或 macOS
- 2 GB 以上 RAM、10 GB 以上可用磁碟空間
- 可連線至公開 npm registry 的 Shell 存取權限
- Node.js 18.x 或 20.x LTS(請參閱步驟 1)
- 擁有啟用中 API key 的 CometAPI 帳號 — 在此取得
1
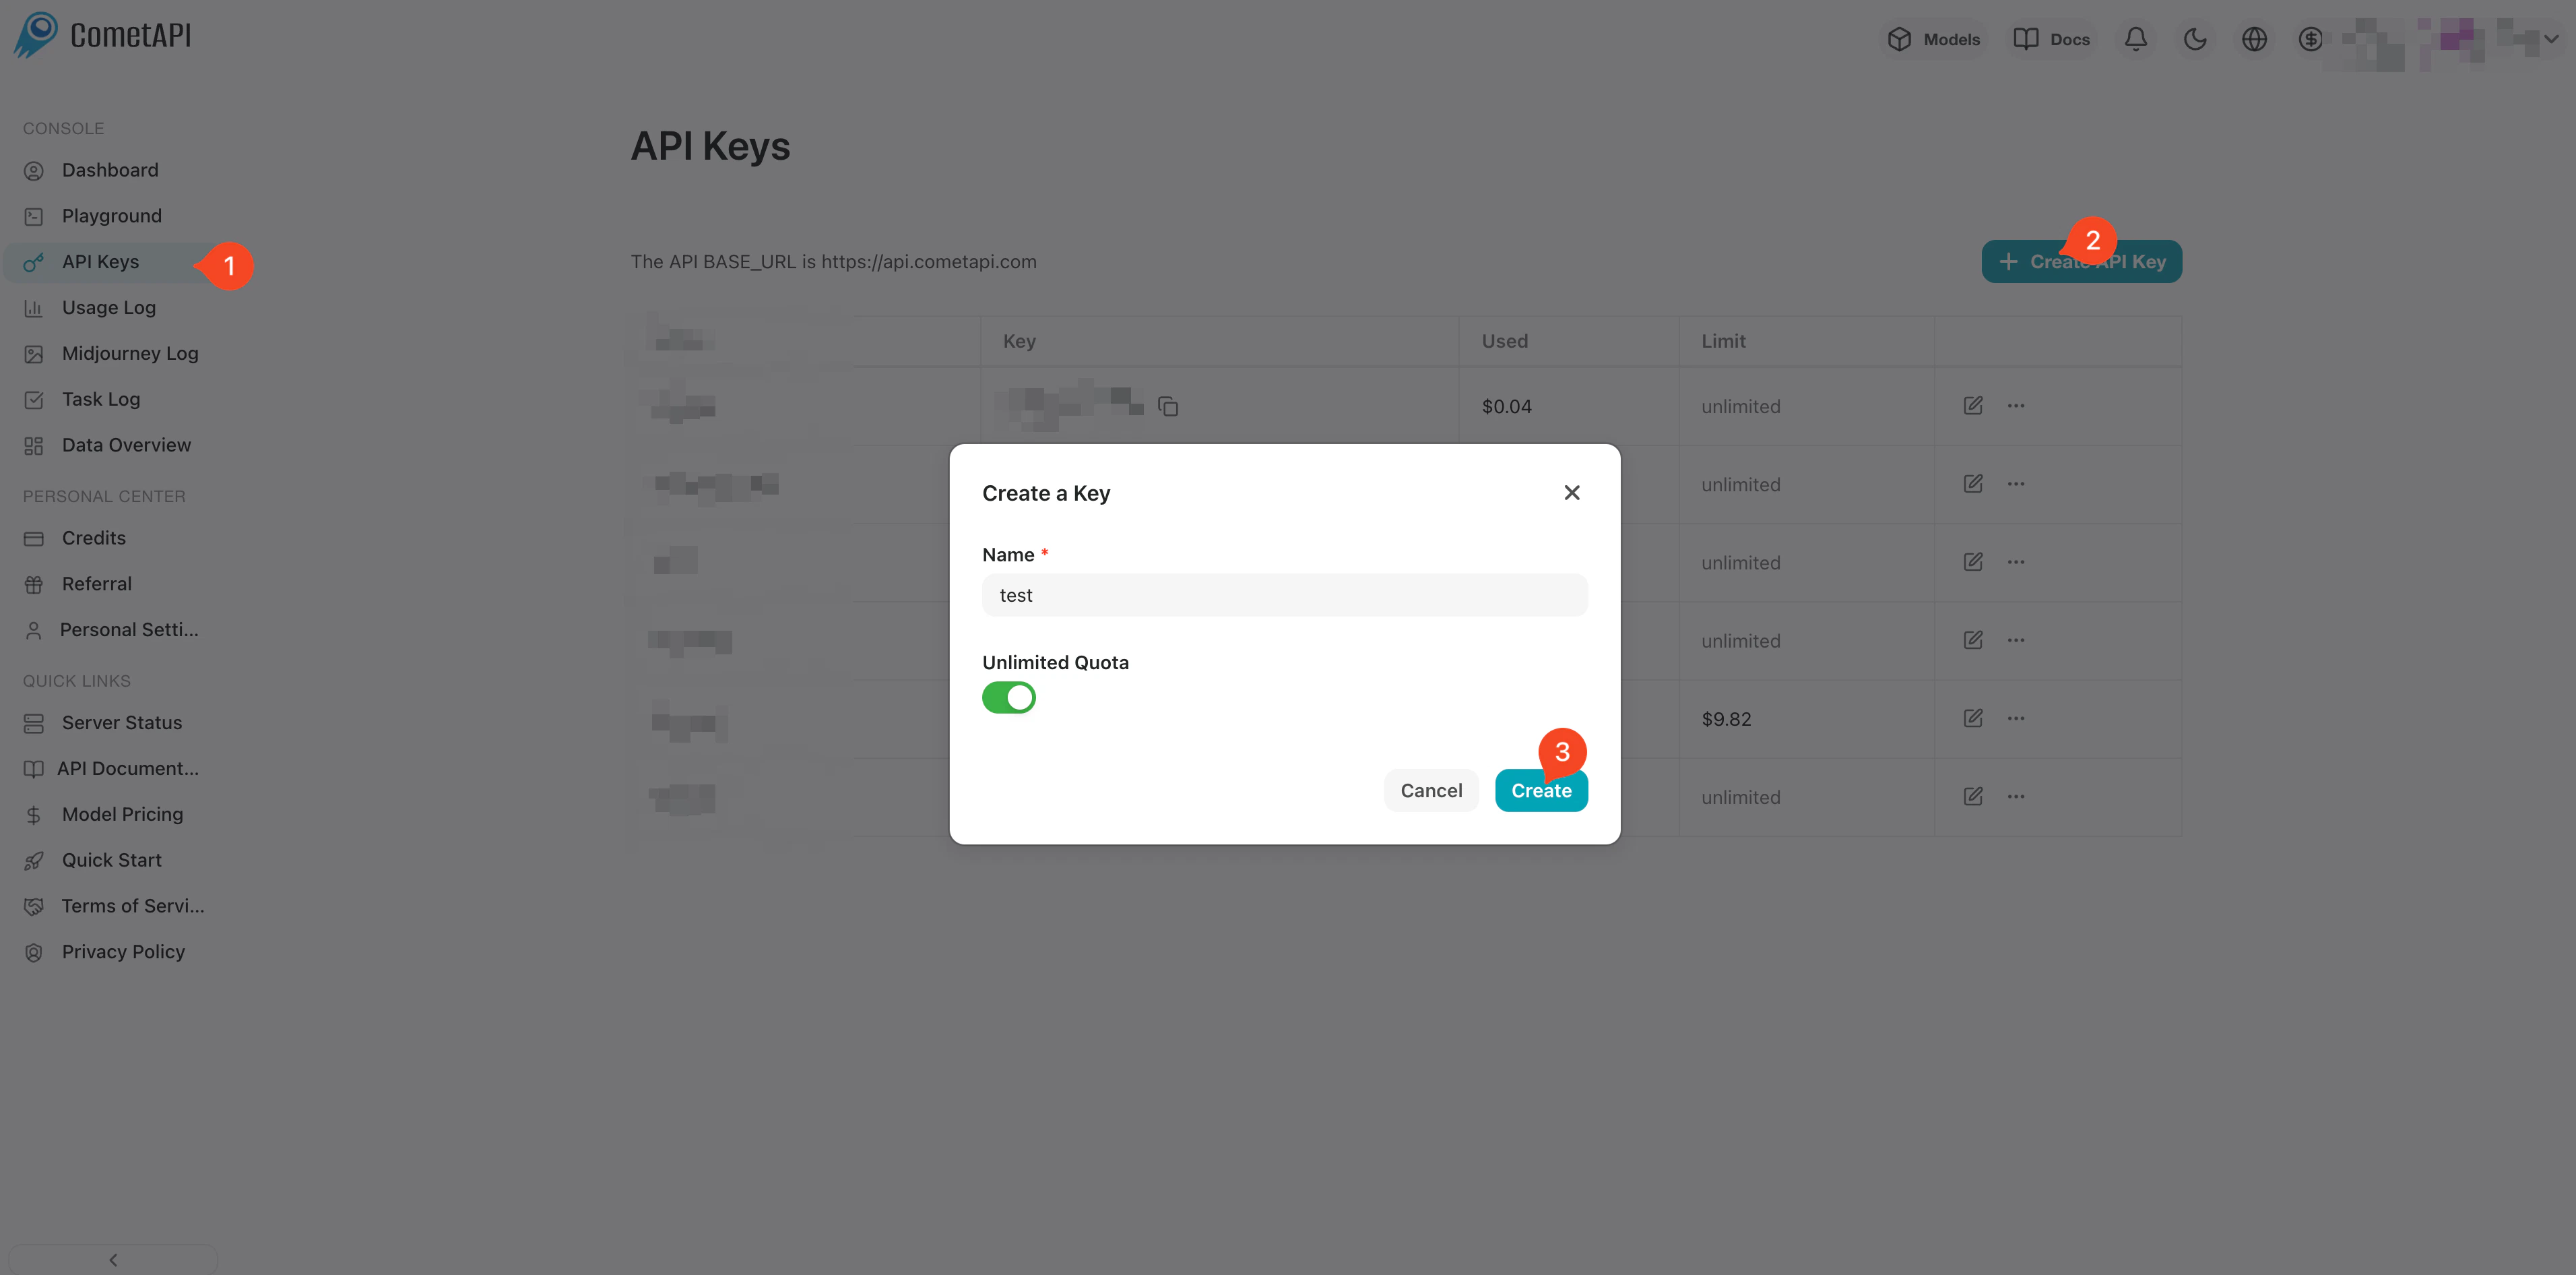
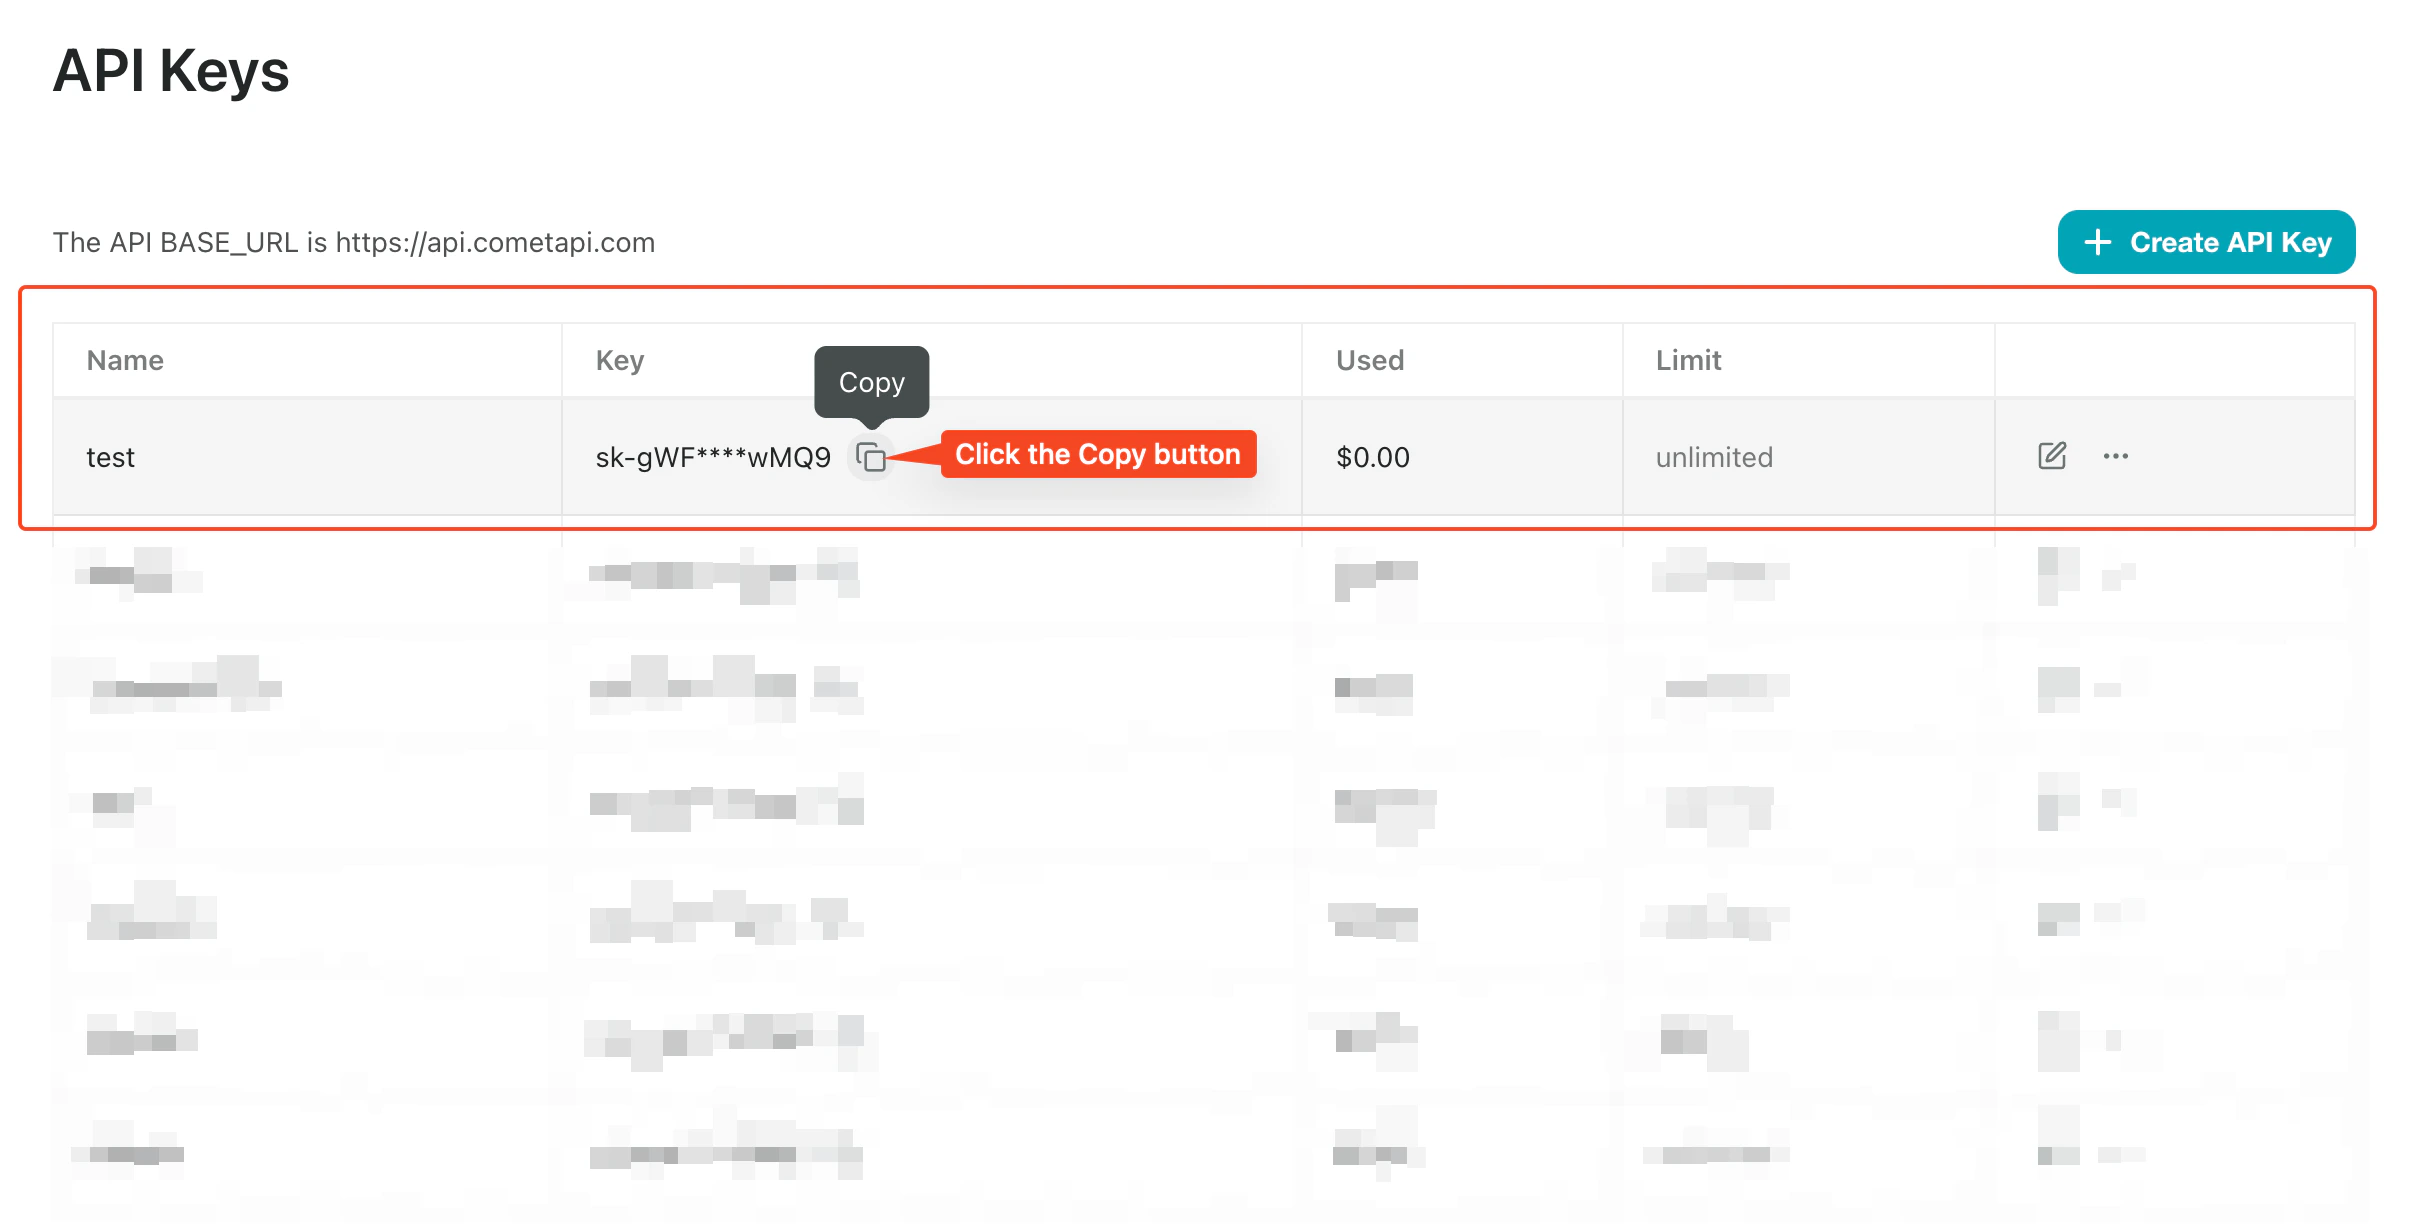
取得你的 CometAPI API key
2
透過 nvm 安裝 Node.js
n8n 1.x 需要 Node.js 18.x 或 20.x。建議使用 nvm:
如果你之後看到
n8n: command not found,請重新啟動終端機,或確認由 nvm 管理的 npm 全域 bin 目錄已加入你的 PATH。3
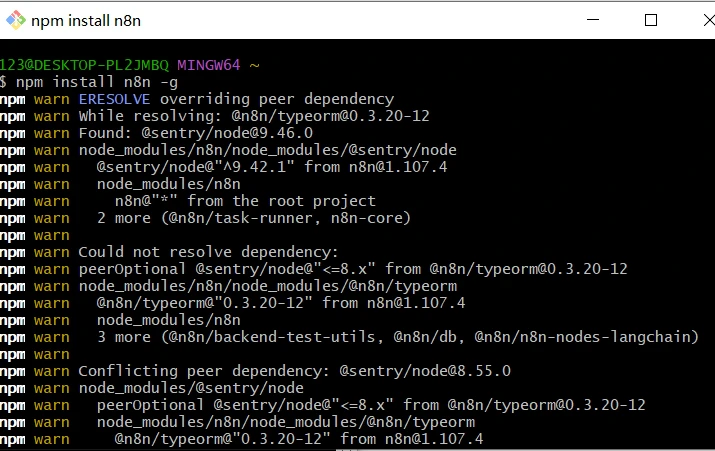
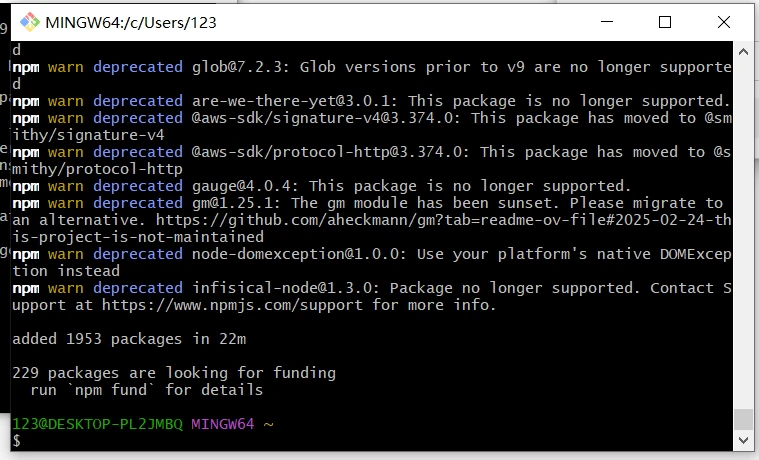
安裝並啟動 n8n
4
建立你的 owner 帳號
在瀏覽器中開啟 http://localhost:5678/。首次執行時,設定精靈會要求你建立 Owner 帳號(電子郵件 + 密碼)。完成後登入。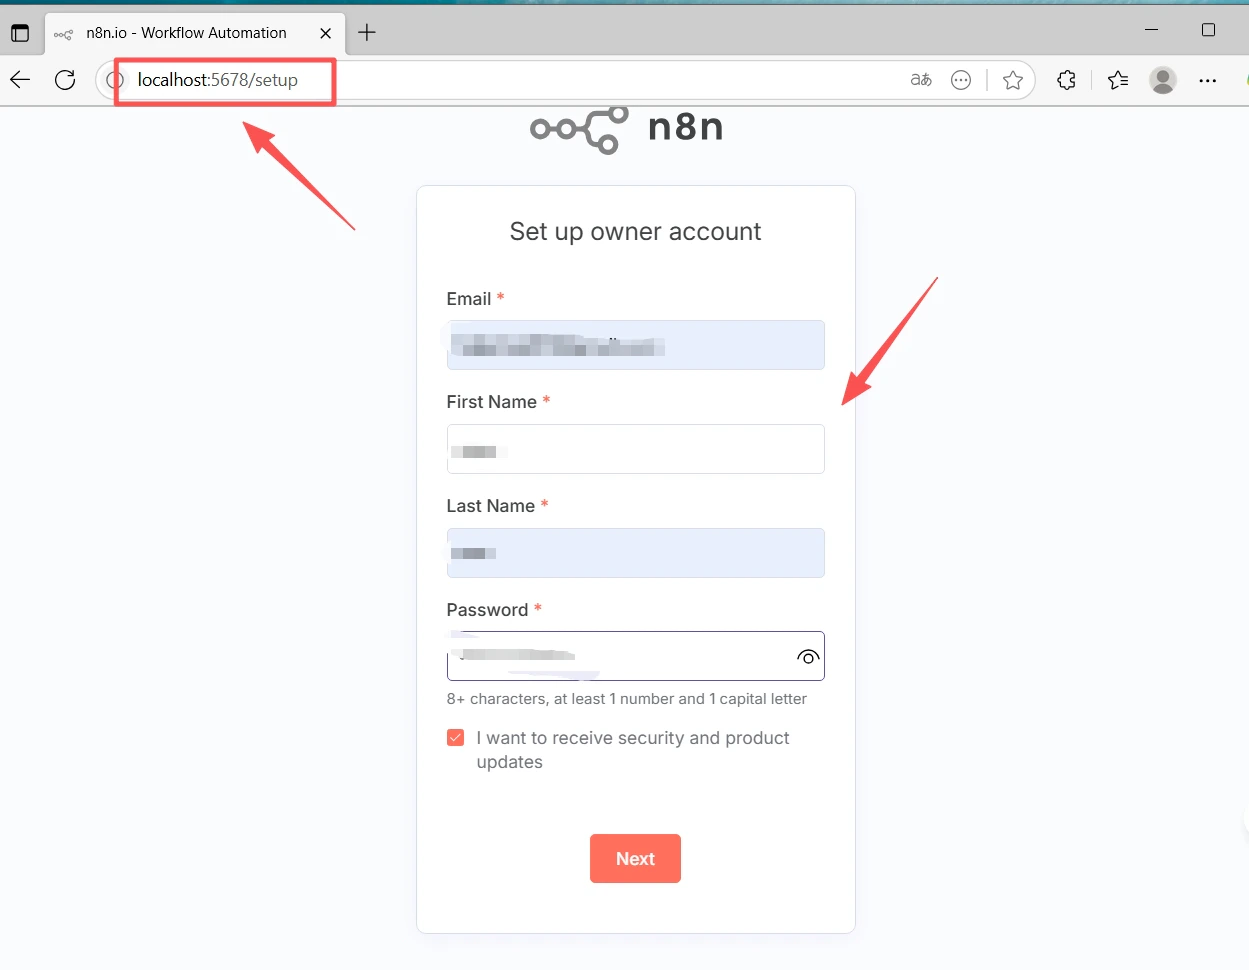
5
安裝 CometAPI 社群節點
- 前往 Settings(左下角)→ Community nodes
- 點擊 Install a community node
- 輸入套件名稱:
@cometapi-dev/n8n-nodes-cometapi - 勾選風險確認方塊,然後點擊 Install
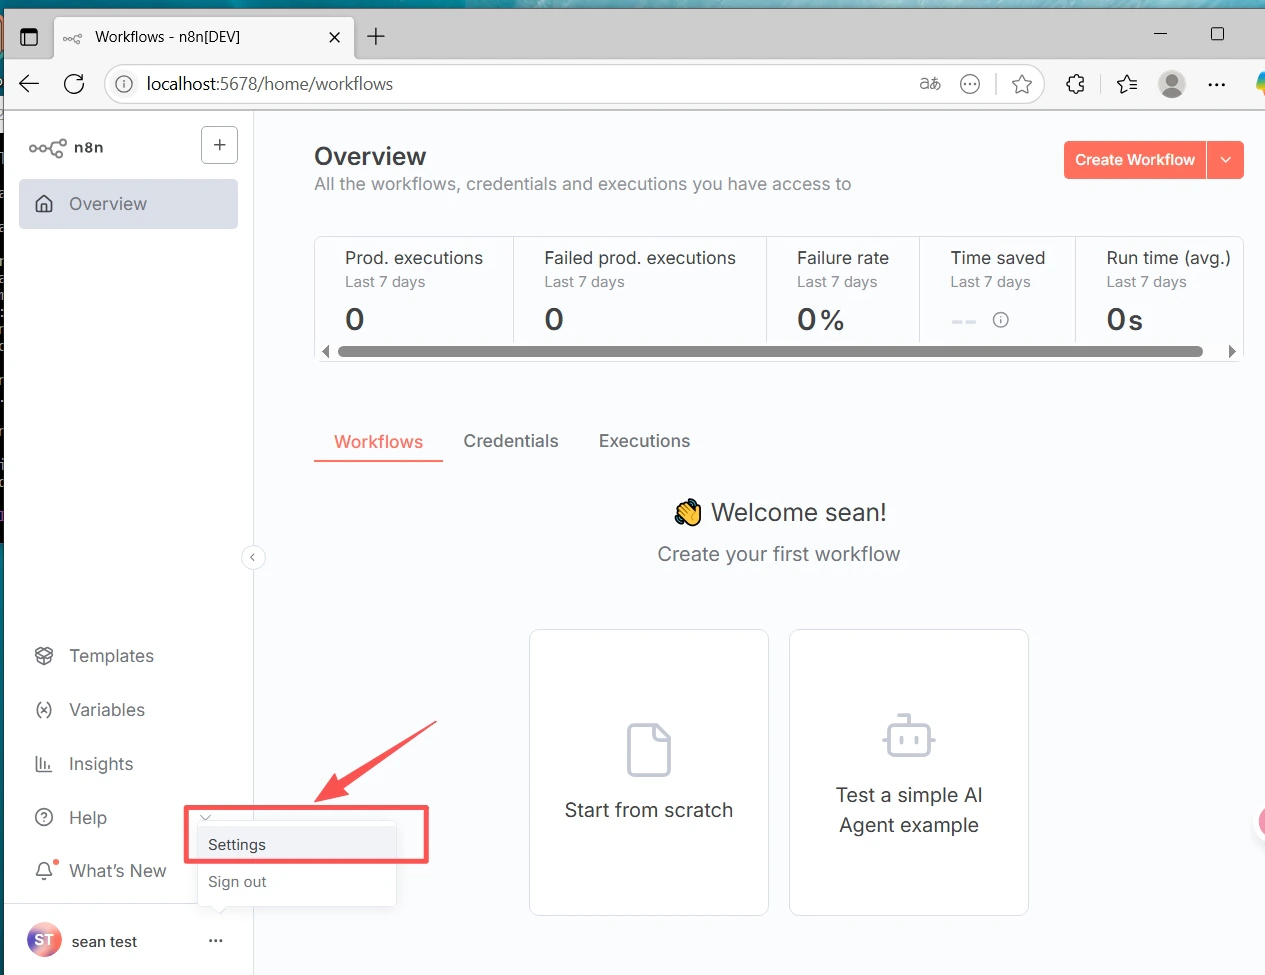
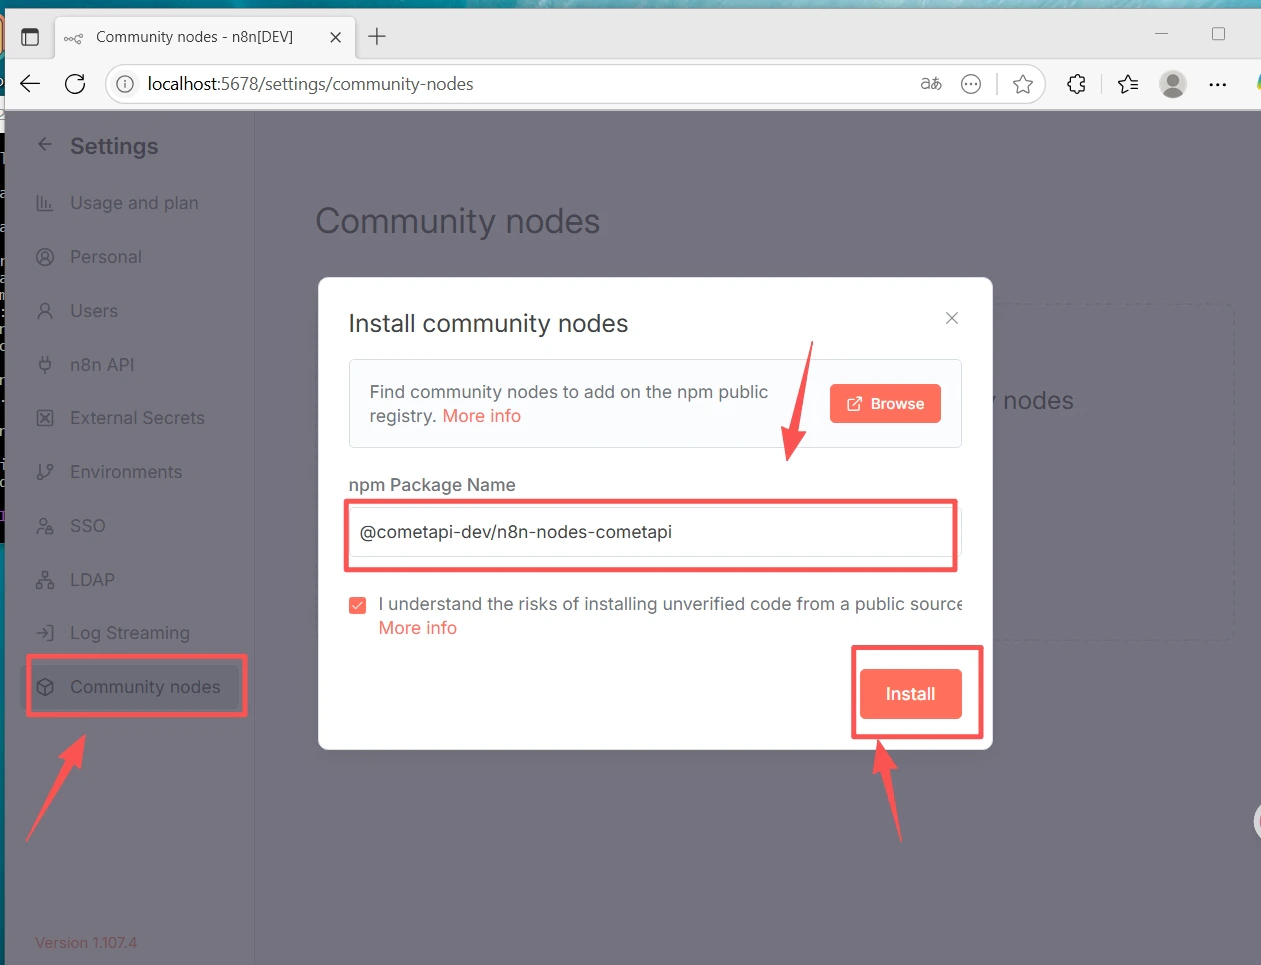
如果找不到 Community Nodes 區段:請確認你是以 Owner 帳號登入,並檢查 Settings → Security 以確認已啟用社群節點安裝。
6
建立工作流程並設定憑證
- 點擊頂部的 + New 以建立工作流程。
- 點擊畫布上的 +,搜尋 CometAPI 以新增節點。
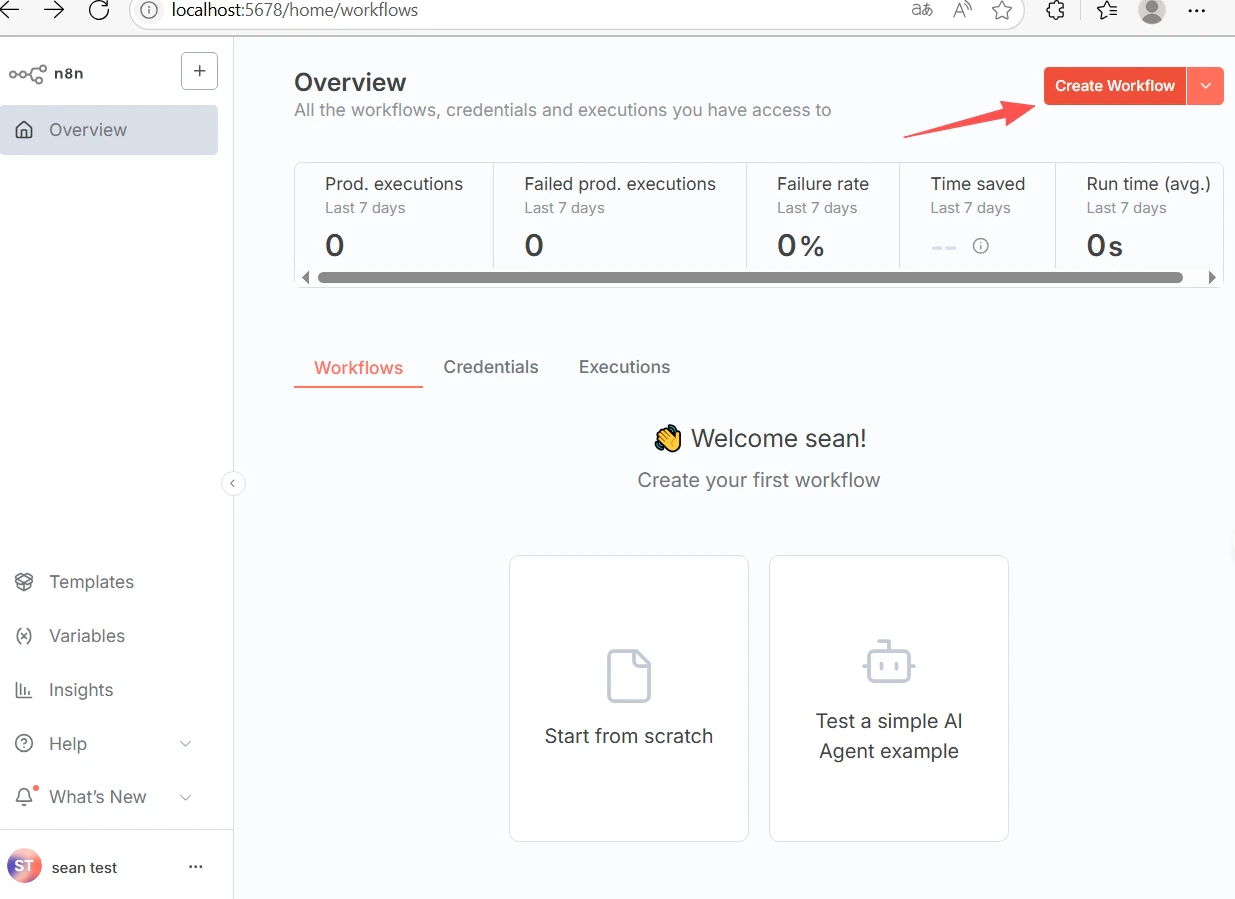
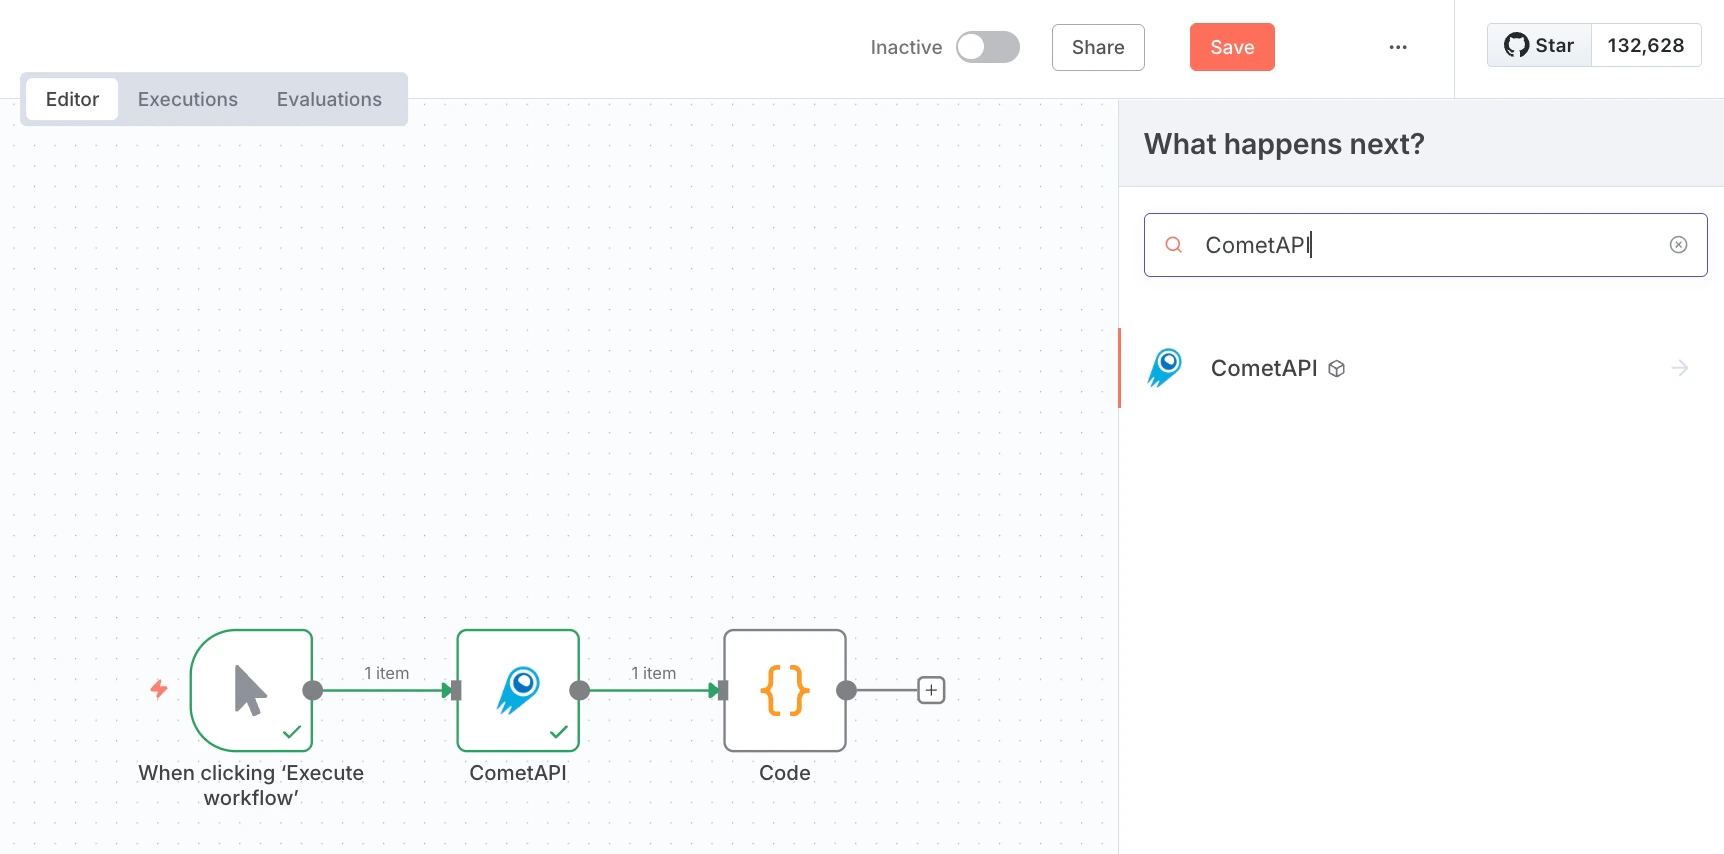
- 新增一個 Manual Trigger 節點,並將其連接到 CometAPI 節點。
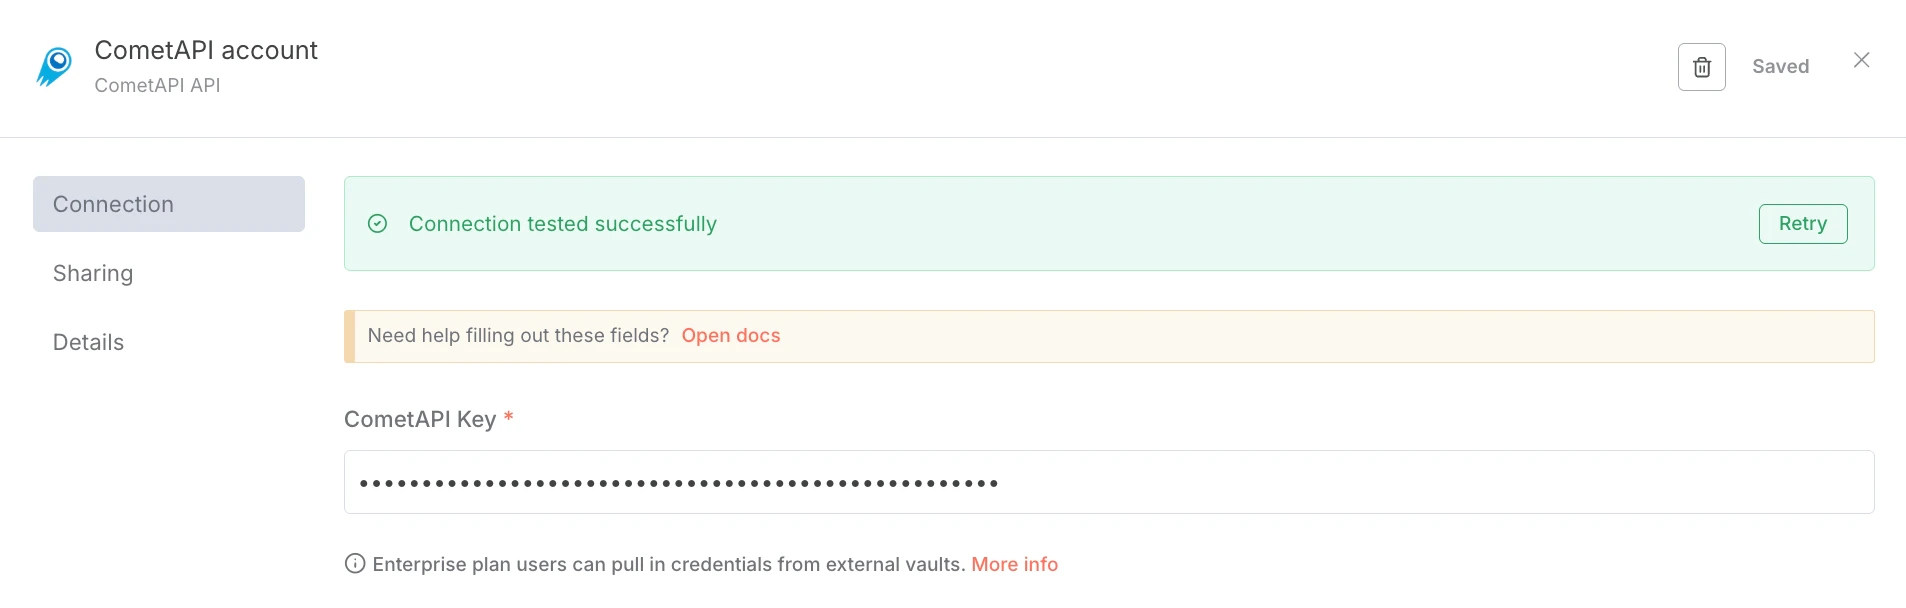
- 在 CometAPI 節點中,於 Credential to connect with 下選擇 Create new。將你的 CometAPI API key 貼到 CometAPI Key,然後點擊 Save。Base URL 預設為
https://api.cometapi.com,通常不需要變更。
- 設定節點:
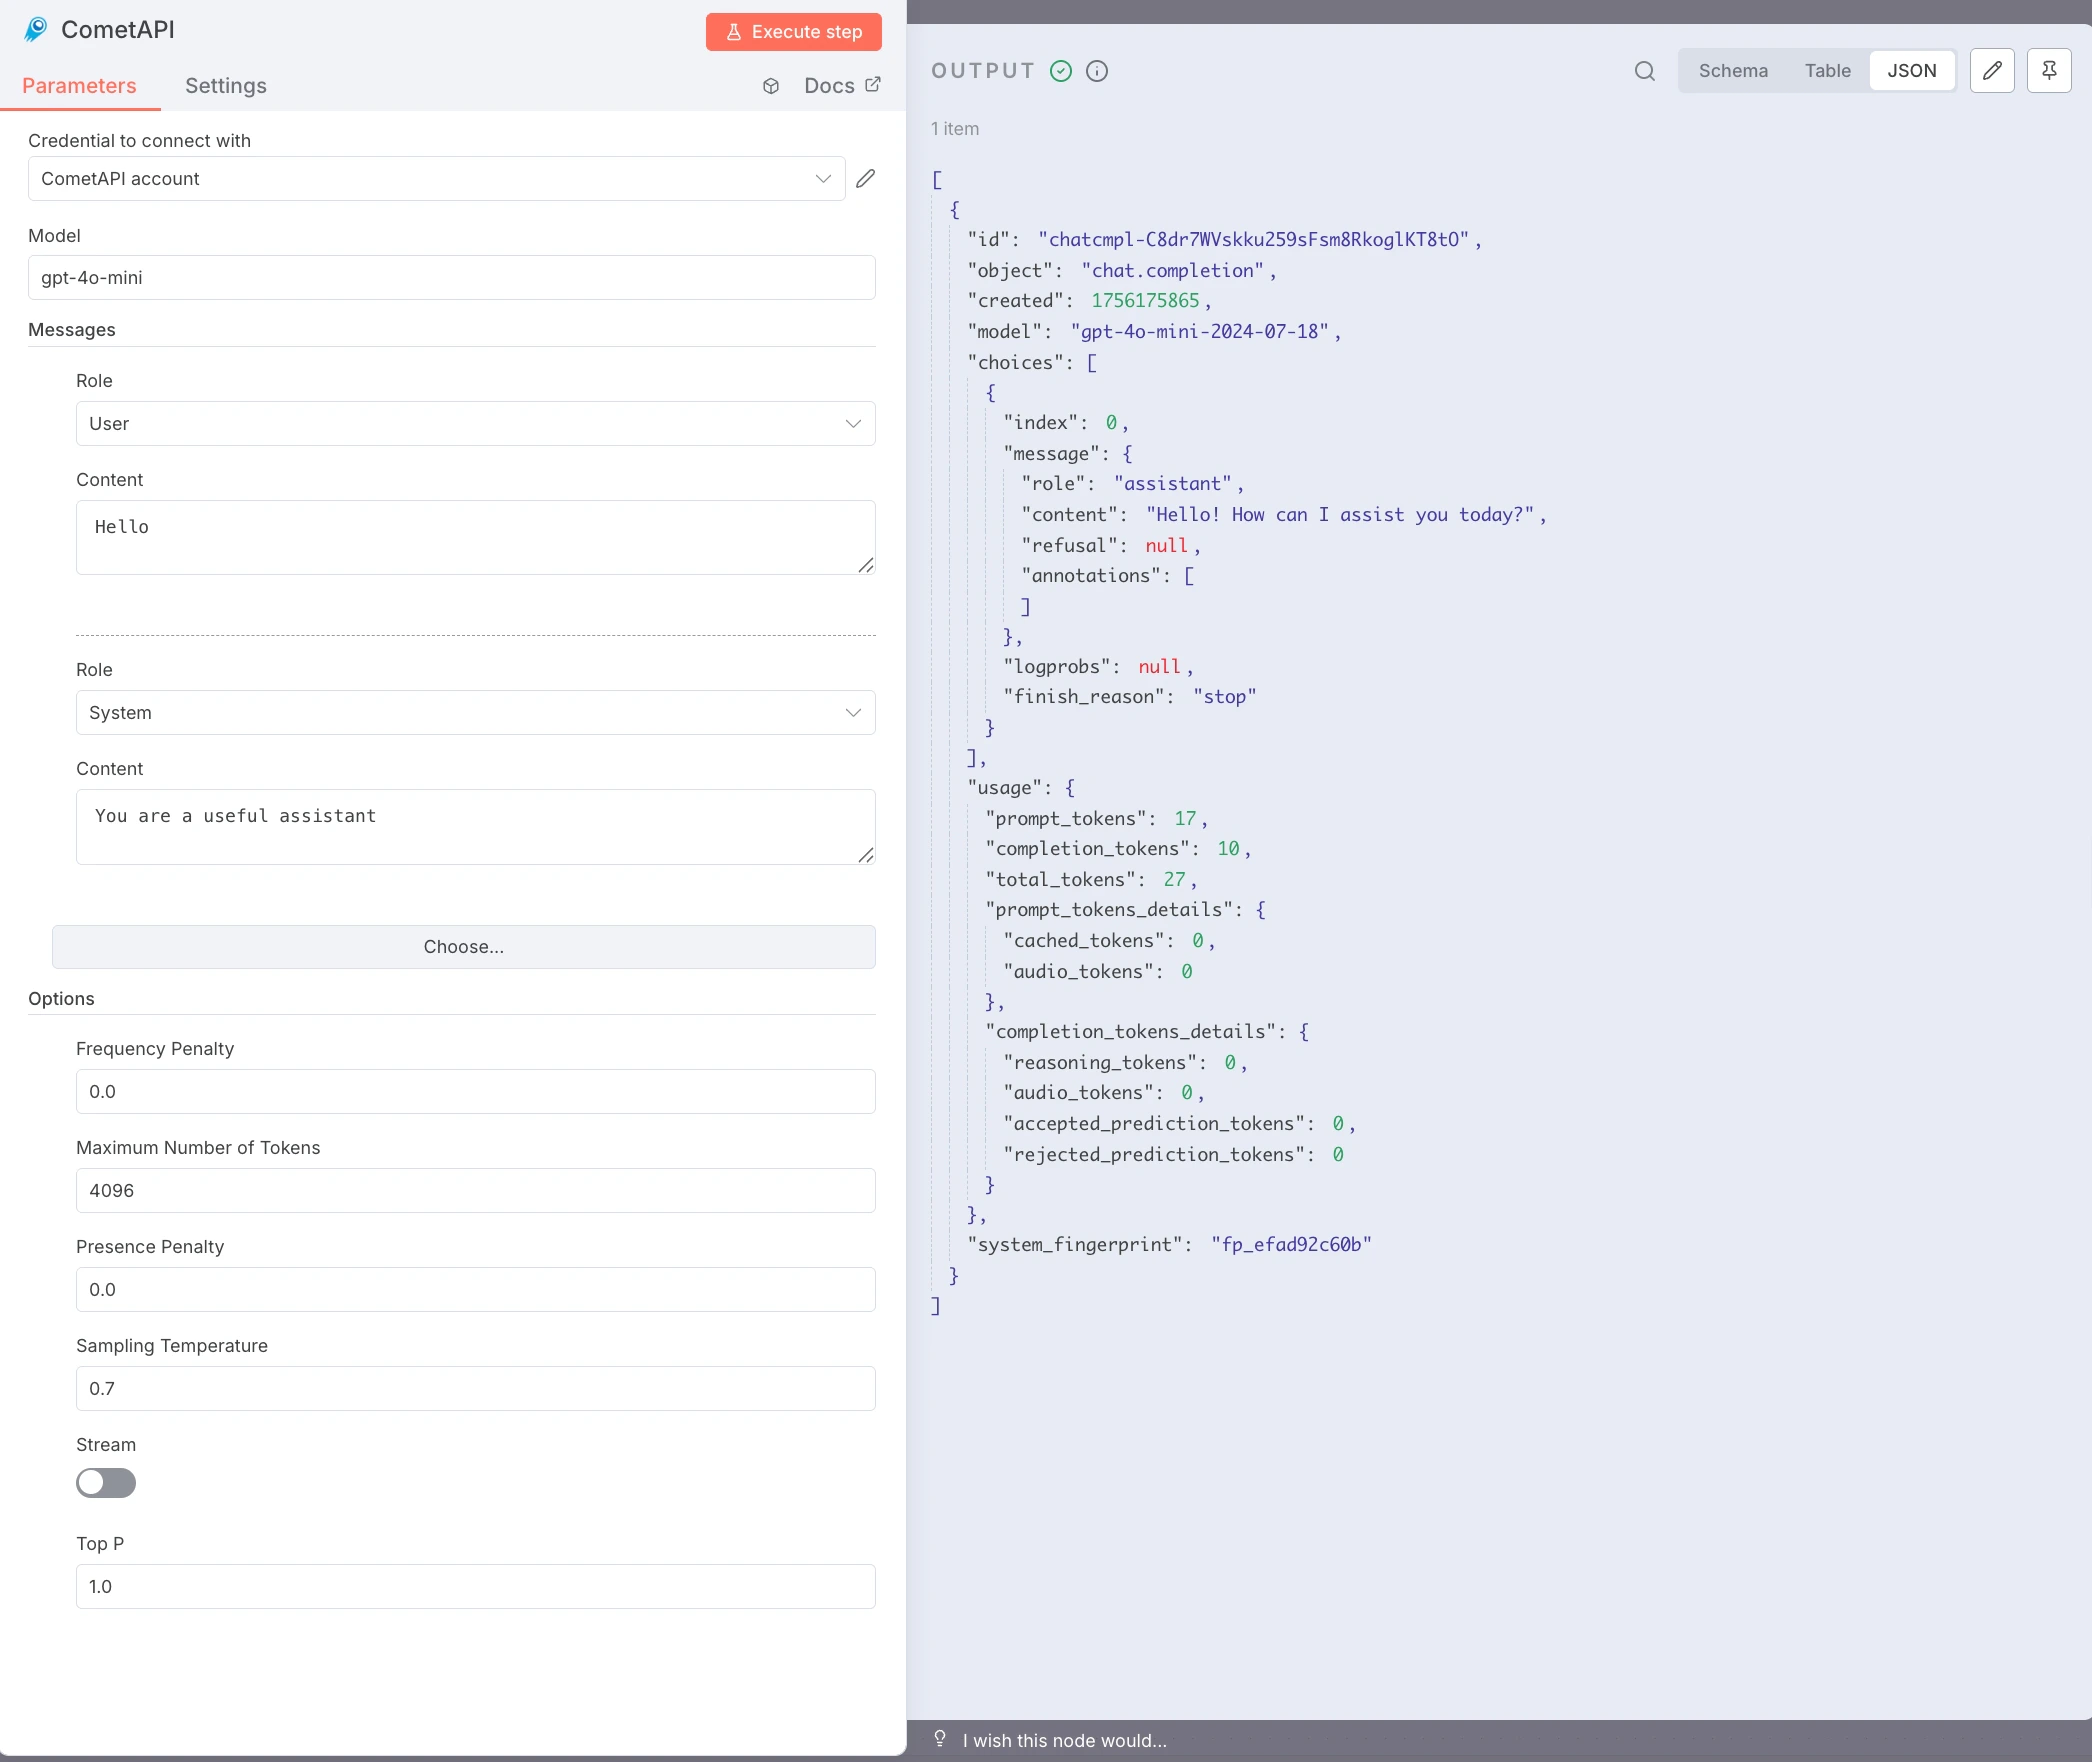
- Model:輸入你要使用的目前 model ID
- Messages:將 Role 設為
user,Content 設為你的測試 prompt(例如Hello) - 選填:加入
system訊息、設定 Max Tokens、Temperature 等
- 點擊 Execute step 以執行節點。Output 面板會顯示 JSON 回應。
疑難排解
疑難排解
node-gyp或原生建置錯誤 — 安裝建置工具:sudo apt install build-essential python3(Debian/Ubuntu)或 Xcode Command Line Tools(macOS)。- npm 權限錯誤(EACCES) — 使用 nvm 進行使用者層級的 Node.js 安裝;不需要
sudo。 - 連接埠衝突(
localhost:5678無法使用) — 在執行n8n start前設定N8N_PORT=5679(或其他可用連接埠)。 - 缺少 Community Nodes 區段 — 以 Owner 帳號登入並檢查 Settings → Security。
- 公司網路環境下 npm install 失敗 — 設定 proxy:
npm config set proxy http://user:pass@host:port - CometAPI 節點回傳 401/403 — 驗證你的 API key,並確認你的 CometAPI 方案可存取該模型。
- 空白回應或 Token 限制錯誤 — 增加 Max Tokens;視需要調整 Temperature 與 Top P。
- 關閉終端機後 n8n 停止執行 — 使用 pm2:
pm2 start "n8n" --name n8n && pm2 save。